How To Install Vinyl Siding: Complete Guide for Homeowners
04.16.2025
9 Min Read
Vinyl siding is an attractive, cost-effective option for homeowners who want to boost their home’s curb appeal and protect it from the elements. But what many don’t realize is that installing vinyl siding can be a DIY-friendly project if you’re equipped with the right tools, instructions, and a bit of patience. Below, you’ll learn everything you need to know about how to install vinyl siding, including:
- The basics of preparing for a vinyl siding installation
- Step-by-step instructions for installing vinyl siding
- How to maintain vinyl siding once it’s installed
🛠️ How to Prepare for a Vinyl Siding Installation

Before you even think about attaching the first panel, proper preparation is essential to ensure your project goes smoothly and delivers long-lasting results. Skipping steps or rushing through the preparation process can lead to costly mistakes, such as uneven siding, moisture damage, or structural issues down the line. By taking the time to inspect your home, gather the right tools, and prep your surface correctly, you’ll set yourself up for a successful and seamless vinyl siding installation. Here’s everything you need to know to get started:
- Inspect Your Home’s Exterior: Check for damage like rot, mold, or broken panels. Repair any structural issues before starting the vinyl siding installation.
- Gather Tools and Materials: You’ll need tools like a tape measure, chalk line, hammer, utility knife, level, and more. Ensure you have enough vinyl siding, plus 10% extra for waste.
- Remove Old Siding: If siding is already installed, carefully remove it with a pry bar and siding removal tool. Dispose of the old material responsibly.
- Install a Moisture Barrier: Secure a moisture barrier, like house wrap or tar paper, to protect your home from wind and rain. Attach it tightly with staples or nails.
✅ 6 Step Guide to Install Vinyl Siding

Installing vinyl siding is straightforward when you break it into manageable steps. Follow these key instructions, and you’ll have your siding up in no time.
1. Install the Starter Strip
The starter strip serves as the foundation for your vinyl siding and is critical to ensuring the entire installation is aligned correctly. Begin by measuring and marking a level line around the base of your home. This line will guide the placement of the starter strip. Securely nail the starter strip along this line, ensuring it is perfectly level as you go. Use galvanized nails to prevent rust, spacing them about 16 inches apart. If the starter strip isn’t level, it can cause the siding to look crooked and create gaps later on. Double-check your work with a spirit level as you progress around the perimeter. Taking the time to install this correctly ensures the first row of siding panels will sit evenly, creating a strong and reliable foundation for the rest of the project.
2. Attach Corner Posts and J-Channels
Once the starter strip is installed, the next step is to add corner posts and J-channels. Corner posts are essential for both structural and aesthetic purposes. They are placed vertically at the corners of your home and act as anchors for the ends of the siding panels. Start by aligning the corner posts with the edge of your home, ensuring they are plumb using a level. Nail them into place, leaving a small gap at the top and bottom to allow for expansion and contraction of the material.
After the corner posts are secured, move on to installing J-channels around all windows, doors, and eaves. J-channels are U-shaped trim pieces that frame the siding panels, providing a finished appearance while supporting the edges. Cut the J-channels to the appropriate lengths for each opening, ensuring clean, straight cuts at the corners for a polished look. Secure the J-channels with nails, again leaving a slight gap to account for thermal movement. Properly installing these components ensures the siding panels will fit snugly and look professional.
3. Measure and Cut Panels
With the foundational elements in place, it’s time to prepare the vinyl siding panels. Start by measuring each section of your home carefully to determine the exact panel lengths needed. Use a tape measure and mark the measurements directly onto the panels. Keep in mind that vinyl siding expands and contracts with temperature changes, so it’s important to leave about 1/4 inch of clearance at each end of the panels to allow for this movement.
When cutting the panels, use a circular saw fitted with a fine-toothed blade or a sharp utility knife. If using a saw, ensure you cut slowly to prevent cracking or splintering the vinyl. For smaller cuts or intricate angles, a utility knife can provide more precision. Score the panel with the knife and then bend it gently until it snaps along the scored line. Take care to label each cut panel to avoid confusion during installation. By preparing the panels correctly, you’ll save time and ensure a seamless fit during the attachment process.
4. Attach the Panels
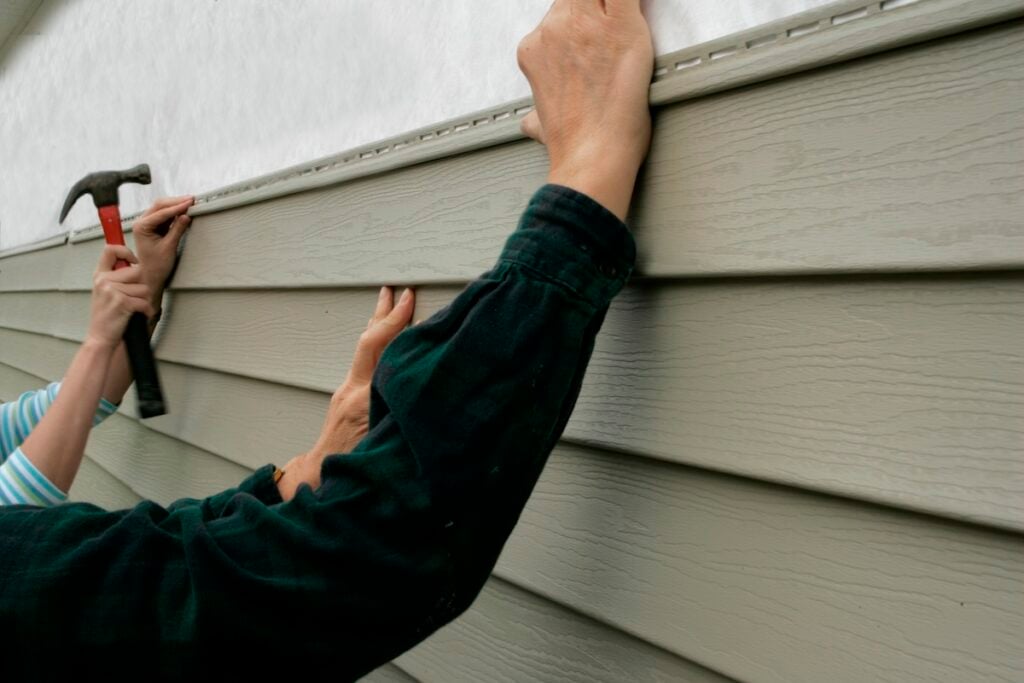
Now it’s time to begin attaching the vinyl siding panels to your home. Start with the bottom-most row, locking the first panel into the starter strip. This step is crucial, as it sets the alignment for all subsequent rows. Use the pre-punched slots in the panel to guide your nails. Place the nails in the center of each slot and leave about 1/16 inch of space between the nail head and the panel to allow for movement. Driving the nails too tightly can restrict the panel’s ability to expand and contract, leading to buckling or warping over time.
Work your way horizontally along the wall, ensuring each panel locks securely into the one below it. Use a level periodically to check that the panels remain straight as you progress. Take your time to align each panel properly, as mistakes in the lower rows can create larger issues as you move up the wall. This step establishes the foundation for a durable, weather-resistant siding system that will last for years.
5. Overlap Seams
As you attach the panels, you’ll need to connect them by overlapping the seams. Overlap each panel by at least one inch, ensuring there are no gaps that could expose the underlying structure to moisture or air infiltration. This overlap provides the flexibility needed for the vinyl to expand and contract naturally with temperature changes, preventing gaps or buckling.
To create a more seamless and professional appearance, avoid aligning the seams in a straight vertical line. Instead, stagger the panel overlaps randomly across the surface of your home. This approach minimizes the visibility of the seams and enhances the overall aesthetic of the siding. Take extra care to ensure the overlaps are consistent in size and securely locked into place. Properly overlapping the seams not only maintains the structural integrity of the siding but also gives your home a polished and cohesive look.
6. Finish the Top Row
The final step is to complete the top row of siding. Begin by measuring the gap between the top of the last full panel and the eaves of your home. Use these measurements to trim the panels to the appropriate size. A utility knife works well for this, especially for smaller or more detailed cuts. Be sure to leave about 1/4 inch of clearance to allow for expansion.
Once the panels are trimmed, slide them into place, ensuring they fit snugly within the J-channels installed earlier. Check that the top row is level and properly aligned with the rest of the siding. Secure the panels by locking them into the row below and using the J-channels to hold the top edges in place. The J-channels not only provide a clean, finished look but also keep the panels securely positioned.
With this final touch, your vinyl siding installation is complete. Your home is now protected from the elements and boasts a fresh, professional appearance. Take a step back and admire your work—you’ve successfully installed a durable and visually appealing siding system!
👉 How to Maintain Vinyl Siding

Once your vinyl siding is installed, it’s important to maintain it to keep it looking its best. Thankfully, vinyl siding is low-maintenance and durable.
Regular Cleaning
To keep your siding looking its best, make it a habit to clean it at least once a year. Use a garden hose and a mixture of mild soap and water to gently wash away dirt, grime, and any buildup. Be sure to avoid using a pressure washer, as the high-pressure spray can damage or loosen the panels, potentially leading to costly repairs.
Inspect for Damage
At the end of every season, take some time to carefully inspect your siding for any signs of wear and tear. Look for cracks, warping, or loose panels that could compromise the integrity of your home’s exterior. If you notice any damaged sections, replace them as soon as possible to prevent further issues like water infiltration or pest problems.
Trim Landscaping
Overgrown trees and bushes growing too close to your siding can create scratches, encourage moss or algae growth, and even trap moisture against the surface. Regularly trim back vegetation to ensure it doesn’t come into contact with your siding. This simple step can significantly extend the life of your siding while maintaining your home’s curb appeal.
🏠 Vinyl Siding Installation
While installing vinyl siding might seem like a task you can tackle yourself, achieving long-lasting, professional results requires the expertise of a trusted team. At Barkley-Jensen Roofing & Restoration, we combine expert craftsmanship, premium materials, and unmatched customer care to ensure your siding not only looks incredible but also protects your home for years to come.
Don’t leave your home’s exterior to chance—let our skilled team handle the hard work so you can enjoy peace of mind. Contact us today to schedule a consultation and take the first step toward transforming your home with quality vinyl siding!


