


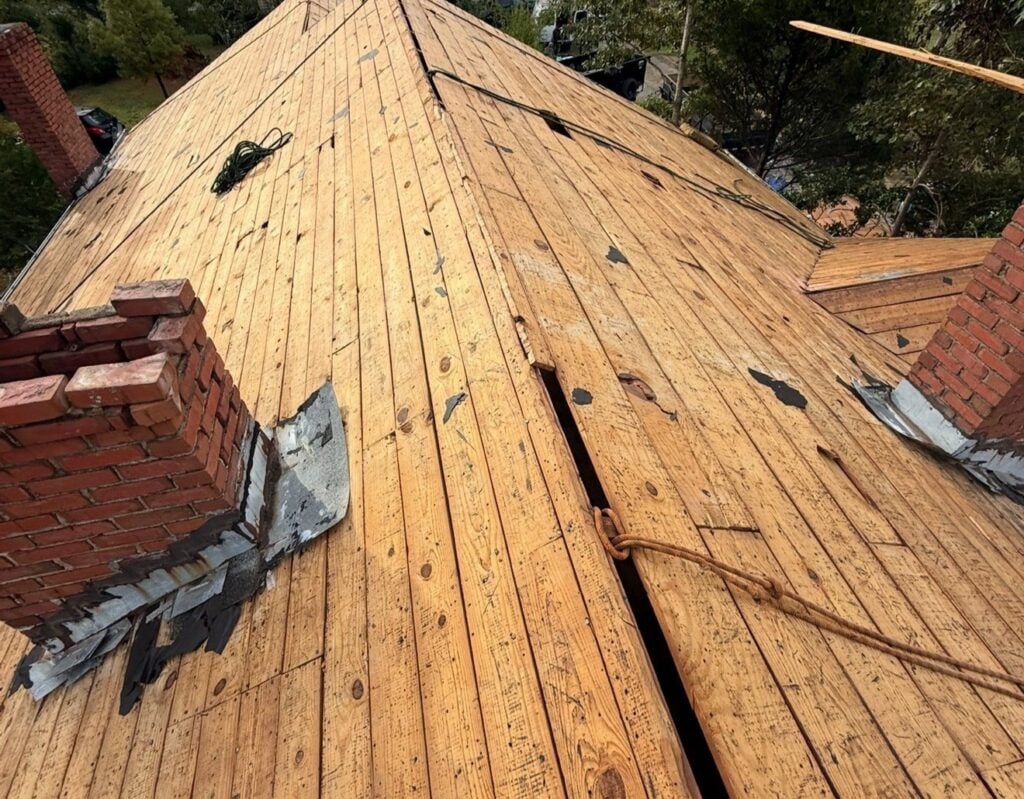
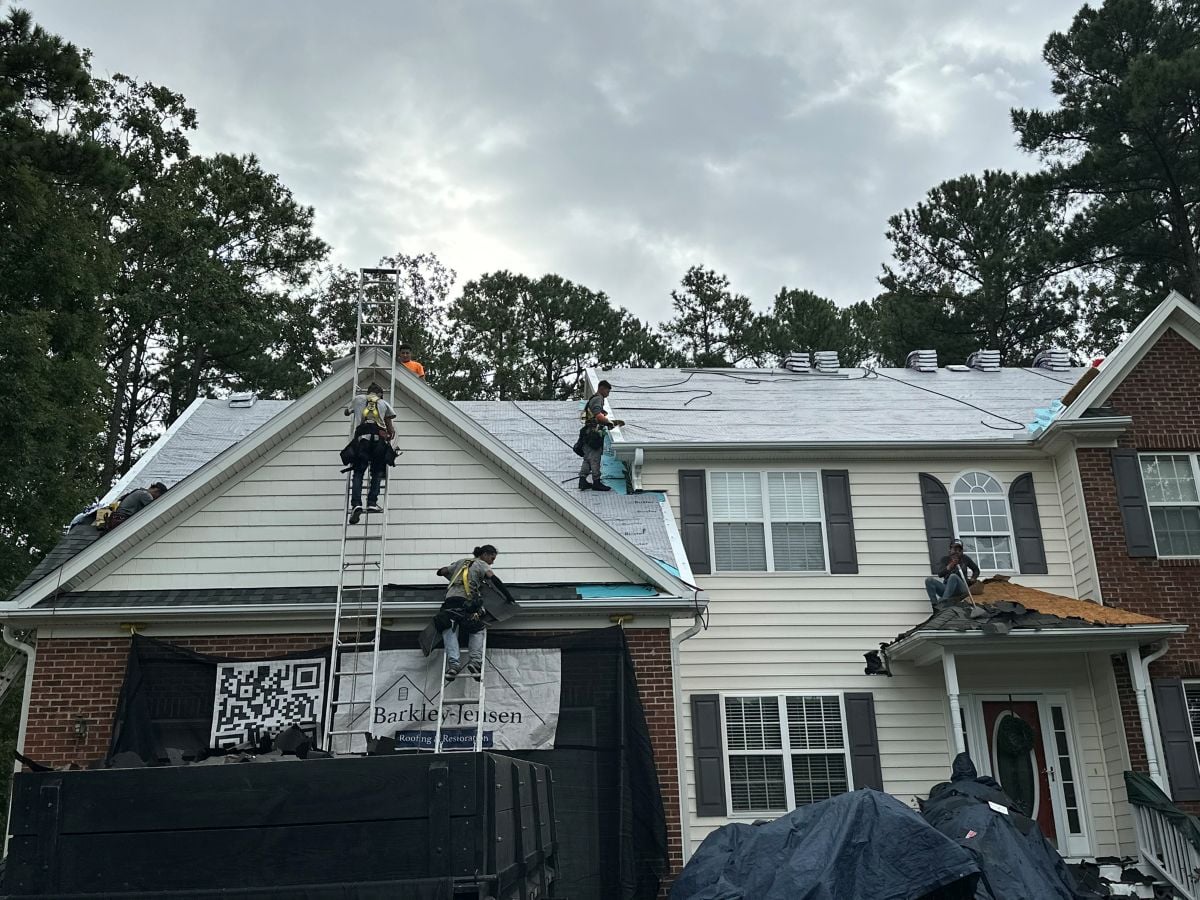
Barkley-Jensen Roofing & Restoration
Pitched Roof Types: 8 Common Types & Choosing the Right One
04.30.2026
7 Min Read
Choosing the right roof design is one of the most important decisions you can make for your home, and a pitched roof is one of the most popular and effective options available. From durability to water drainage, the structure of your roof impacts long-term performance. Many homeowners exploring options like finding the right roofing solution for their home quickly discover how much roof shape influences protection and curb appeal.
In this guide, you will learn:
- The most common pitched roof types and how they differ
- The benefits of pitched roofing compared to other designs
- How to choose the best option for your home
- Key factors that impact performance and longevity
- What to expect when installing or replacing a pitched roof
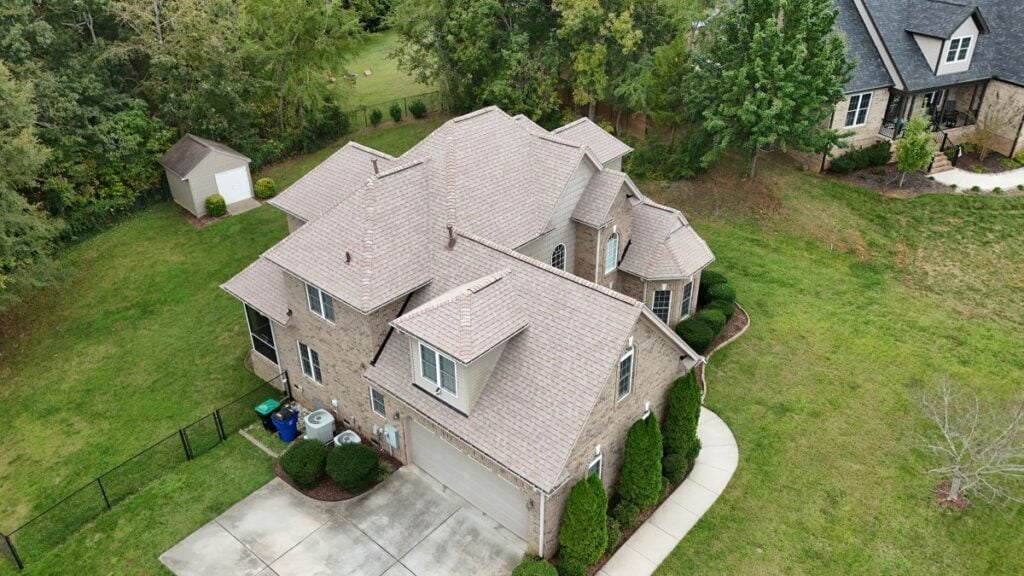
Why a Pitched Roof Is a Smart Choice for Homeowners
A pitched roof is designed with a slope that allows water, snow, and debris to run off easily. This simple feature provides major advantages in durability and maintenance.
For homeowners in Cary and surrounding areas, where seasonal storms and heavy rainfall can occur, choosing the right roof structure plays a big role in protecting your home.
Here are some of the biggest benefits of a pitched roof:
- Improved Water Drainage: Sloped surfaces help prevent standing water, reducing the risk of leaks and damage.
- Longer Lifespan: Better drainage and ventilation contribute to extended roof longevity.
- Energy Efficiency: The design allows for improved attic ventilation and insulation performance.
- Versatile Design Options: Pitched roofs come in a variety of styles that enhance curb appeal.
- Stronger Weather Resistance: They perform well in rain, wind, and snow compared to flat roofs.
Understanding these benefits helps explain why pitched roofing remains a top choice for residential homes.
8 Common Pitched Roof Types and What Makes Each Unique
There are several types of pitched roofs, each offering different advantages depending on your home’s design and your priorities.
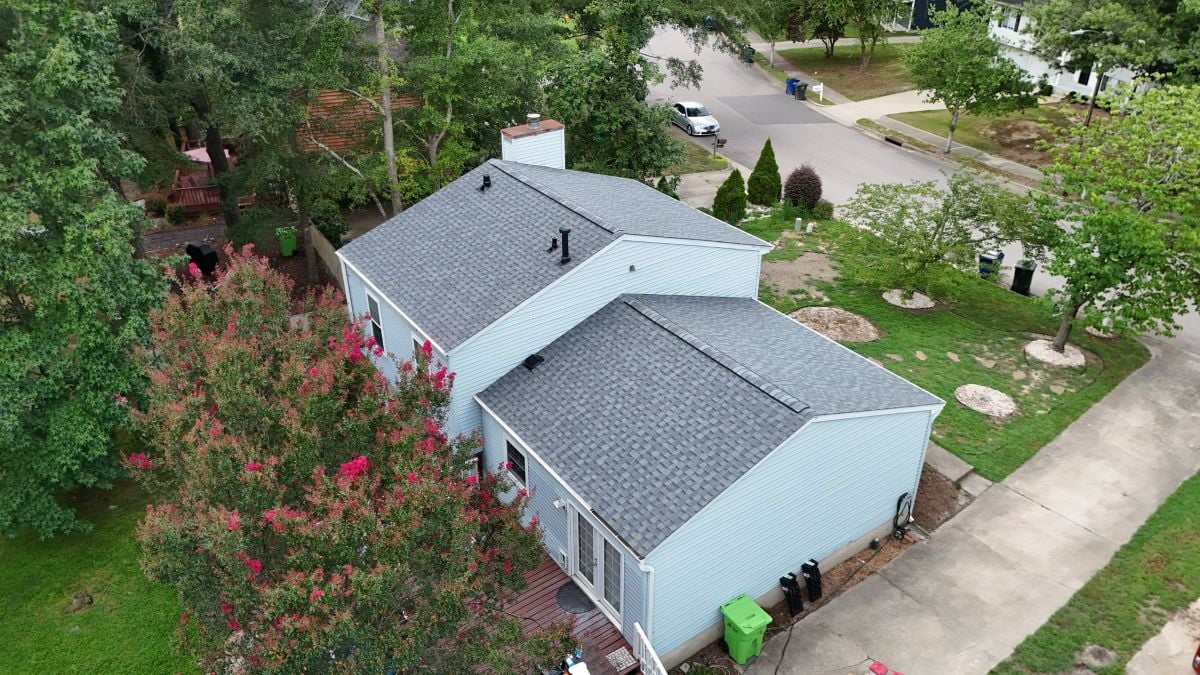
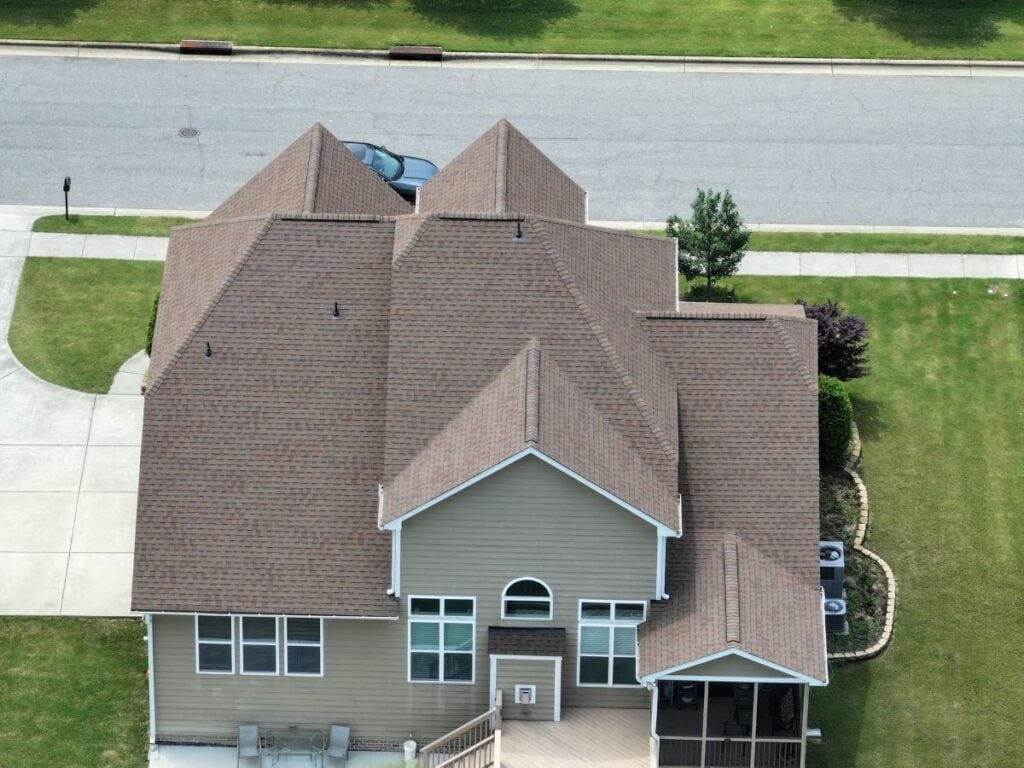
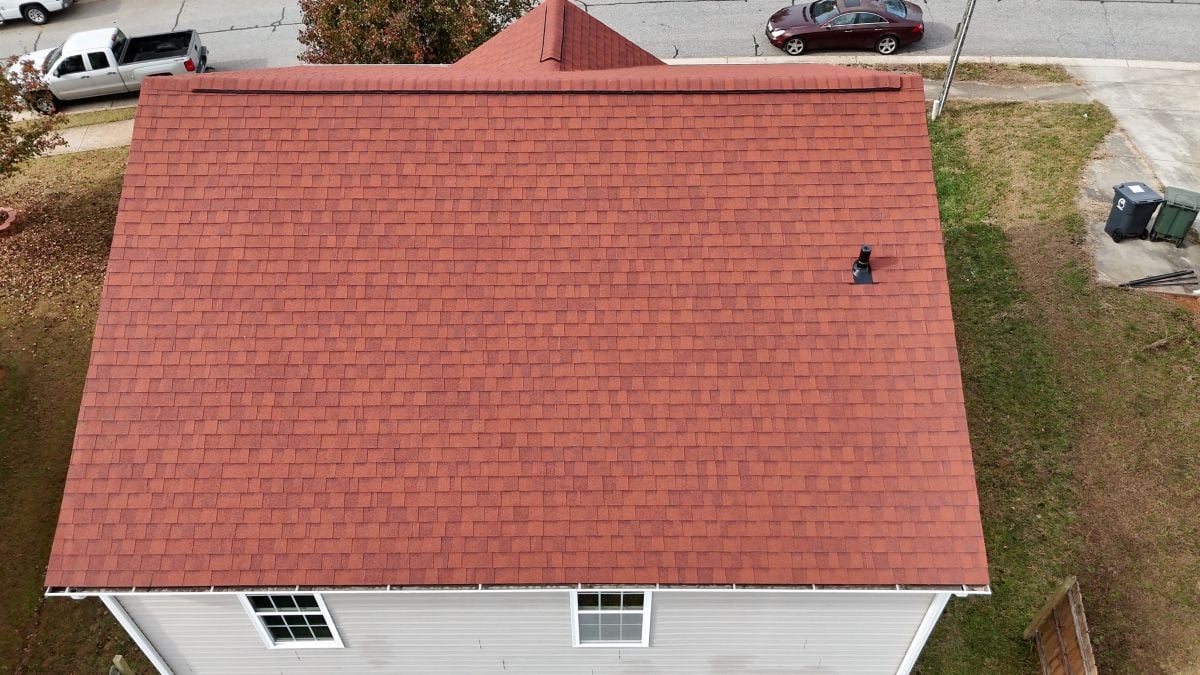
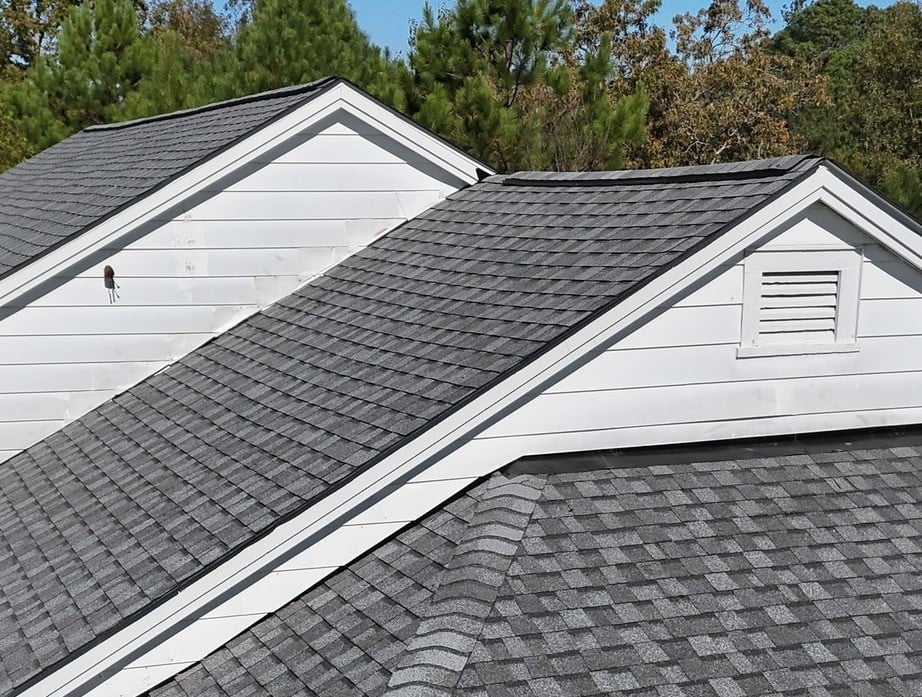
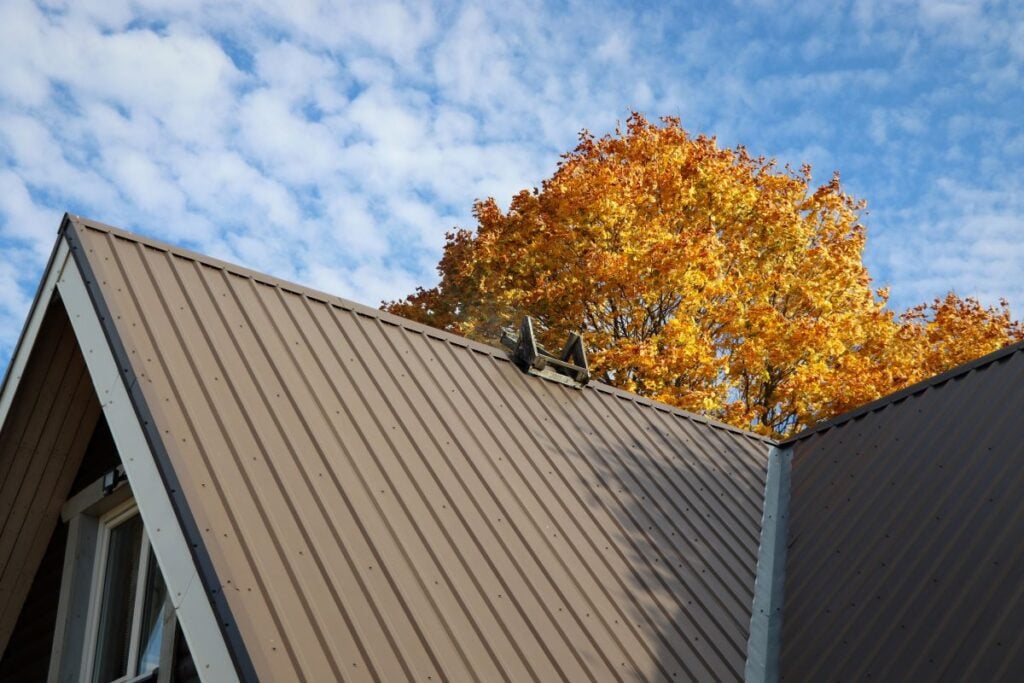
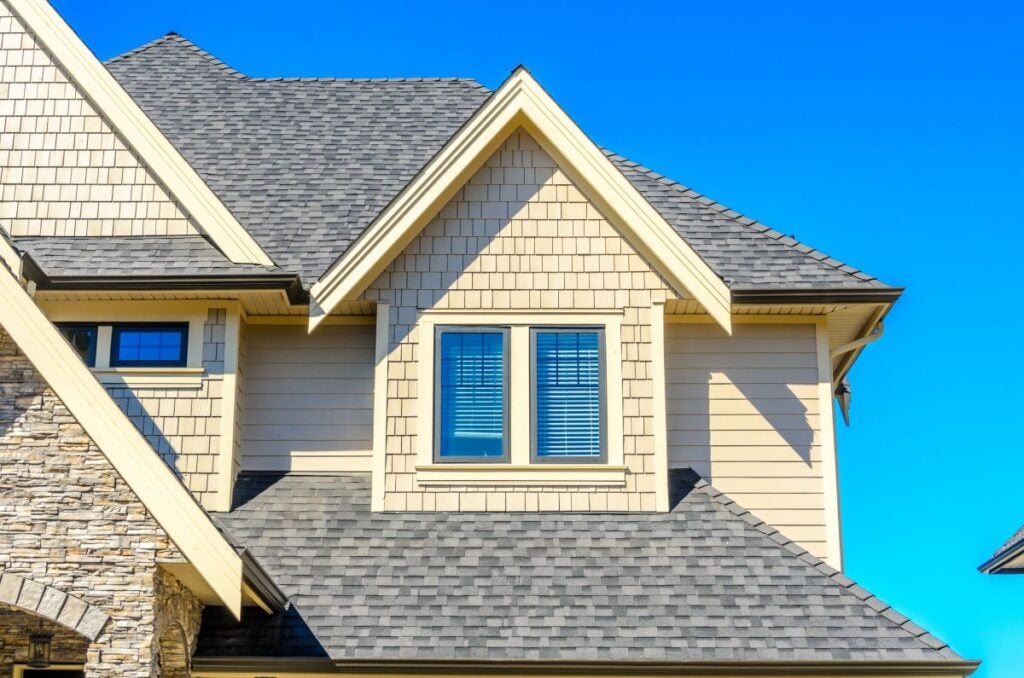
1. Gable Roof
The gable roof is one of the most common pitched roof designs.
- Two sloping sides that meet at a ridge
- Simple and cost-effective construction
- Excellent water and snow drainage
This design is widely used because of its simplicity and reliability.
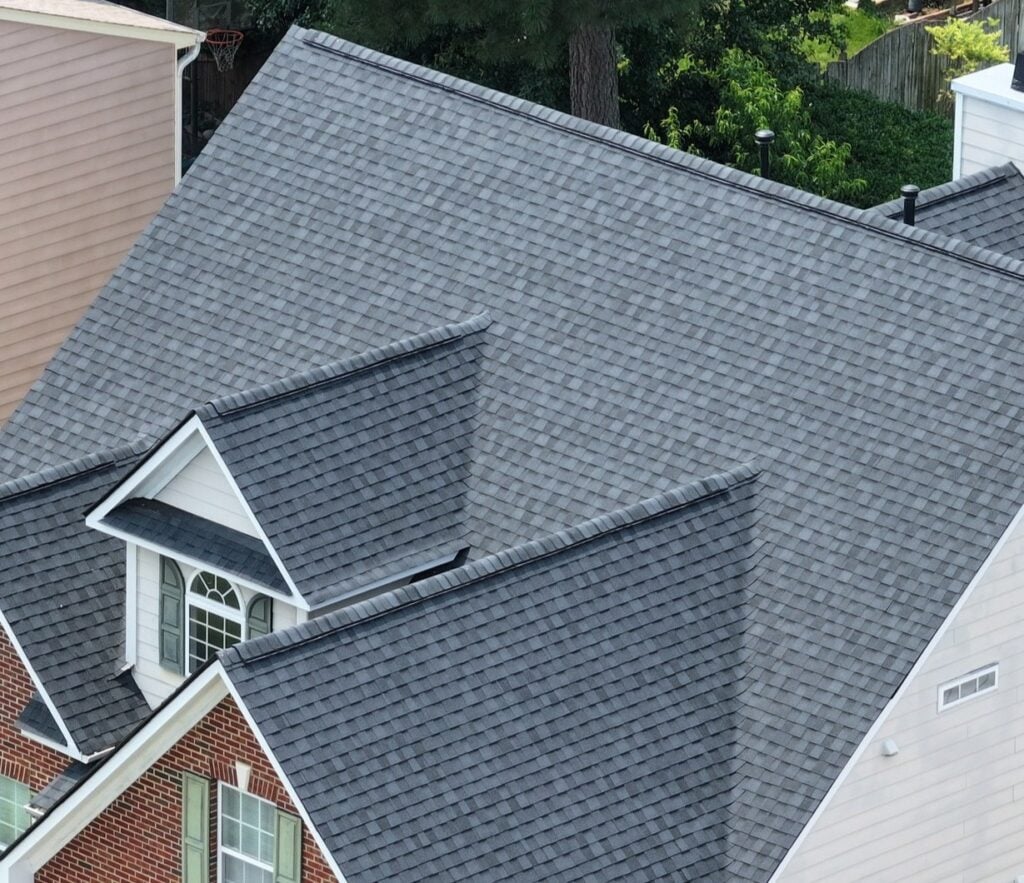
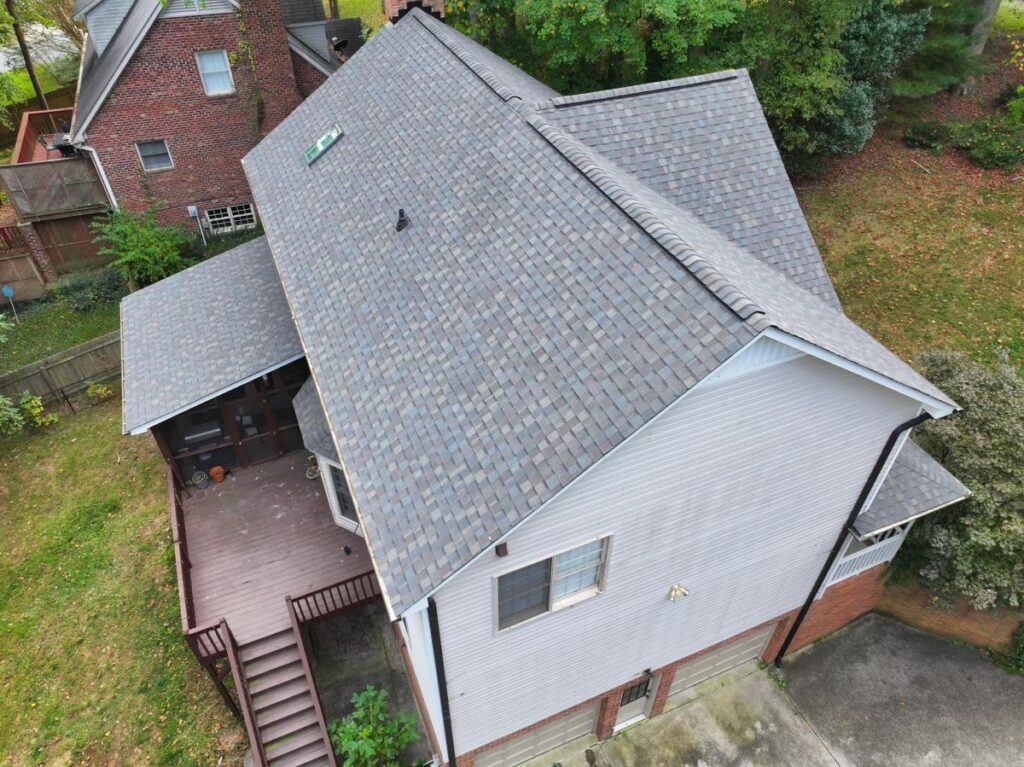
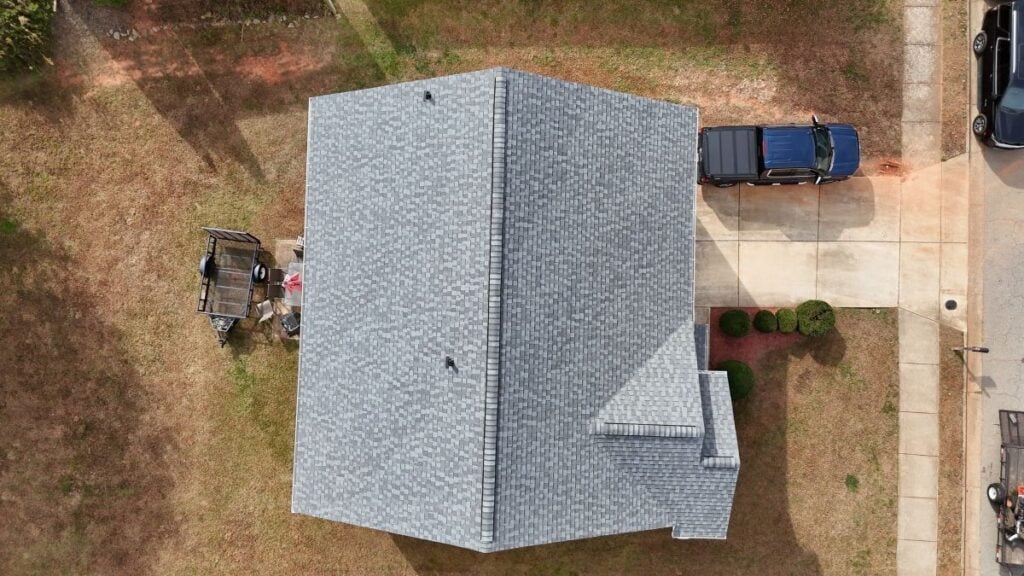
2. Hip Roof
A hip roof slopes on all four sides, creating a more stable structure.
- Better resistance to strong winds
- Even weight distribution
- More complex construction than gable roofs
Homes in Cary and surrounding areas often benefit from this design due to improved wind performance.
3. Mansard Roof
This style features two slopes on each side, with the lower slope being steeper.
- Maximizes interior living space
- Classic architectural appearance
- Requires more maintenance
It is a popular choice for homeowners looking to add usable attic space.
4. Gambrel Roof
Often seen on barns, the gambrel roof has two slopes on each side.
- Steep lower slope for extra space
- Efficient use of interior volume
- Distinctive appearance
This design is both functional and visually unique.
5. Shed Roof
A shed roof consists of a single sloping surface.
- Simple and modern design
- Easy to construct and maintain
- Ideal for additions or smaller homes
It is often used in contemporary architecture.
6. Butterfly Roof
This design features two slopes that angle inward, creating a valley in the center.
- Unique and modern aesthetic
- Allows for rainwater collection
- Requires careful drainage planning
While less common, it offers a striking visual appeal.
7. Saltbox Roof
The saltbox roof has an asymmetrical design with one long slope.
- Traditional colonial style
- Excellent drainage performance
- Added interior space
It is both functional and historically inspired.
8. Skillion Roof
Similar to a shed roof but often steeper, the skillion roof is used in modern homes.
- Sharp angles for a bold look
- Efficient water runoff
- Works well with solar panel installations
This type combines functionality with modern design trends.
How to Choose the Right Pitched Roof for Your Home
Selecting the right pitched roof involves more than just appearance. Several practical factors should guide your decision.
Consider Your Climate
Weather conditions play a major role in performance.
- Areas with heavy rain benefit from steeper slopes
- Wind-prone regions may require more stable designs
- Temperature changes impact material selection
In Cary and surrounding areas, balancing drainage and durability is key.
Evaluate Your Home’s Structure
Not all roof types work with every home design.
- Structural support requirements vary
- Roof pitch affects attic space
- Existing layout may limit options
Working with a professional helps ensure compatibility.
Think About Maintenance Needs
Different designs require different levels of upkeep.
- Complex roofs may need more frequent inspections
- Simpler designs are easier to maintain
- Drainage systems must be properly managed
Choosing a design that fits your maintenance preferences is important.
Balance Cost and Value
Budget plays a role in every roofing decision.
- Simpler designs cost less to install
- Complex roofs may increase labor costs
- Long-term durability affects overall value
Investing in the right design can save money over time.
Pitched Roof vs Flat Roof: Key Differences
Understanding how pitched roofs compare to flat roofs helps clarify their advantages.
Performance Comparison
| Feature | Pitched Roof | Flat Roof |
| Water Drainage | Excellent | Limited |
| Lifespan | Longer | Shorter |
| Maintenance | Moderate | Higher |
| Cost | Moderate to high | Lower upfront |
| Design Flexibility | High | Limited |
Pros and Cons Breakdown
Pitched Roof Pros:
- Better drainage and durability
- Longer lifespan
- Improved ventilation
Pitched Roof Cons:
- Higher initial cost
- More complex construction
Flat Roof Pros:
- Lower upfront cost
- Easier access for maintenance
Flat Roof Cons:
- Poor drainage
- Shorter lifespan
For most residential homes, pitched roofs offer better long-term performance.
Factors That Impact Pitched Roof Longevity
Even the best roof design needs proper care to last.
Material Selection
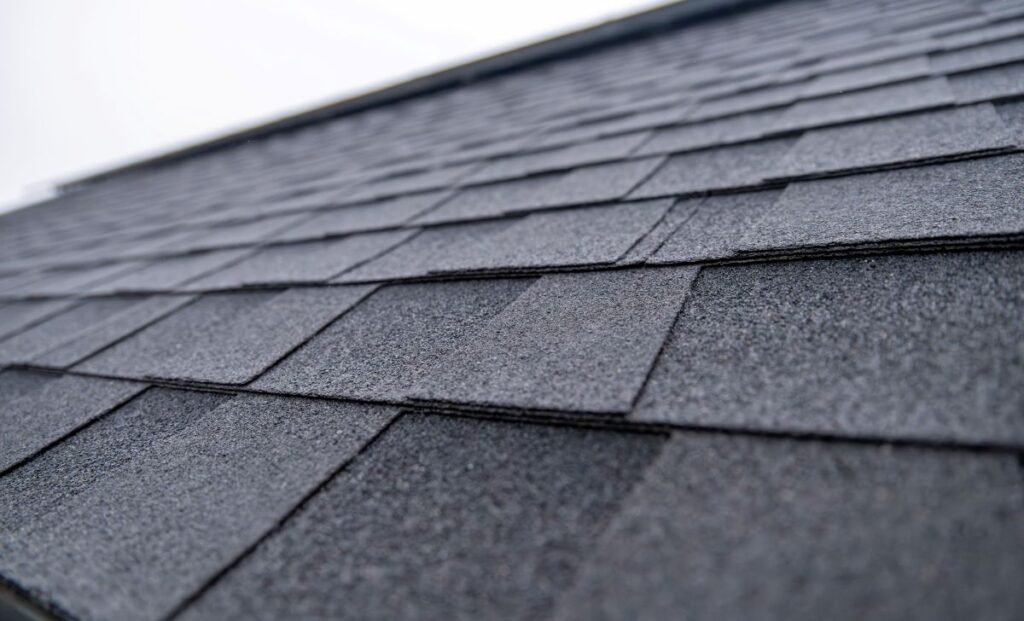
- Asphalt shingles offer affordability and reliability
- Metal roofing provides long-term durability
- Tile and slate offer premium longevity
Choosing the right material enhances performance.
Installation Quality
- Proper flashing and sealing prevent leaks
- Accurate alignment ensures durability
- Professional installation reduces risk
Poor installation can shorten lifespan significantly.
Ventilation and Insulation
- Proper airflow prevents moisture buildup
- Insulation improves energy efficiency
- Balanced systems extend roof life
These factors work together to protect your home.
Routine Maintenance
- Regular inspections catch early issues
- Cleaning debris prevents damage
- Timely repairs extend lifespan
Maintenance is essential for long-term performance.
Frequently Asked Questions About Pitched Roofs
What is a pitched roof?
A pitched roof is a roof with a slope that allows water and debris to run off easily. It is commonly used in residential construction because it improves durability and reduces maintenance compared to flat roofs.
Are pitched roofs better than flat roofs?
In most cases, pitched roofs are better for residential homes. They provide superior drainage, longer lifespan, and better resistance to weather. Flat roofs may be suitable for certain designs but often require more maintenance.
How long does a pitched roof last?
The lifespan depends on materials and maintenance. Asphalt shingles typically last 20 to 30 years, while metal or tile roofs can last much longer. Proper installation and care are key to maximizing longevity.
What is the best pitched roof type?
The best type depends on your home’s design, climate, and budget. Gable and hip roofs are among the most popular due to their balance of cost, durability, and performance.
Can a pitched roof improve home value?
Yes, a well-designed pitched roof can increase curb appeal and overall home value. It also provides better protection, which is attractive to potential buyers.
Find the Right Pitched Roof for Your Home
Choosing the right pitched roof is about more than style. It is about protecting your home, improving efficiency, and ensuring long-term durability. With so many options available, understanding your needs and priorities is the first step toward making the right decision.
For homeowners in Cary and surrounding areas, working with an experienced roofing team ensures your roof is built to last. Barkley-Jensen Roofing provides expert guidance, quality craftsmanship, and reliable service for every project.
If you are ready to explore your options or need help choosing the right roof design, contact us today to get started with Barkley-Jensen Roofing.
How Long Does a Roof Last? (7 Factors for Roof Longevity)
04.28.2026
7 Min Read
Your roof is one of the most important parts of your home, but many homeowners are unsure how long does a roof last or what affects its lifespan. The answer depends on materials, installation quality, and ongoing maintenance. If you are thinking ahead about protecting your home, exploring options like choosing the right roofing system for long-term durability can make a significant difference in how long your roof performs.
In this guide, you will learn:
- The average lifespan of different roofing materials
- Key factors that impact roof longevity
- Signs your roof may be nearing the end of its life
- How to extend the lifespan of your roof
- When it is time to consider replacement
A typical residential roof lasts between 20 and 50 years depending on material, installation, and maintenance. Asphalt shingles usually last 20 to 30 years, while metal and tile roofs can last significantly longer with proper care.
Why Understanding Roof Lifespan Matters
Knowing how long a roof lasts is essential for planning maintenance, budgeting for replacement, and protecting your home from damage. Many roofing issues can be avoided simply by understanding what to expect over time.
For homeowners in Greensboro and surrounding areas, where weather conditions include heat, humidity, and storms, roof longevity is especially important.
Here are the key benefits of understanding your roof’s lifespan:
- Proactive Planning: Knowing your roof’s expected lifespan helps you prepare financially for future replacement.
- Damage Prevention: Early awareness allows you to address small issues before they become major problems.
- Home Value Protection: A well-maintained roof improves curb appeal and resale value.
- Energy Efficiency: Older roofs may lose efficiency, increasing heating and cooling costs.
- Peace of Mind: Understanding your roof’s condition reduces uncertainty and stress.
Taking a proactive approach can save you time, money, and frustration.
7 Key Factors That Affect How Long a Roof Lasts
Several variables determine how long your roof will perform effectively. These factors work together, and even one weak point can shorten the lifespan.
1. Roofing Material Type
The type of material used plays the biggest role in longevity.
- Asphalt shingles: 20 to 30 years
- Architectural shingles: 30 to 40 years
- Metal roofing: 40 to 70 years
- Tile or slate: 50 years or more
Choosing higher-quality materials often leads to a longer-lasting roof.
2. Installation Quality
Even the best materials will fail if installed incorrectly.
- Proper alignment of shingles
- Correct installation of flashing and underlayment
- Secure fastening and sealing
Professional installation ensures your roof performs as expected.
3. Climate and Weather Exposure
Weather conditions have a major impact on roof lifespan.
- Heavy rain and storms can wear down materials
- Heat and UV exposure can cause deterioration
- Wind can loosen or damage shingles
In Greensboro and surrounding areas, seasonal weather changes can accelerate wear if the roof is not properly maintained.
4. Ventilation and Insulation
Proper attic ventilation is critical for roof health.
- Prevents moisture buildup
- Reduces heat damage from trapped air
- Extends shingle lifespan
Poor ventilation is one of the most common causes of premature roof failure.
5. Maintenance and Repairs
Regular maintenance can significantly extend roof life.
- Routine inspections
- Prompt repair of small issues
- Clearing debris from the roof and gutters
Neglecting maintenance often leads to avoidable damage.
6. Roof Design and Slope
The design of your roof affects how well it sheds water and debris.
- Steeper roofs drain water more effectively
- Complex designs may have more vulnerable areas
- Flat or low-slope roofs require additional care
Design plays a key role in durability and maintenance needs.
7. Quality of Roofing Components
A roof is more than just shingles.
- Underlayment provides moisture protection
- Flashing prevents leaks around penetrations
- Roof decking supports the entire system
High-quality components contribute to overall longevity.
Average Lifespan by Roofing Material
Different roofing materials offer varying levels of durability. Understanding these differences helps you choose the best option for your home.
Asphalt Shingles
- Most common residential roofing material
- Affordable and widely available
- Lifespan typically 20 to 30 years
Metal Roofing
- Durable and resistant to weather damage
- Energy-efficient and long-lasting
- Lifespan ranges from 40 to 70 years
Tile and Slate Roofing
- Extremely durable and visually appealing
- Resistant to fire and harsh weather
- Lifespan can exceed 50 years
Wood Shingles and Shakes
- Natural appearance with moderate durability
- Requires regular maintenance
- Lifespan typically 20 to 40 years
Choosing the right material depends on your budget, climate, and long-term goals.
Signs Your Roof May Be Reaching the End of Its Life
Recognizing warning signs early can help you avoid costly damage.
Visible Exterior Damage
- Missing or curling shingles
- Cracked or broken materials
- Granule loss on asphalt shingles
These signs indicate wear and potential failure.
Interior Warning Signs
- Water stains on ceilings or walls
- Mold or mildew in the attic
- Increased humidity inside the home
Interior issues often signal roof problems.
Age of the Roof
If your roof is approaching its expected lifespan, it may be time to plan for replacement.
- Older roofs are more prone to failure
- Repairs become less effective over time
- Replacement may be more cost-effective
Regular inspections help confirm your roof’s condition.
How to Extend the Life of Your Roof
Proper care can add years to your roof’s lifespan.
Schedule Regular Inspections
- Check your roof at least once a year
- Inspect after major storms
- Look for early signs of damage
Early detection prevents bigger problems.
Keep Your Roof Clean
- Remove leaves and debris
- Clean gutters regularly
- Prevent water buildup
A clean roof performs better and lasts longer.
Address Repairs Quickly
- Fix minor issues before they worsen
- Replace damaged shingles promptly
- Seal leaks as soon as they appear
Timely repairs protect the entire system.
Ensure Proper Ventilation
- Maintain airflow in the attic
- Prevent heat and moisture buildup
- Improve overall roof performance
Ventilation is essential for long-term durability.
Roof Repair vs Replacement: When to Decide
Knowing whether to repair or replace your roof is a common concern. A helpful rule of thumb is that if repairs are going to cost more than 30% of the cost of a new roof, it’s usually smarter to replace it instead.
When Repairs Are Enough
- Minor damage in isolated areas
- Roof is relatively new
- No widespread structural issues
Repairs can extend the life of a newer roof.
When Replacement Is the Better Option
- Roof is near the end of its lifespan
- Multiple leaks or widespread damage
- Frequent repairs becoming costly
In these cases, replacement provides better long-term value.
Quick Comparison
| Situation | Repair | Replacement |
| Minor damage | Yes | No |
| Aging roof | Temporary fix | Recommended |
| Multiple issues | Limited benefit | Best option |
Making the right choice depends on your roof’s condition and age.
Frequently Asked Questions About Roof Lifespan
How long does a roof last on average?
Most residential roofs last between 20 and 50 years. Asphalt shingles typically last 20 to 30 years, while metal and tile roofs can last much longer. The exact lifespan depends on materials, installation quality, and maintenance.
Can a roof last 30 years or more?
Yes, many roofs can last 30 years or longer with proper care. High-quality materials and professional installation play a major role. Regular maintenance and inspections also help extend the lifespan.
What shortens the lifespan of a roof?
Poor installation, lack of maintenance, and harsh weather conditions can shorten roof lifespan. Issues like poor ventilation and water damage also contribute to early failure. Addressing these factors can help extend durability.
How do I know if my roof needs to be replaced?
Signs include missing shingles, leaks, interior water damage, and age nearing its expected lifespan. If repairs are frequent or damage is widespread, replacement may be the best option.
Does maintenance really extend roof life?
Yes, regular maintenance can significantly extend roof life. Cleaning, inspections, and timely repairs prevent small issues from becoming major problems. This helps maximize the value of your roofing system.
Protect Your Home with a Roof Built to Last
Understanding how long a roof lasts helps you plan ahead and protect your home from unexpected issues. With the right materials, proper installation, and regular maintenance, your roof can provide reliable protection for decades.
For homeowners in Greensboro and surrounding areas, working with a trusted roofing professional ensures your roof is built for long-term performance. Barkley-Jensen Roofing delivers quality workmanship and dependable service you can rely on.
If you are unsure about your roof’s condition or are planning for the future, contact us today to speak with the team at Barkley-Jensen Roofing and get expert guidance tailored to your home.
Is DIY Roof Replacement Worth It? (8 Reasons to Do or Don’t)
04.23.2026
8 Min Read
Taking on a roofing project yourself might sound like a smart way to save money, but diy roof replacement is far more complex than most homeowners expect. From safety risks to long-term performance, your decision can affect your home for decades. Many homeowners exploring options like upgrading their roof with a professionally installed system quickly realize that proper installation plays a major role in durability and protection.
In this guide, you will learn:
- Whether DIY roofing is actually worth it
- The real cost of DIY roof replacement vs hiring a professional
- Common roof replacement mistakes to avoid
- Safety risks and permit requirements
- How to decide the best option for your home
Replacing your own roof can be done, but for most homeowners, it is not worth the risk due to safety concerns, skill requirements, and potential costly mistakes. While DIY roof replacement may reduce upfront labor costs, improper installation often leads to leaks, structural issues, and higher long-term expenses.
Why DIY Roof Replacement Is a High-Impact Decision
A roof is one of the most important systems protecting your home. It shields against water, wind, and temperature changes. Poor installation can compromise everything underneath it.
For homeowners in Apex and surrounding areas, where storms and seasonal weather shifts are common, a reliable roof is essential. This makes the decision between DIY roofing and hiring a professional especially important.
Here are the biggest reasons this topic matters:
- Long-Term Protection: A properly installed roof prevents water damage, mold, and structural issues that can cost thousands to repair.
- Financial Risk vs Savings: The cost of DIY roof replacement may seem lower, but mistakes can quickly outweigh any initial savings.
- Safety Concerns: Roofing involves heights, heavy materials, and specialized tools that increase the risk of injury.
- Code and Permit Requirements: Roofing permits and inspections ensure your roof meets local building standards.
- Home Value Impact: Poor workmanship can reduce resale value and create problems during inspections.
Understanding these factors helps you make a smarter, more informed decision.
8 Reasons to Do or Avoid DIY Roof Replacement
Below is a balanced look at why homeowners consider DIY roof installation and why many ultimately choose professional help.
1. Cost of DIY Roof Replacement Is Not Always Lower
DIY roofing eliminates labor costs, but other expenses quickly add up. Materials, tools, and disposal can significantly increase your total.
- Shingles, underlayment, flashing, and roof decking repairs
- Tool rentals like nail guns, ladders, and safety gear
- Dumpster fees for removing old roofing materials
In many cases, the cost difference between DIY and professional work is smaller than expected.
2. Safety Risks Are Extremely High
Roofing is one of the most dangerous home improvement projects. Falls and injuries are common without proper training.
- Working at steep angles increases fall risk
- Carrying heavy bundles of shingles adds strain
- Weather conditions can make surfaces slippery
Even experienced DIYers underestimate the physical demands.
3. Skill and Technique Matter More Than You Think
Replacing your own roof requires precision. It is not just about laying shingles in place.
- Proper installation of flashing around chimneys and vents
- Correct layering of shingles and underlayment
- Ensuring proper ventilation to prevent moisture buildup
Small mistakes can lead to major issues like leaks and mold.
4. Time Commitment Can Be Overwhelming
Professional roofing crews can complete a project in a few days. DIY roof replacement often takes much longer.
- Learning the process while working
- Delays due to weather or fatigue
- Limited working hours compared to full crews
For many homeowners in Apex and surrounding areas, time becomes a major challenge.
5. Roofing Permits and Inspections Are Required
Many areas require permits before starting a roof replacement.
- Local building codes must be followed
- Inspections may be required at different stages
- Failing to comply can lead to fines or issues when selling
Handling permits on your own adds complexity to the project.
6. Warranty Protection Is Often Lost
Most roofing materials come with warranties, but they usually require professional installation.
- Manufacturer warranties may be voided
- Insurance claims can be denied
- No labor warranty coverage
This leaves homeowners responsible for future repairs.
7. Common Roof Replacement Mistakes Are Costly
DIY roofing mistakes can lead to expensive problems.
- Improper sealing allows water intrusion
- Incorrect nail placement weakens shingles
- Poor ventilation causes long-term damage
Fixing these issues often costs more than hiring a professional initially.
8. DIY Roofing Offers Personal Satisfaction
Despite the risks, some homeowners enjoy the challenge.
- Full control over materials and schedule
- Opportunity to learn new skills
- Sense of accomplishment after completion
However, satisfaction should be weighed against the risks involved.
Cost Breakdown of DIY Roof Replacement vs Professional Roofing
Understanding the true cost helps answer one of the most common questions: how much does DIY roof replacement cost?
DIY Roof Replacement Costs
- Materials: shingles, underlayment, flashing, ventilation components
- Tools: nail guns, ladders, safety harnesses
- Disposal: dumpster rental and debris removal
- Unexpected repairs: replacing damaged roof decking
Total costs vary, but they are often higher than expected once everything is included.
Professional Roofing Costs
- Labor and installation included
- Access to high-quality materials
- Faster completion time
- Warranty protection
While the upfront cost is higher, professional work reduces long-term risk.
Cost vs Risk Summary
DIY roof replacement may save money upfront, but it increases the risk of costly mistakes. Professional roofing requires a higher initial investment but offers reliability, safety, and long-term value.
When DIY Roof Replacement Might Make Sense
DIY roofing is not always the wrong choice. In certain situations, it can be a reasonable option.
Smaller Projects
- Detached garages or sheds
- Simple roof designs with minimal complexity
- Low-slope roofs with fewer safety concerns
These projects are easier to manage and carry less risk.
Experience in Construction
If you have roofing or construction experience, your chances of success improve.
- Familiarity with roofing materials and techniques
- Knowledge of safety practices
- Confidence using tools and equipment
Even with experience, planning is essential.
Limited Budget Situations
Some homeowners choose DIY due to financial constraints.
- Immediate need for roof replacement
- Limited access to financing
- Willingness to accept potential risks
This approach requires careful consideration of long-term costs.
Help from Skilled Assistants
Roofing is rarely a one-person job.
- Extra help improves efficiency
- Reduces physical strain
- Increases safety
Having experienced assistance can make a significant difference.
DIY vs Professional Roofing Comparison
Choosing between DIY and professional roofing becomes clearer when comparing key factors.
Side-by-Side Comparison
| Factor | DIY Roof Replacement | Professional Roofing |
| Cost | Lower upfront | Higher upfront |
| Time | Longer and unpredictable | Fast and efficient |
| Safety | High personal risk | Managed by trained crews |
| Quality | Depends on skill | Consistent and reliable |
| Warranty | Often voided | Fully protected |
Pros and Cons Breakdown
DIY Roofing Pros:
- Lower initial cost
- Full control over the project
- Personal satisfaction
DIY Roofing Cons:
- High safety risks
- Time-consuming
- Greater chance of mistakes
Professional Roofing Pros:
- Expert installation
- Faster completion
- Warranty protection
Professional Roofing Cons:
- Higher upfront investment
This comparison helps clarify why many homeowners choose professional roofing.
Frequently Asked Questions About DIY Roof Replacement
Can I replace my own roof safely?
Replacing your own roof is possible, but it is not considered safe for most homeowners. Roofing involves working at heights, handling heavy materials, and using specialized tools. Without proper safety training and equipment, the risk of injury is high.
How much does DIY roof replacement cost?
The cost of DIY roof replacement depends on materials, tools, and disposal. While you save on labor, expenses like equipment rental and unexpected repairs can increase the total. Many homeowners find the final cost closer to professional pricing than expected.
Is DIY roof replacement worth it?
DIY roof replacement is usually not worth it for most homeowners. The risks, time commitment, and potential for costly mistakes outweigh the savings. It may only make sense for small projects or those with professional experience.
What are the biggest risks of replacing your own roof?
The biggest risks include falls, improper installation, and long-term damage from leaks or poor ventilation. These issues can lead to expensive repairs and reduced roof lifespan.
Do I need permits for DIY roofing?
Yes, many areas require roofing permits and inspections. These ensure the work meets local building codes. Skipping permits can result in fines and complications during resale.
Make the Smart Choice for Your Roof and Your Home
Deciding whether to take on a DIY roof replacement or hire a professional comes down to risk, cost, and long-term value. While DIY may seem appealing, the challenges and potential consequences often outweigh the benefits.
For homeowners in Apex and surrounding areas, working with an experienced team ensures your roof is installed correctly and built to last. Barkley-Jensen Roofing provides reliable service, expert craftsmanship, and peace of mind from start to finish.
If you are considering a roof replacement and want guidance you can trust, contact us today to discuss your options with Barkley-Jensen Roofing.
Should I Stay Home During Roof Replacement? (7 Reasons)
04.21.2026
8 Min Read
Replacing your roof is a major home improvement project, and it naturally raises questions about comfort, safety, and daily routines. One of the most common concerns homeowners have is should i stay home during roof replacement. If you are preparing for a project like this, understanding what to expect can help you make the best decision for your household. When planning ahead for work like this, many homeowners explore options like upgrading their roof with long-lasting materials to ensure lasting protection and peace of mind.
In this guide, you will learn:
- What happens during a roof replacement project
- Whether staying home is safe or practical
- Key reasons homeowners choose to stay or leave
- Tips to reduce stress during the process
- How to prepare your home, family, and pets
Why Deciding to Stay or Leave Matters
A roof replacement is not a minor repair. It is a full-scale construction project happening directly on top of your home. That makes your decision to stay or leave more important than many homeowners initially realize.
For homeowners in Raleigh and surrounding areas, where busy households and work-from-home setups are common, understanding how this project affects your daily life is essential.
Here is why this decision deserves careful thought:
- Comfort and Noise Control: Roofing work involves constant hammering and equipment use, which can make your home feel chaotic throughout the day.
- Safety Awareness: Even with professional crews, there is always movement, materials, and debris around your property.
- Routine Disruption: Daily activities like working, relaxing, or caring for family members can become more difficult.
- Peace of Mind: Knowing what to expect helps reduce stress and allows you to feel more in control during the project.
Taking the time to weigh your options ensures you are not caught off guard once the work begins.
7 Reasons to Stay or Leave During Roof Replacement
Every homeowner’s situation is unique, but these seven common factors will help you decide whether staying home during a roof replacement is the right choice.
1. The Noise Can Be Overwhelming
Roof replacement is loud. There is no way around it. From tear-off to installation, crews use tools that create constant noise.
- Hammering and nail guns throughout the day
- Scraping and removal of old materials
- Early morning start times
If you need quiet for work or relaxation, leaving for the day may be the better option.
2. Safety Around Your Property
Roofing professionals take safety seriously, but the nature of the work still introduces risks.
- Falling shingles and debris
- Nails and sharp materials on the ground
- Equipment placed around your home
If you have children or frequently use outdoor spaces, temporarily leaving can reduce concerns. The area around a house undergoing roof replacement becomes a construction zone with hazards such as falling shingles, old nails, and tools.
3. Working from Home Challenges
Remote work has become more common, especially in Raleigh and surrounding areas. Roofing projects can make it difficult to stay productive.
- Loud background noise during meetings
- Limited ability to concentrate
- Unexpected interruptions
If your job requires focus or communication, finding a temporary workspace elsewhere is often helpful.
4. Pets May Experience Stress
Pets are especially sensitive to unfamiliar sounds and activity.
- Anxiety caused by loud noises
- Attempting to hide or escape
- Changes in behavior or appetite
If your pets tend to get nervous, it may be best to relocate them for the duration of the project. Roof replacement typically reaches noise levels of 90–120 decibels, similar to a lawnmower or motorcycle engine.
5. You Want to Monitor the Project
Some homeowners feel more comfortable being present during major home improvements.
- Ability to ask questions in real time
- Confidence in the progress being made
- Opportunity to address concerns immediately
If oversight is important to you, staying home may provide reassurance.
6. Weather and Scheduling Changes
Roofing projects depend heavily on weather conditions.
- Rain or storms can delay work
- Crews may adjust schedules quickly
- Timelines can shift unexpectedly
Being home allows you to stay informed and adapt as needed.
7. Personal Preference and Flexibility
At the end of the day, your decision often comes down to personal comfort.
- Some homeowners are not bothered by noise
- Others prefer to avoid disruption entirely
- Your schedule may allow flexibility
There is no universal answer. The right choice depends on what works best for your lifestyle.
What It’s Like to Stay Home During Roof Replacement
If you choose to remain at home, it helps to know exactly what to expect. Roof replacement projects are temporary, but they can feel intense while they are happening.
Most residential projects last one to three days, depending on the size and complexity of the roof. During that time, your home will feel very active.
Inside the Home
Even though the work happens outside, you will notice the effects indoors.
- Constant Noise: Sound travels easily through your ceiling and walls
- Vibration: Hammering may cause slight shaking, especially upstairs
- Limited Quiet Spaces: Finding a calm area can be difficult
Using headphones or planning quiet activities outside the home can help manage the experience.
Outside the Home
Your yard and driveway will become part of the job site.
- Material Deliveries: Shingles and equipment will be dropped off
- Crew Activity: Workers will move around all sides of your home
- Restricted Access: Certain areas may be temporarily blocked
Planning ahead for parking and outdoor use can reduce inconvenience.
Communication with the Roofing Team
One advantage of staying home is the ability to stay connected with your contractor.
- Ask questions throughout the day
- Receive updates on progress
- Address concerns immediately
This can provide peace of mind, especially for first-time roof replacements.
How to Prepare If You Decide to Leave
If leaving during the project feels like the better option, preparation is key to ensuring everything goes smoothly.
Taking a few proactive steps can protect your home and make the experience stress-free.
Prepare the Interior of Your Home
Before work begins, secure items that could be affected by vibration.
- Remove Fragile Items: Take down wall décor or fragile shelf items
- Protect the Attic: Cover stored belongings if needed
- Secure Fixtures: Ensure lighting or ceiling fixtures are stable
These small steps help prevent minor issues during the project.
Make Arrangements for Pets and Family
Planning ahead keeps everyone comfortable.
- Arrange for pet care or boarding
- Coordinate schedules for children
- Inform family members about the project timeline
This avoids last-minute stress and confusion.
Stay Available for Communication
Even if you are not home, staying reachable is important.
- Keep your phone nearby
- Respond quickly to contractor calls or messages
- Be available for decisions if needed
Clear communication helps keep the project on track.
Choose a Productive Place to Go
Where you spend your time matters.
- Work from a quiet office or café
- Visit friends or family
- Run errands during peak work hours
Many homeowners in Raleigh and surrounding areas use this time to stay productive while avoiding the noise.
Staying vs Leaving: A Simple Comparison
Making a decision is easier when you can clearly compare your options.
Staying Home
Advantages:
- Direct communication with your contractor
- Ability to monitor progress
- No need to relocate
Disadvantages:
- Loud and disruptive environment
- Potential safety concerns outdoors
- Interrupted routines
Leaving Home
Advantages:
- Peace and quiet
- Reduced stress for pets and family
- More comfortable daily routine
Disadvantages:
- Less direct oversight
- Need to coordinate communication
- Temporary inconvenience
A Balanced Approach
Some homeowners find that a mix of both options works best.
- Stay home during quieter phases
- Leave during tear-off or installation
- Adjust your schedule as needed
This flexible approach can give you the best of both worlds.
Making Your Roof Replacement Experience Easier
Whether you stay or leave, a little preparation can make a big difference in how smooth the process feels.
Set Clear Expectations with Your Contractor
Before the project begins, discuss:
- Start and end times
- Estimated project duration
- Cleanup procedures
Knowing what to expect helps you plan your days with confidence.
Protect Your Property
Take simple steps to safeguard your home.
- Move vehicles away from the driveway
- Clear outdoor furniture from the area
- Protect landscaping near the home
These actions help prevent accidental damage.
Stay Flexible Throughout the Process
Roofing projects can be affected by unexpected factors.
- Weather delays
- Material adjustments
- Schedule changes
Flexibility helps reduce frustration and keeps the process moving forward.
Focus on the Long-Term Benefits
While the process may feel disruptive, the results are worth it.
- Stronger protection for your home
- Improved curb appeal
- Increased property value
Keeping the end result in mind makes the temporary inconvenience easier to manage.
Plan Your Roof Replacement with Confidence
Deciding whether to stay home during a roof replacement depends on your comfort level, schedule, and personal preferences. By understanding what to expect and preparing ahead of time, you can make the right choice for your household.
For homeowners in Raleigh and surrounding areas, having a trusted roofing team makes all the difference. Barkley-Jensen Roofing is dedicated to delivering a smooth, professional experience from start to finish.
If you are ready to take the next step or have questions about your project, contact us today to get expert guidance and dependable service.
What Roofing Warranties Are Available For Homeowners In Wake Forest, NC?
04.16.2026
6 Min Read
Understanding what roofing warranties are available for homeowners in Wake Forest NC is essential when investing in a new roof. A warranty is more than just paperwork. It protects your home, your finances, and your peace of mind. With several types of warranties available, knowing the differences can help you make a confident decision. Many homeowners begin by exploring options and reviewing coverage details with trusted roofing professionals to ensure they are fully protected.
In this guide, you will learn:
- The different types of roofing warranties available
- What each warranty typically covers
- Key terms and conditions to understand
- How to choose the right warranty for your home
- Common mistakes to avoid when reviewing warranty coverage
Why Roofing Warranties Matter More Than You Might Think
A roof replacement is a significant investment, and warranties play a major role in protecting that investment. Without proper coverage, homeowners may be responsible for costly repairs that could have been avoided.
Homeowners in Wake Forest and surrounding areas often deal with weather conditions that can impact roof performance, making warranty protection even more important.
Here is why roofing warranties are essential:
- Financial Protection: Helps cover repair or replacement costs due to defects or installation issues.
- Long-Term Confidence: Provides peace of mind knowing your roof is backed by coverage.
- Quality Assurance: Strong warranties often indicate high-quality materials and workmanship.
- Resale Value: Transferable warranties can increase your home’s appeal to future buyers.
- Risk Reduction: Protects against unexpected problems that may arise over time.
Understanding warranty options helps you make a smarter, more secure investment.
6 Types of Roofing Warranties Homeowners Should Know
Roofing warranties come in several forms, each offering different levels of protection. Knowing how they work helps you choose the right coverage for your needs.
1. Manufacturer Material Warranty
This type of warranty covers defects in the roofing materials themselves. It ensures that the products used meet quality standards and perform as expected.
What it typically includes:
- Coverage for defective shingles or materials
- Protection against premature failure
- Long-term coverage depending on the product
However, it does not usually cover installation errors.
2. Workmanship Warranty
A workmanship warranty is provided by the contractor and covers installation quality.
Key features:
- Protection against installation mistakes
- Coverage for issues related to labor
- Duration varies by contractor
This warranty is essential because even the best materials can fail if installed incorrectly.
3. Extended Manufacturer Warranty
Some manufacturers offer extended warranties that combine material and workmanship coverage.
Benefits include:
- More comprehensive protection
- Longer coverage periods
- Often backed by certified contractors
These warranties provide added peace of mind.
4. Full System Warranty
A full system warranty covers all components of the roofing system, not just individual materials.
What it may include:
- Underlayment
- Ventilation components
- Flashing and accessories
This type of warranty ensures the entire system works together properly.
5. Prorated vs Non-Prorated Coverage
Understanding how coverage changes over time is important.
- Prorated warranties reduce coverage as the roof ages
- Non-prorated warranties maintain consistent coverage for a set period
Knowing the difference helps you evaluate long-term value.
6. Transferable Warranties
Some warranties can be transferred to a new homeowner if you sell your home.
Advantages:
- Adds value to your property
- Provides reassurance to buyers
- Can make your home more attractive on the market
Transferability is an important feature for long-term planning.
Key Terms and Conditions to Understand
Roofing warranties often include specific terms that can affect coverage. Understanding these details helps you avoid surprises.
Coverage Limitations
Not all issues are covered under every warranty.
Common exclusions:
- Damage from severe weather
- Improper maintenance
- Unauthorized repairs
Reading the fine print is essential.
Maintenance Requirements
Many warranties require regular maintenance to remain valid.
Typical requirements:
- Routine inspections
- Prompt repairs
- Proper cleaning
Failing to maintain your roof can void coverage.
Installation Requirements
Some warranties require installation by certified contractors.
This ensures:
- Proper installation techniques
- Compliance with manufacturer guidelines
- Eligibility for extended coverage
Working with qualified professionals is key.
Claim Process
Understanding how to file a claim is important in case issues arise.
Steps often include:
- Documenting the problem
- Contacting the contractor or manufacturer
- Scheduling an inspection
Knowing the process helps you act quickly.
How to Choose the Right Roofing Warranty for Your Home
Selecting the right warranty depends on your priorities, budget, and long-term plans.
Evaluate Your Needs
Consider what level of protection you want.
Ask yourself:
- How long do you plan to stay in your home
- What risks are most concerning
- How much coverage you need
Your answers will guide your decision.
Compare Warranty Options
Review different warranties side by side to understand what each offers.
| Warranty Type | Coverage | Duration | Best For |
| Manufacturer | Materials only | Long-term | Basic protection |
| Workmanship | Installation | Varies | Labor coverage |
| Extended | Materials and labor | Longer | Comprehensive protection |
| Full System | Entire system | Long-term | Maximum coverage |
Comparing options helps you choose wisely.
Consider Long-Term Value
A more comprehensive warranty may cost more upfront but provide greater protection over time.
Benefits of stronger coverage:
- Reduced out-of-pocket expenses
- Better protection against defects
- Increased peace of mind
Investing in quality coverage can pay off.
Work With a Trusted Contractor
The contractor you choose plays a major role in warranty quality.
A reliable contractor will:
- Offer clear warranty options
- Explain coverage details
- Ensure proper installation
Homeowners in Wake Forest and surrounding areas benefit from working with experienced professionals who understand local conditions.
Common Warranty Mistakes to Avoid

Even with the best intentions, homeowners can make mistakes when reviewing or selecting warranties.
- Overlooking Fine Print: Failing to read the details can lead to unexpected exclusions or limitations.
- Choosing Based on Price Alone: Lower-cost warranties may offer limited coverage.
- Ignoring Maintenance Requirements: Skipping maintenance can void your warranty.
- Not Verifying Contractor Credentials: Working with unqualified contractors can affect warranty validity.
- Assuming All Warranties Are the Same: Coverage can vary significantly between providers.
Avoiding these mistakes helps you get the most from your investment.
Protect Your Investment With the Right Roofing Warranty
Understanding what roofing warranties are available for homeowners in Wake Forest NC helps you make informed decisions that protect your home and your budget. By choosing the right coverage and working with experienced professionals, you can ensure your roof performs reliably for years to come.
If you are ready to explore your options or need help understanding your warranty choices, contact us today to speak with the team at Barkley-Jensen Roofing. Proudly serving homeowners in Wake Forest and surrounding areas, they provide dependable roofing solutions backed by quality workmanship and reliable protection.
How Long Does A Roof Replacement Take In Holly Springs, NC?
04.14.2026
7 Min Read
If you are wondering how long does a roof replacement take in Holly Springs NC, you are not alone. Timing is one of the biggest concerns for homeowners planning a roofing project. While most replacements move quickly, several factors can influence how long the process takes. Understanding the timeline helps you prepare your home and avoid surprises. Many homeowners start by reviewing expectations and working with trusted roofing professionals to ensure everything runs smoothly from start to finish.
In this guide, you will learn:
- Typical timelines for roof replacement projects
- The key factors that affect how long it takes
- What happens during each phase of the process
- How to prepare your home before work begins
- Tips to help your project stay on schedule
Why Roof Replacement Timelines Matter More Than You Think

A roof replacement is not just about installing new materials. It is a coordinated process that impacts your daily routine, your home’s safety, and your long-term investment. Knowing how long it takes allows you to plan effectively and reduce stress during the project.
Homeowners in Apex and surrounding areas often experience unpredictable weather patterns, which can affect scheduling and timelines.
Here is why understanding the timeline is important:
- Better Scheduling: Helps you plan around work, family, and daily activities during the project.
- Reduced Disruption: Knowing what to expect minimizes inconvenience and uncertainty.
- Improved Coordination: Clear timelines allow better communication with your contractor.
- Weather Preparedness: Awareness of seasonal conditions helps avoid delays.
- Peace of Mind: Understanding the process reduces stress and builds confidence.
When you know what to expect, the entire experience becomes more manageable.
8 Step Roof Replacement Timeline
Most roof replacement projects follow a consistent sequence. While the exact duration may vary, understanding each stage helps you see where time is spent and what to expect along the way.
1. Inspection and Project Planning
The process begins with a detailed inspection of your roof. This step allows contractors to assess the condition of your current system and identify any potential issues.
During this phase:
- The roof is evaluated for damage or wear
- Measurements are taken
- A project plan and estimate are created
This stage typically takes a few days depending on scheduling and project complexity.
2. Scheduling and Material Preparation
Once the project is approved, your contractor will schedule the work and order the necessary materials.
This step involves:
- Confirming a start date
- Coordinating crew availability
- Arranging material delivery
Depending on demand and availability, this phase can take several days to a couple of weeks.
3. Site Preparation
Before installation begins, the work area is prepared to ensure safety and efficiency.
Preparation includes:
- Protecting landscaping and surrounding areas
- Setting up equipment
- Organizing materials for easy access
This stage is usually completed within a single day.
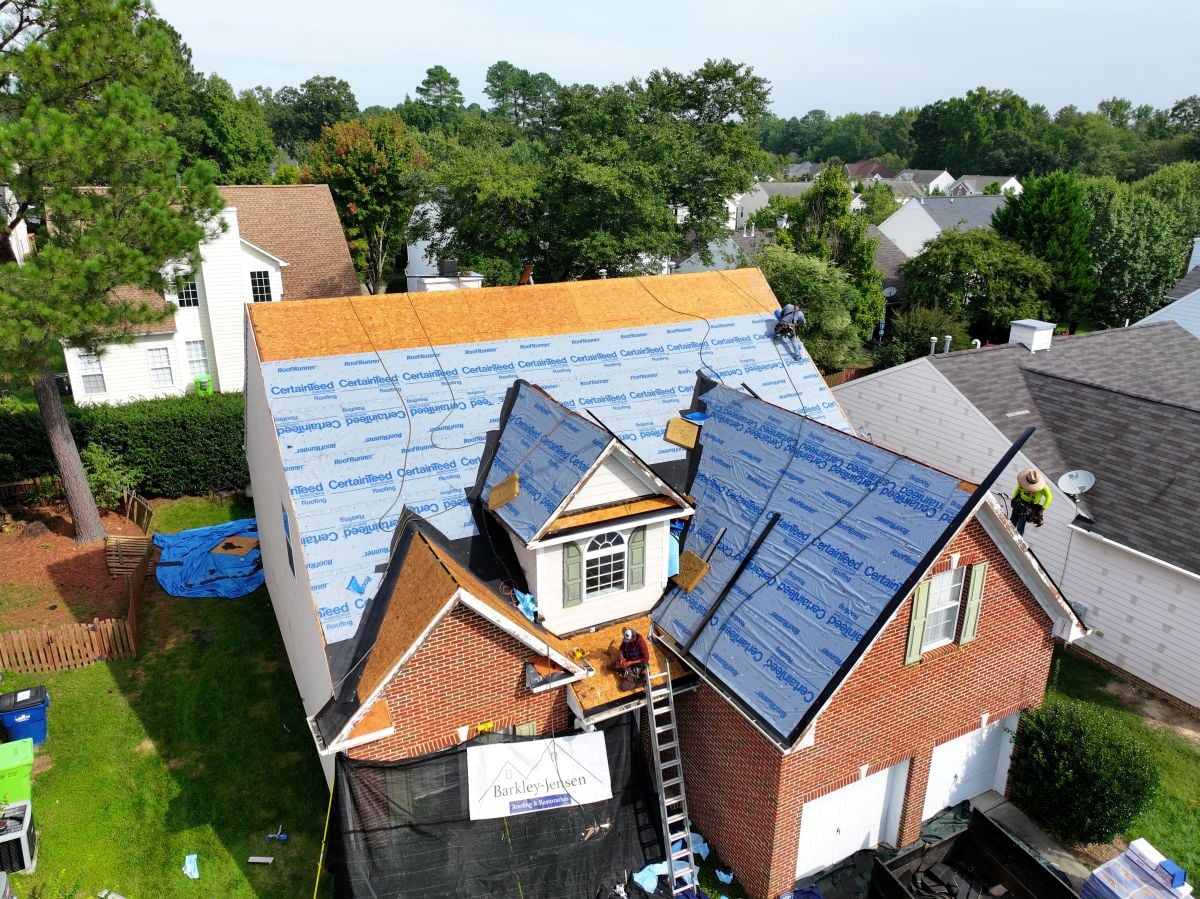
4. Removal of Existing Roofing
The old roofing materials must be removed to create a clean surface for the new system.
During this phase:
- Shingles or materials are stripped away
- Debris is collected and disposed of
- The roof deck is exposed for inspection
For most homes, this step is completed in one day.
5. Structural Repairs if Needed
Once the old materials are removed, the underlying structure is inspected for damage.
Common repairs include:
- Replacing damaged decking
- Fixing moisture-related issues
- Reinforcing weak areas
The time required depends on the extent of any issues found.
6. Installation of New Roofing Materials
This is the main phase of the project where your new roof takes shape.
Key tasks include:
- Installing underlayment
- Laying shingles or other materials
- Securing flashing and ventilation components
Most residential installations are completed within one to two days.
7. Cleanup and Final Inspection
After installation, the crew conducts a thorough cleanup and inspects the completed work.
This includes:
- Removing debris and leftover materials
- Checking for quality and consistency
- Ensuring all work meets standards
Cleanup is typically completed the same day as installation.
8. Final Walkthrough
The final step is a walkthrough with your contractor to review the finished project.
During this stage:
- You inspect the completed roof
- Any questions are addressed
- Final approval is given
This ensures everything meets your expectations.
What Can Affect How Long a Roof Replacement Takes
While many roof replacements are completed quickly, several factors can influence the timeline. Understanding these variables helps set realistic expectations.
Roof Size and Design
Larger roofs require more materials and labor, which naturally increases the time needed for completion.
Complex designs can also add time due to:
- Steeper slopes
- Multiple angles
- Features like skylights or chimneys
More complexity means more detailed work.
Weather Conditions
Weather is one of the most significant factors affecting roofing timelines.
In Apex and surrounding areas, conditions such as rain or high humidity can delay work.
Weather-related delays may include:
- Rainstorms interrupting installation
- High winds affecting safety
- Extreme heat slowing down work
Contractors prioritize safety and quality, which may require adjustments.
Material Type
Different roofing materials require different installation methods and timeframes.
For example:
- Asphalt shingles are quicker to install
- Metal roofing may take longer due to precision work
- Specialty materials can require additional steps
Material choice can impact overall duration.
Unexpected Repairs
Hidden damage discovered during the project can extend the timeline.
Examples include:
- Rotting wood beneath the surface
- Structural issues
- Moisture damage
Addressing these issues is essential for long-term performance.
How to Prepare Your Home for a Smooth Project
Preparation plays a major role in keeping your roof replacement on schedule. Taking a few simple steps can help avoid delays and improve efficiency.
Clear the Exterior Work Area
Make space around your home for equipment and materials.
This helps:
- Provide easy access for the crew
- Protect your belongings
- Speed up the workflow
A clear work area improves efficiency.
Protect Interior Spaces
Roof work can cause vibrations that affect your home’s interior.
Consider:
- Securing fragile items
- Removing wall decorations
- Covering items in the attic
These steps help prevent accidental damage.
Communicate Expectations
Clear communication with your contractor ensures everyone is aligned.
Discuss:
- Project timeline
- Daily work hours
- Any concerns or special requests
Good communication keeps the project on track.
Plan for Temporary Disruption
Roof replacement can be noisy and busy.
Prepare by:
- Adjusting your schedule if needed
- Making arrangements for pets
- Informing household members
Planning ahead reduces stress.
Typical Timeline Expectations for Homeowners
While each project is unique, most homeowners can expect a general timeframe based on their roof size and complexity.
Average Timeframes
- Smaller homes: often completed in one to two days
- Standard homes: typically two to three days
- Larger or more complex roofs: three to five days
These estimates can vary depending on the factors discussed earlier.
What Happens If Delays Occur
Delays are sometimes unavoidable, especially due to weather or unexpected repairs.
When delays happen:
- Contractors will communicate updates
- Work resumes as soon as conditions allow
- Quality and safety remain the top priority
Flexibility helps ensure a successful outcome.
Why Faster Is Not Always Better
While quick completion is ideal, quality should never be compromised.
A properly installed roof:
- Lasts longer
- Performs better
- Reduces future repair costs
Taking the necessary time ensures long-term value.
Working With Experienced Professionals
Experienced contractors streamline the process and minimize delays.
Benefits include:
- Efficient project management
- Skilled crews
- Reliable timelines
Professional expertise makes a significant difference.
Plan Your Roof Replacement With Confidence
Understanding how long a roof replacement takes in Holly Springs NC helps you prepare for the process and avoid unnecessary stress. With the right expectations and proper planning, your project can be completed efficiently while delivering long-lasting results.
If you are ready to start your project or want a personalized timeline, contact us today to speak with the team at Barkley-Jensen Roofing. Proudly serving homeowners in Apex and surrounding areas, they provide dependable, high-quality roofing solutions designed to protect your home for years to come.
What Roofing Materials Are Most Popular For Homes In Chapel Hill, NC?
04.09.2026
6 Min Read
Choosing the right roofing material is one of the most important decisions a homeowner can make. If you are wondering what roofing materials are most popular for homes in Chapel Hill NC, the answer depends on a mix of climate, style, and long-term value. With changing weather patterns and architectural trends, selecting the right option matters more than ever. Many homeowners begin by exploring options and learning from trusted roofing professionals to ensure their choice fits both their home and lifestyle.
In this guide, you will learn:
- The most popular roofing materials used in Chapel Hill and surrounding areas
- Why certain materials perform better in this region
- The pros and cons of each option
- How to choose the best material for your home
- What to consider for long-term performance and value
Why Roofing Material Choice Matters in Chapel Hill, NC
Roofing materials are not one-size-fits-all. The right choice depends heavily on local climate conditions, home design, and long-term maintenance expectations. In Chapel Hill and surrounding areas, homeowners face a mix of heat, humidity, storms, and seasonal changes that all impact roofing performance.
Selecting the right material is essential for several reasons:
- Weather Resistance: Materials must withstand heavy rain, humidity, and occasional storm activity common in the area.
- Energy Efficiency: The right roofing option can help regulate indoor temperatures and reduce energy costs.
- Durability: Choosing a long-lasting material reduces the need for frequent repairs or replacement.
- Curb Appeal: Roofing plays a major role in your home’s overall appearance and value.
- Maintenance Needs: Some materials require more upkeep than others, which affects long-term convenience.
Making an informed decision ensures your roof performs well for years to come.
9 Popular Roofing Materials for Homes in Chapel Hill, North Carolina
Several roofing materials stand out as popular choices for homeowners in Chapel Hill and surrounding areas. Each option offers unique advantages depending on your priorities and budget.
1. Asphalt Shingles
Asphalt shingles are the most widely used roofing material in residential construction. Their affordability and versatility make them a top choice.
Why homeowners choose them:
- Cost-effective compared to other materials
- Available in a wide range of colors and styles
- Easy to install and repair
They are well-suited for many homes and provide reliable performance.
2. Architectural Shingles
Architectural shingles are an upgraded version of traditional asphalt shingles. They offer enhanced durability and a more dimensional appearance.
Key benefits:
- Longer lifespan than standard shingles
- Improved resistance to wind and weather
- More visually appealing design
This option is popular among homeowners looking for both performance and style.
3. Metal Roofing
Metal roofs are gaining popularity due to their durability and energy efficiency.
Advantages include:
- Long lifespan, often lasting decades
- Reflective properties that reduce heat absorption
- Low maintenance requirements
While the upfront cost is higher, the long-term benefits are significant.
4. Clay and Concrete Tiles
Tile roofing offers a distinctive look and excellent durability, especially for certain architectural styles.
Common features:
- Strong resistance to heat and weather
- Long lifespan
- Unique aesthetic appeal
However, they are heavier and may require additional structural support.
5. Wood Shingles and Shakes
Wood roofing provides a natural and rustic appearance that appeals to many homeowners.
Benefits include:
- Attractive, traditional look
- Good insulation properties
- Environmentally friendly option
They do require regular maintenance to prevent moisture-related issues.
6. Synthetic Roofing Materials
Synthetic options are designed to mimic the appearance of natural materials while offering improved durability.
Advantages:
- Lightweight and versatile
- Resistant to weather and impact
- Lower maintenance than natural materials
These materials are becoming increasingly popular for modern homes.
How to Choose the Best Roofing Material for Your Home
Selecting the right roofing material involves balancing several factors. Understanding your priorities helps narrow down the best option.
Consider Your Budget
Budget plays a major role in material selection. Some options have lower upfront costs, while others offer long-term savings.
Think about:
- Initial installation cost
- Maintenance expenses
- Expected lifespan
Balancing cost and value is key.
Evaluate Your Home’s Style
Your home’s architectural design should influence your roofing choice.
For example:
- Traditional homes often pair well with shingles
- Modern designs may benefit from metal roofing
- Historic styles may suit tile or wood
Choosing a material that complements your home enhances curb appeal.
Think About Maintenance Requirements
Different materials require different levels of upkeep.
Consider:
- Frequency of inspections
- Cleaning needs
- Repair complexity
Low-maintenance options can save time and effort.
Factor in Local Climate
Weather conditions in Chapel Hill and surrounding areas should guide your decision.
Look for materials that:
- Resist moisture and humidity
- Withstand temperature changes
- Perform well during storms
Climate compatibility ensures long-term performance.
Comparing Roofing Materials Side by Side
Understanding how different materials compare helps homeowners make confident decisions.
Material Comparison Table
| Material | Cost Level | Lifespan | Maintenance | Best For |
| Asphalt Shingles | Lower | Moderate | Low | Budget-friendly homes |
| Architectural Shingles | Mid-range | Longer | Low | Enhanced durability |
| Metal Roofing | Higher | Long | Low | Energy efficiency |
| Tile Roofing | Higher | Long | Moderate | Unique aesthetics |
| Wood Shingles | Mid-range | Moderate | High | Natural appearance |
| Synthetic Materials | Mid-range | Long | Low | Versatility |
This comparison highlights the strengths of each option.
Matching Materials to Your Needs
The best material depends on your specific goals.
For example:
- If affordability is your priority, asphalt shingles are a strong choice
- If longevity matters most, metal roofing may be ideal
- If appearance is key, tile or wood options stand out
Understanding your priorities helps guide your decision.
Long-Term Value Considerations
It is important to think beyond initial cost.
Higher-quality materials can:
- Last longer
- Require fewer repairs
- Improve energy efficiency
Investing in long-term value often leads to better results.
Working With Professionals
Choosing the right material is easier with expert guidance.
Professionals can:
- Assess your home’s needs
- Recommend suitable options
- Ensure proper installation
This support helps you make the best decision.
Making the Right Roofing Choice for Your Home
Selecting the right roofing material is a critical step in protecting your home and enhancing its value. By understanding what roofing materials are most popular for homes in Chapel Hill NC and evaluating your options carefully, you can choose a solution that meets your needs and performs well over time.
If you are ready to explore your options or need expert advice, contact us today to get started. Barkley-Jensen Roofing proudly serves homeowners in Chapel Hill and surrounding areas with reliable, high-quality roofing solutions tailored to your home.
What Does A Roof Replacement Cost In Raleigh, NC? (Guide)
04.07.2026
6 Min Read
If you are wondering what does a roof replacement cost in Raleigh NC, you are not alone. Replacing a roof is a major investment, and understanding the factors that influence pricing can help you plan with confidence. Costs can vary widely depending on materials, size, and condition. Many homeowners start by exploring options and reviewing estimates with experienced roofing professionals to better understand what their project may involve.
In this guide, you will learn:
- Average roof replacement costs in Raleigh and surrounding areas
- Key factors that impact pricing
- How different materials affect your total investment
- Ways to budget and plan for your project
- How to get the most value from your roof replacement
Why Understanding Roof Replacement Costs Matters
Replacing your roof is not just another home improvement project. It is a critical investment that protects your entire home. Knowing what influences the cost allows you to make informed decisions and avoid unexpected expenses.
Homeowners in Raleigh and surrounding areas often experience varying weather conditions, which can affect both roof lifespan and replacement needs.
Here is why understanding costs is so important:
- Budget Planning: Knowing the expected range helps you prepare financially and avoid surprises.
- Informed Decisions: Understanding cost factors allows you to choose the right materials and options.
- Avoiding Overpayment: Being informed helps you recognize fair pricing and avoid inflated estimates.
- Long-Term Value: Investing wisely ensures your roof lasts as long as possible.
- Project Confidence: Clear expectations reduce stress and improve the overall experience.
Taking the time to understand pricing helps you approach your project with confidence.
6 Key Factors That Influence Roof Replacement Cost
Roof replacement costs are not one-size-fits-all. Several variables come into play, and understanding each one helps explain why estimates can vary.
1. Roof Size and Complexity
The size of your roof is one of the biggest cost drivers. Larger roofs require more materials and labor.
Additional complexity can also increase costs:
- Steep slopes
- Multiple angles or peaks
- Dormers and skylights
More complex roofs require more time and expertise to complete.
2. Roofing Material Selection
The type of material you choose has a significant impact on overall cost.
Common options include:
- Asphalt shingles which are affordable and widely used
- Metal roofing which offers durability but at a higher price point
- Architectural shingles which balance cost and longevity
Each material offers different benefits and price ranges.
3. Labor and Installation Costs
Labor costs can vary depending on the contractor’s experience and the difficulty of the project.
Factors that affect labor include:
- Roof accessibility
- Safety requirements
- Installation complexity
Choosing experienced professionals ensures quality results.
4. Removal of Existing Roofing
Before installing a new roof, the old materials often need to be removed.
This process can add to the total cost due to:
- Disposal fees
- Additional labor
- Potential repairs uncovered during removal
Tear-off is an important step in ensuring a solid foundation.
5. Roof Condition and Repairs
If your roof deck or underlying structure is damaged, repairs will be necessary before installation.
Common repair needs:
- Replacing rotted wood
- Fixing water damage
- Reinforcing structural components
These repairs can impact the final price.
6. Permits and Local Requirements
Local regulations in Raleigh and surrounding areas may require permits for roof replacement projects.
Costs may include:
- Permit fees
- Inspections
- Compliance with building codes
These requirements ensure your roof meets safety standards.
Average Roof Replacement Costs in Raleigh, NC
While every project is different, understanding general price ranges can help set expectations.
Typical Cost Range
In Raleigh and surrounding areas, most homeowners can expect:
- Asphalt shingle roofs: Moderate cost range depending on size and quality
- Architectural shingles: Slightly higher due to improved durability
- Metal roofing: Higher upfront investment but longer lifespan
The total cost depends heavily on the factors discussed earlier.
Cost Per Square Foot
Roofing costs are often calculated per square foot.
Factors influencing cost per square foot:
- Material type
- Labor requirements
- Roof complexity
This metric helps compare estimates more effectively.
Additional Cost Considerations
Beyond the base price, there may be additional expenses:
- Upgraded underlayment
- Ventilation improvements
- Gutter adjustments
These upgrades can improve performance and longevity.
Long-Term Value vs Initial Cost
It is important to consider long-term value rather than focusing only on upfront cost.
Higher-quality materials may:
- Last longer
- Require fewer repairs
- Improve energy efficiency
Investing in quality often pays off over time.
How to Budget and Plan for Your Roof Replacement
Planning ahead can make your roof replacement more manageable and less stressful.
Setting a Realistic Budget
Start by gathering multiple estimates to understand the expected range.
Consider:
- Material preferences
- Project complexity
- Potential repairs
A realistic budget helps guide your decisions.
Exploring Financing Options
Many homeowners choose to finance their roof replacement.
Options may include:
- Payment plans through contractors
- Home improvement loans
- Insurance coverage if applicable
Financing can make the project more accessible.
Timing Your Replacement
Timing can affect both cost and convenience.
Best times to schedule:
- During moderate weather conditions
- Before major damage occurs
- When contractors have availability
Planning ahead helps avoid emergency situations.
Getting Multiple Estimates
Comparing estimates ensures you receive fair pricing and quality service.
Look for:
- Detailed breakdowns of costs
- Clear timelines
- Warranty information
This step is essential for making an informed decision.
Comparing Roofing Materials and Their Cost Impact
Different materials offer varying levels of durability, appearance, and cost.
Asphalt Shingles
- Most common and affordable option
- Suitable for many homes
- Moderate lifespan
Architectural Shingles
- Enhanced durability and appearance
- Longer lifespan than standard shingles
- Slightly higher cost
Metal Roofing
- Long-lasting and energy-efficient
- Higher upfront investment
- Minimal maintenance
Material Comparison Table
| Material | Cost Level | Lifespan | Key Benefit |
| Asphalt | Lower | Moderate | Affordable |
| Architectural | Mid-range | Longer | Durability |
| Metal | Higher | Long | Longevity |
Choosing the right material depends on your budget and long-term goals.
Matching Materials to Your Home
Consider:
- Architectural style
- Climate conditions
- Maintenance preferences
Selecting the right material ensures both performance and appearance.
Make the Right Investment for Your Home
Understanding what a roof replacement costs in Raleigh NC helps you plan ahead and make confident decisions. By considering factors like materials, labor, and long-term value, you can ensure your investment protects your home for years to come.
If you are ready to explore your options or want a detailed estimate, contact us today to get started. Barkley-Jensen Roofing proudly serves homeowners in Raleigh and surrounding areas with reliable, high-quality roofing solutions tailored to your needs.
How to Choose a Roofing Contractor: Key Questions to Ask
04.02.2026
6 Min Read
Knowing how to choose a roofing contractor can make the difference between a smooth project and a costly mistake. Your roof is one of the most important parts of your home, so hiring the right professional is essential for long-term protection. With so many options available, it helps to understand what truly matters when making a decision. Many homeowners begin their search by comparing options and learning from trusted roofing professionals to ensure they are making the right choice.
In this guide, you will learn:
- What separates a reliable contractor from an unreliable one
- The most important questions to ask before hiring
- How to evaluate experience, credentials, and reputation
- Warning signs to avoid during the selection process
- How to confidently move forward with your decision
Why Choosing the Right Roofing Contractor Matters More Than You Think
Hiring a roofing contractor is not just about getting the job done. It is about ensuring your home is protected for years to come. A poor choice can lead to improper installation, hidden issues, and expensive repairs down the road.
Homeowners in Pinehurst and surrounding areas often face weather conditions that demand durable, high-quality roofing work, making contractor selection even more critical.
Here are the key reasons why your choice matters:
- Workmanship Quality: A skilled contractor ensures your roof is installed or repaired correctly the first time.
- Long-Term Durability: Proper installation extends the life of your roofing system.
- Warranty Protection: Reliable contractors offer warranties that protect your investment.
- Safety Standards: Professionals follow proper safety protocols to protect your property and workers.
- Peace of Mind: Knowing your home is in good hands reduces stress throughout the project.
Taking time to choose carefully can prevent major headaches later.
7 Key Questions to Ask Before Hiring a Roofing Contractor
Asking the right questions helps you evaluate whether a contractor is trustworthy, experienced, and qualified for your project. These questions provide insight into their professionalism and reliability.
1. Are You Licensed and Insured?
A reputable contractor should always be properly licensed and insured. This protects both you and the workers on your property.
Important details to confirm:
- Valid business license
- General liability insurance
- Workers’ compensation coverage
Never move forward with a contractor who cannot provide proof of these credentials.
2. How Much Experience Do You Have?
Experience matters when it comes to roofing. Contractors with a proven track record are more likely to deliver quality results.
Ask about:
- Years in business
- Types of roofing systems they specialize in
- Experience with projects similar to yours
An experienced contractor is better equipped to handle unexpected challenges.
3. Can You Provide References or Reviews?
Customer feedback offers valuable insight into a contractor’s reliability and quality of work.
Look for:
- Online reviews and ratings
- Testimonials from past clients
- References you can contact directly
Consistent positive feedback is a strong indicator of trustworthiness.
4. What Does the Estimate Include?
A detailed estimate helps you understand exactly what you are paying for and prevents surprises later.
Make sure it covers:
- Materials and labor costs
- Project timeline
- Cleanup and disposal
Clear communication upfront leads to a smoother project.
5. What Warranties Do You Offer?

Warranties provide protection and demonstrate confidence in the contractor’s work.
Ask about:
- Manufacturer warranties on materials
- Workmanship guarantees
- Coverage duration and terms
A strong warranty adds value and peace of mind.
6. How Will You Protect My Property?
Roofing projects can be messy, so it is important to understand how your property will be protected.
Key considerations:
- Landscaping protection
- Debris management
- Cleanup procedures
Professional contractors take steps to minimize disruption.
7. Who Will Be On-Site During the Project?
Knowing who will be working on your roof helps ensure accountability.
Ask:
- Whether the contractor uses in-house crews or subcontractors
- Who supervises the project
- How communication will be handled
Clear roles improve project coordination.
8. What Is the Project Timeline?
Understanding the timeline helps you plan and manage expectations.
Discuss:
- Start and completion dates
- Potential delays due to weather
- Daily work schedules
A realistic timeline keeps the project on track.
Warning Signs to Watch for When Choosing a Contractor
Not all contractors operate with the same level of professionalism. Being aware of red flags can help you avoid costly mistakes.
Unusually Low Estimates
If a quote seems too good to be true, it often is. Low estimates may indicate poor-quality materials or inexperienced labor.
Lack of Proper Documentation
A contractor who cannot provide licenses, insurance, or written estimates should be avoided.
High-Pressure Sales Tactics
Reputable contractors give you time to make informed decisions. Be cautious of anyone pushing for immediate commitments.
Poor Communication
Delayed responses or unclear answers can signal potential issues during the project.
No Physical Business Presence
A legitimate contractor should have a verifiable address and established presence in the community.
Homeowners in Pinehurst and surrounding areas benefit from choosing contractors with strong local reputations and proven reliability.
How to Compare Roofing Contractors Effectively
Once you have gathered information from multiple contractors, comparing them side by side helps you make a confident decision.
Key Factors to Evaluate
When comparing options, focus on:
- Experience and expertise
- Quality of materials offered
- Warranty coverage
- Communication and professionalism
These factors provide a well-rounded view of each contractor.
Comparing Contractor Options
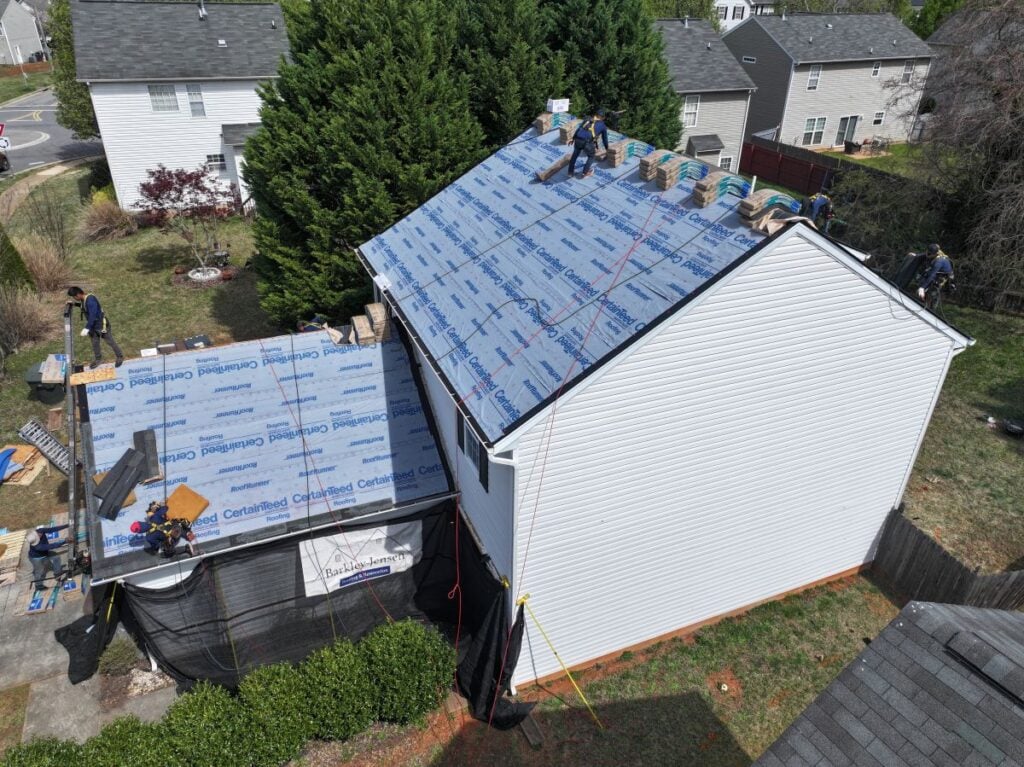
| Factor | Contractor A | Contractor B | Contractor C |
| Experience | High | Moderate | High |
| Reviews | Excellent | Mixed | Good |
| Warranty | Strong | Limited | Strong |
| Price | Mid-range | Low | High |
| Communication | Clear | Inconsistent | Clear |
This type of comparison helps highlight strengths and weaknesses.
Balancing Cost and Value
While price is important, it should not be the only deciding factor. A slightly higher investment often results in better materials, workmanship, and long-term performance.
Consider:
- Total value rather than upfront cost
- Long-term durability
- Potential savings on future repairs
Choosing value over price helps protect your investment.
Trusting Your Decision
After evaluating all factors, trust your research and instincts. A contractor who communicates clearly, provides detailed information, and demonstrates professionalism is likely the right choice.
Make the Right Choice for Your Home With Confidence
Choosing the right roofing contractor is one of the most important decisions you can make as a homeowner. By asking the right questions, recognizing warning signs, and comparing your options carefully, you can ensure your roof is in capable hands.
If you are ready to start your project or need expert guidance, contact us today to speak with the team at Barkley-Jensen Roofing. Proudly serving homeowners in Pinehurst and surrounding areas, they provide reliable, high-quality roofing solutions you can trust for years to come.
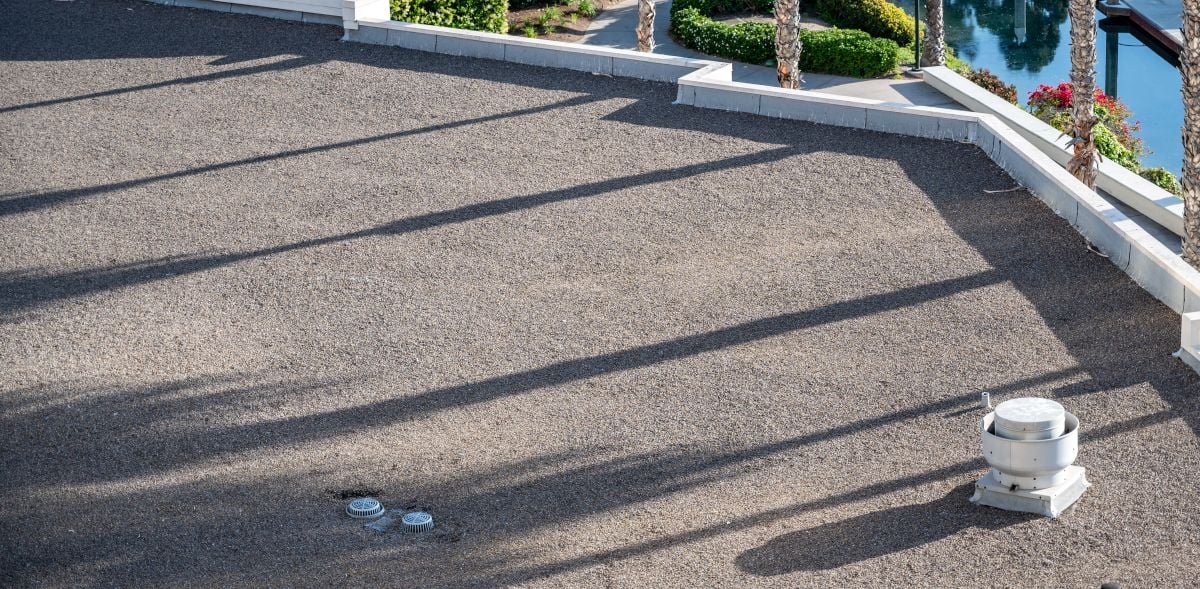
Flat Roof Drainage: 6 Problems That Can Cause Leaks
03.31.2026
6 Min Read
Proper flat roof drainage is one of the most important factors in protecting your home from water damage. Unlike sloped roofs, flat roofs rely entirely on well-designed drainage systems to move water off the surface. When something goes wrong, leaks can develop quickly and cause serious structural issues. Many homeowners begin by learning how their system works and consulting experienced roofing professionals to ensure everything is functioning as it should.
In this guide, you will learn:
- Why flat roof drainage is critical for preventing leaks
- The most common drainage problems homeowners face
- How to identify early warning signs of trouble
- Practical solutions to improve drainage performance
- When professional help is necessary
Why Flat Roof Drainage Is Critical for Preventing Damage

Flat roofs are designed with a slight pitch, but they do not shed water as quickly as traditional roofs. This makes drainage systems essential for directing water away before it has time to accumulate and cause damage.
Homeowners in Knightdale and surrounding areas often experience heavy rainfall and seasonal storms, which can put additional strain on flat roof systems.
Here are the key reasons drainage matters:
- Water Control: Prevents standing water that can lead to leaks and material breakdown.
- Structural Protection: Reduces the weight load caused by pooled water, which can stress the roof deck.
- Leak Prevention: Proper drainage minimizes the risk of water seeping into seams and joints.
- Material Longevity: Helps extend the lifespan of roofing membranes by reducing constant moisture exposure.
- Mold and Mildew Reduction: Limits moisture buildup that can lead to indoor air quality issues.
Without effective drainage, even a well-installed flat roof can develop problems over time.
6 Flat Roof Drainage Problems That Can Cause Leaks
Flat roof drainage systems are reliable when maintained properly, but several common issues can interfere with their performance. Understanding these problems helps homeowners take action before leaks develop.
1. Ponding Water
Ponding water occurs when water remains on the roof for extended periods after rainfall. This is one of the most common and damaging drainage issues.
Why it happens:
- Improper roof slope
- Blocked drains
- Structural settling
How to address it:
- Clear debris from drainage points
- Install tapered insulation to improve slope
- Correct structural issues if needed
Standing water increases the risk of leaks and accelerates material deterioration.
2. Clogged Drains and Scuppers
Leaves, dirt, and debris can easily clog drains and scuppers, preventing water from flowing off the roof.
Common causes:
- Nearby trees shedding leaves
- Lack of regular cleaning
- Storm debris accumulation
Solutions include:
- Routine cleaning and maintenance
- Installing drain guards
- Scheduling seasonal inspections
Keeping drains clear is one of the simplest ways to prevent major problems.
3. Improper Roof Slope
Flat roofs are not completely flat. They are designed with a slight slope to guide water toward drainage points.
Problems arise when:
- The slope is uneven
- Low spots develop over time
- Installation was not done correctly
Fixes may involve:
- Adding tapered insulation
- Regrading sections of the roof
- Addressing structural concerns
Proper slope is essential for effective drainage.
4. Damaged or Aging Roofing Membrane
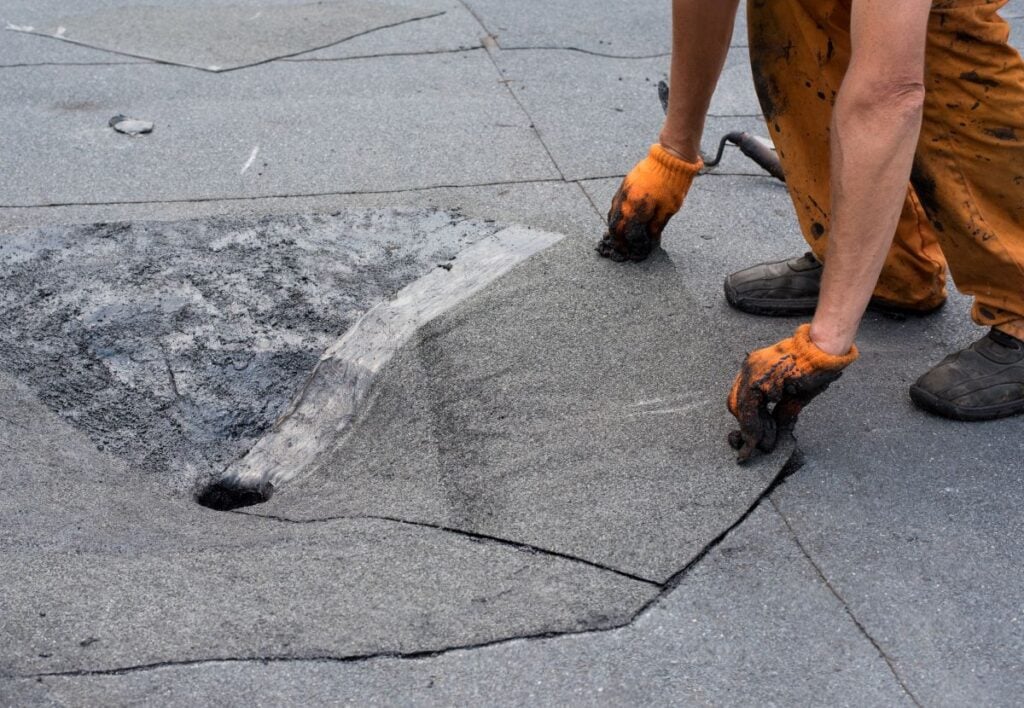
Even with good drainage, an aging or damaged membrane can allow water to seep through.
Signs of damage:
- Cracks or splits
- Blistering or bubbling
- Visible wear
Solutions include:
- Patching damaged areas
- Applying protective coatings
- Replacing sections if necessary
A strong membrane works hand in hand with proper drainage.
5. Gutter and Downspout Issues
Flat roofs often rely on external drainage systems like gutters and downspouts to move water away from the building.
Common issues:
- Sagging gutters
- Loose connections
- Blocked downspouts
Fixes include:
- Securing and aligning gutters
- Clearing blockages
- Ensuring proper water flow away from the foundation
These components are critical for complete drainage.
6. Poor Installation or Design
Sometimes drainage problems stem from the original installation.
Potential issues:
- Insufficient number of drains
- Incorrect placement of drainage points
- Poor material choices
Solutions may involve:
- Adding additional drains
- Redesigning drainage layout
- Consulting professionals for corrections
A well-designed system is key to long-term performance.
Warning Signs Your Flat Roof Drainage Needs Attention
Recognizing early warning signs can help you address drainage issues before they turn into leaks or structural damage.
- Visible Water Accumulation: If water remains on your roof long after rain has stopped, it is a clear indication that drainage is not working properly.
- Interior Water Stains: Water stains on ceilings or walls often signal that drainage issues have already led to leaks.
- Sagging or Uneven Roof Areas: Low spots or sagging sections can trap water and worsen drainage problems over time.
- Mold or Mildew Growth: Excess moisture from poor drainage can create conditions for mold and mildew to develop.
- Overflowing Gutters: If water spills over the sides of your gutters, it may indicate blockages or improper drainage design.
Homeowners in Knightdale and surrounding areas should pay close attention to these signs, especially after heavy storms.
Improving Flat Roof Drainage for Long-Term Protection
Maintaining and improving your drainage system helps prevent leaks and extends the life of your roof.
Routine Maintenance Practices
Regular upkeep is the most effective way to keep drainage systems functioning properly.
Important tasks include:
- Cleaning drains and gutters
- Removing debris from the roof surface
- Checking for blockages after storms
Consistency is key to preventing issues.
Upgrading Drainage Systems
In some cases, upgrades may be necessary to improve performance.
Options include:
- Installing additional drains
- Adding tapered insulation
- Upgrading gutter systems
These improvements can significantly enhance water flow.
Professional Inspections
Professional inspections provide a more thorough evaluation of your roof’s condition.
Benefits include:
- Identifying hidden issues
- Ensuring proper drainage design
- Recommending effective solutions
Expert insight helps prevent costly repairs.
Comparing Drainage Solutions
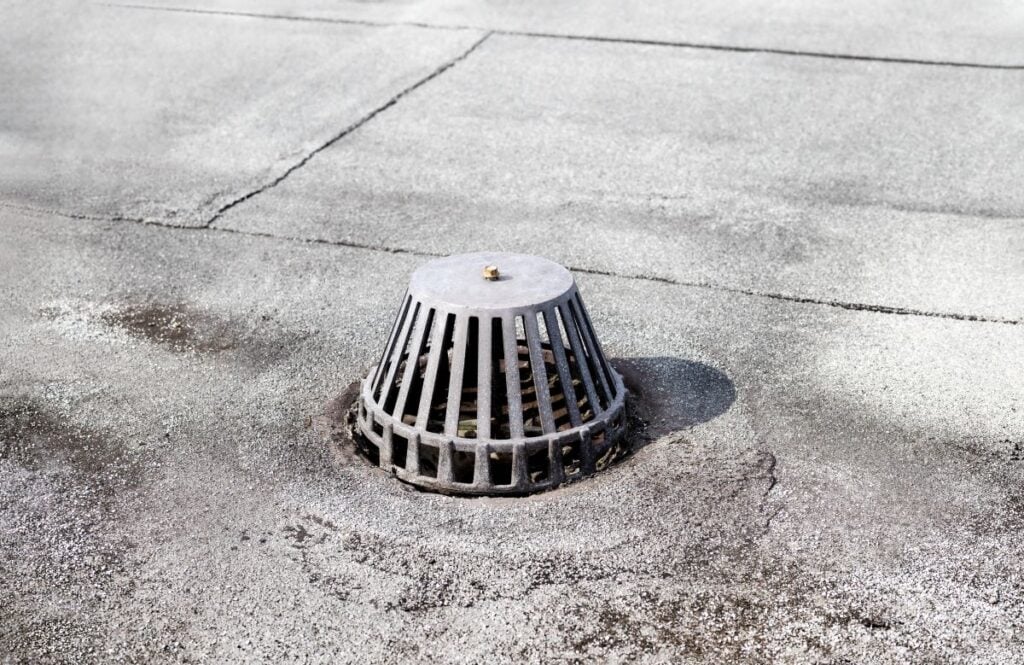
| Solution | Best Use | Key Benefit |
| Internal Drains | Large flat roofs | Efficient water removal |
| Scuppers | Roof edges | Simple and effective |
| Gutters | Residential systems | Directs water away |
| Tapered Insulation | Slope correction | Improves drainage flow |
Choosing the right solution depends on your roof’s design and needs.
Protect Your Home With Proper Flat Roof Drainage
Flat roof drainage plays a vital role in preventing leaks and protecting your home from long-term damage. By understanding common problems and taking proactive steps, you can keep your roof performing at its best.
If you are noticing drainage issues or want a professional evaluation, contact us today to schedule an inspection. Barkley-Jensen Roofing proudly serves homeowners in Knightdale and surrounding areas with reliable solutions designed to keep your home safe and dry year-round.