


Barkley-Jensen Roofing & Restoration
Shingle Roof Cost (2026 Pricing Guide for Homeowners)
10.30.2025
8 Min Read
When it comes to protecting your home, few investments are as important as your roof. Whether you’re replacing an aging roof or building a new home, understanding shingle roof cost can help you budget confidently and make informed choices about materials, installation, and long-term value. Many homeowners in Cary and surrounding areas are planning for upgrades in 2026, and with material prices and labor rates continuing to evolve, staying informed can make all the difference.
If you’re exploring options or comparing estimates, it’s worth visiting our roofing page to better understand how professional installation and premium materials influence total costs.
Here’s what you’ll learn in this guide:
- The real factors that shape today’s shingle roof cost
- What goes into an accurate roofing estimate
- Tips to maximize lifespan and reduce long-term expenses
- How Cary homeowners can get the best value in 2026
Why Shingle Roof Cost Matters for Homeowners
A new roof isn’t just a functional upgrade—it’s one of the best ways to preserve your home’s structure, improve energy efficiency, and boost curb appeal. Understanding what affects cost helps you make smart, lasting decisions.
- Budget Control: Knowing what drives price variations helps prevent surprise costs later in the project.
- Value Over Time: Investing wisely in better materials can lower repair needs and energy bills.
- Resale Impact: Homes with newer, high-quality shingles sell faster and often above market average.
- Peace of Mind: A clear understanding of pricing builds confidence in your contractor selection.
Many homeowners in Cary and surrounding areas find that transparency about cost leads to better results—and far fewer headaches—throughout the process.
5 Key Factors That Determine Shingle Roof Cost
When it comes to estimating your roofing investment, several interconnected factors influence final pricing. Here’s what typically drives the numbers up or down.
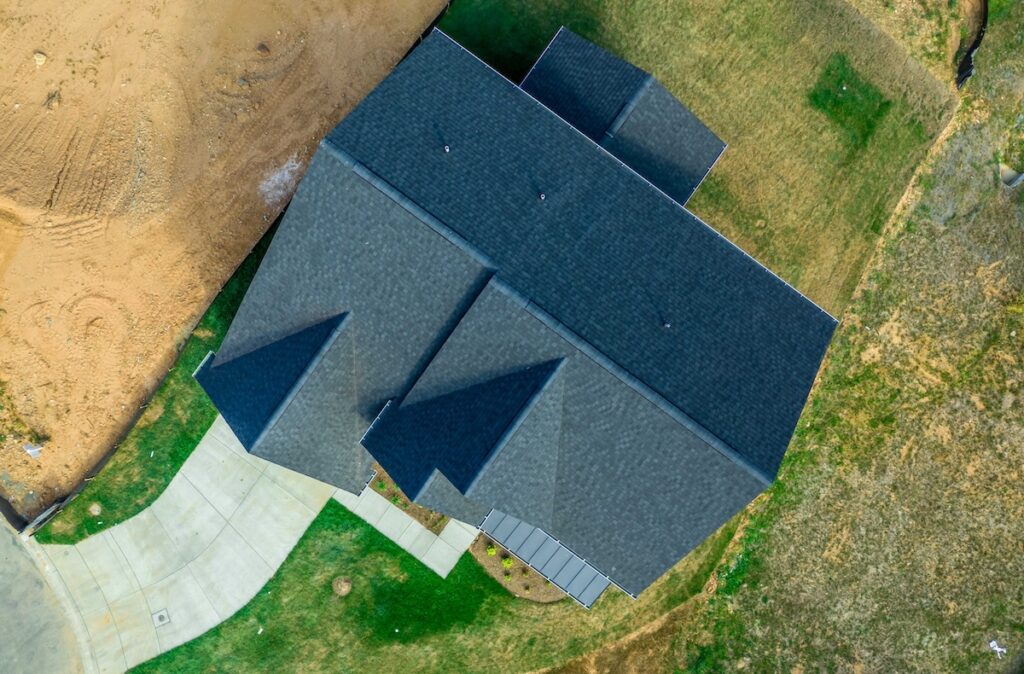
1. Roof Size and Pitch
The total square footage of your roof directly affects material and labor costs. A steeper roof may require special safety equipment and take longer to complete, increasing overall pricing.
- Larger homes generally require more shingles and underlayment.
- Complex rooflines with dormers or valleys take more time to shingle.
2. Shingle Material Choice
Not all shingles are created equal. Each material offers different benefits, lifespans, and price points.
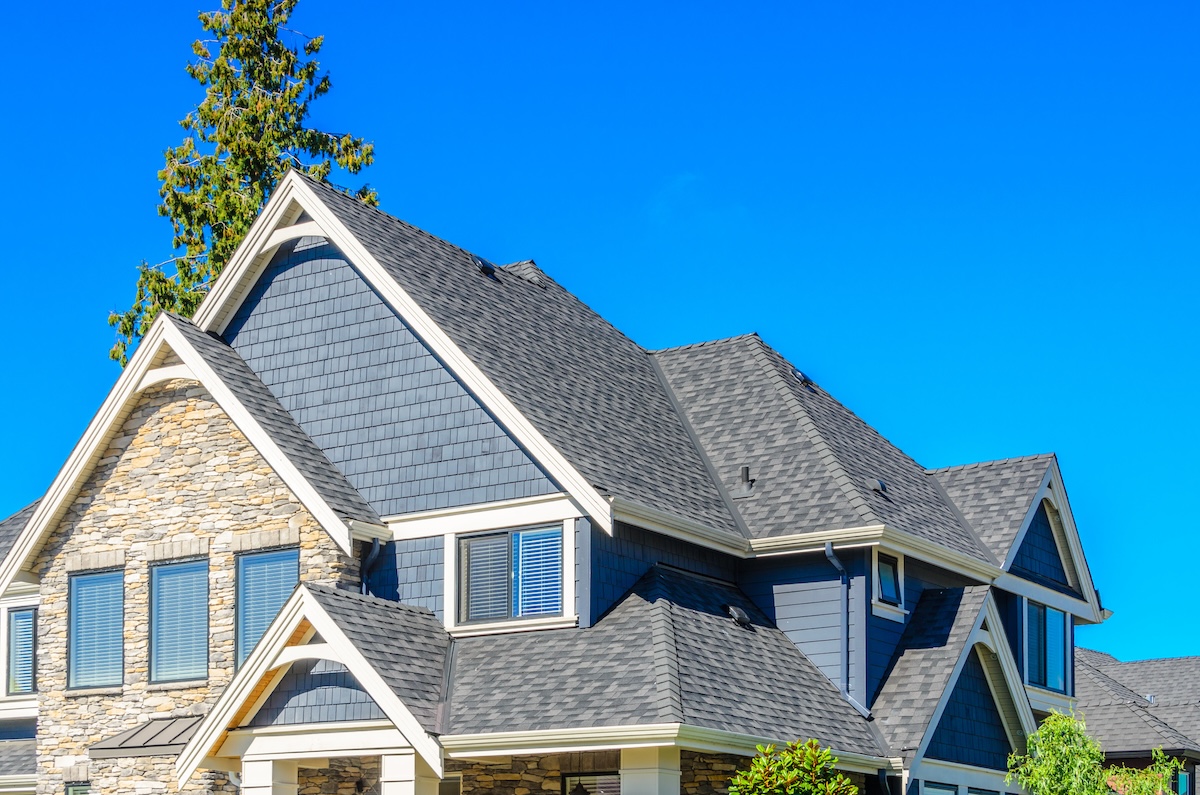
- Asphalt Shingles: Affordable and durable, these remain the most popular choice for Cary and surrounding areas.
- Architectural Shingles: Offer a dimensional look and better resistance to wind and UV damage.
- Premium Designer Shingles: Mimic slate or wood aesthetics and often come with longer warranties.
Choosing higher-grade shingles typically increases upfront cost but can save money over decades through reduced maintenance.
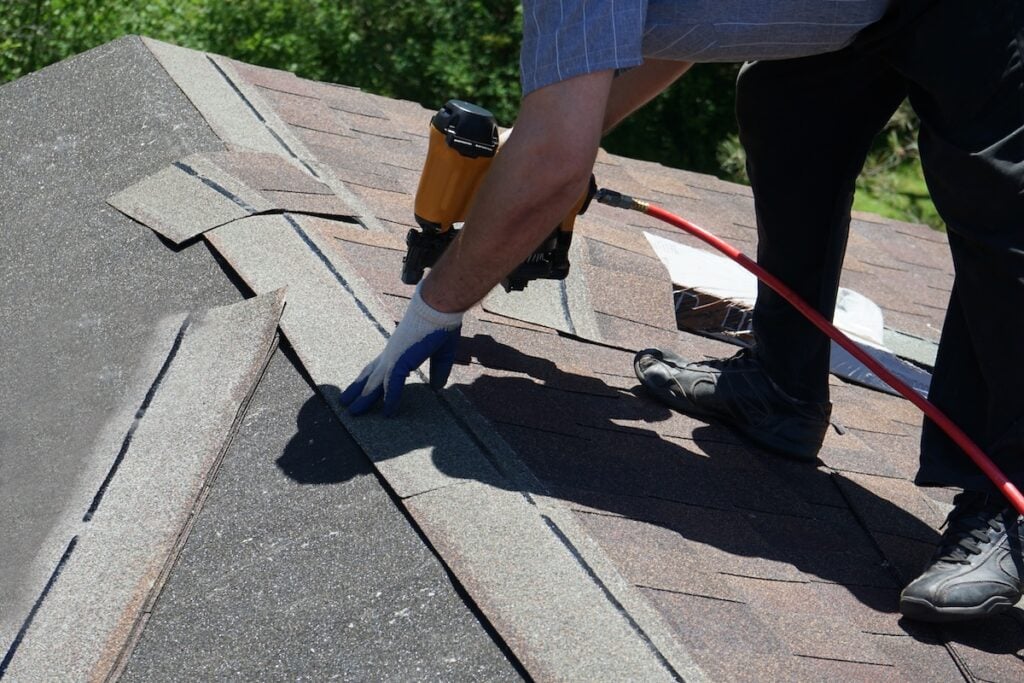
3. Labor Quality and Installation Experience
Labor costs vary based on the roofing crew’s expertise, licensing, and safety standards. While it may be tempting to go with a low bid, professional installers ensure correct ventilation, flashing, and sealing—critical for long-term performance.
- Skilled crews reduce risk of leaks and callbacks.
- Certified contractors can offer enhanced manufacturer warranties.
4. Underlayment, Flashing, and Ventilation
A proper roofing system isn’t just about shingles. High-quality underlayment and flashing are essential for waterproofing, while ventilation prevents moisture buildup and energy inefficiency.
- Synthetic underlayments resist mold and tear damage.
- Proper attic airflow extends shingle lifespan.
5. Removal and Disposal of Old Roofing
If you’re replacing an existing roof, labor and dumpster fees for tearing off old shingles add to the total. Most contractors in Cary and surrounding areas include this in their estimates, but costs may rise for heavier materials like wood shake or multiple existing layers.
2026 Pricing Breakdown for Shingle Roofs
To help you understand current pricing trends, here’s a general breakdown of what homeowners can expect in 2026 based on material type and home size.
| Roof Type | Average Cost per Sq. Ft. | Total for 2,000 Sq. Ft. Roof | Expected Lifespan |
| 3-Tab Asphalt | $4.00 – $5.50 | $8,000 – $11,000 | 15–20 years |
| Architectural | $5.50 – $7.50 | $11,000 – $15,000 | 25–30 years |
| Premium/Designer | $7.50 – $10.00 | $15,000 – $20,000 | 30–40 years |
Note: These averages include both materials and professional installation but may vary based on pitch, removal requirements, and regional labor rates.
In Cary and surrounding areas, homeowners often fall in the mid-range pricing bracket due to seasonal weather variations and material preferences for wind-resistant shingles.
Ways to Make the Most of Your Roofing Investment
Even though roofing can feel like a major expense, there are proven ways to stretch your dollars and protect your home more effectively.
Choose Quality Over the Lowest Bid
While it’s natural to compare prices, choosing the cheapest contractor can lead to premature repairs or hidden costs. Look for licensed, insured professionals who stand behind their workmanship.
Prioritize Proper Ventilation
Good ventilation can extend shingle lifespan by preventing heat buildup in summer and ice damming in winter. This small detail often pays for itself through longer-lasting materials and lower energy bills.
Ask About Warranty Coverage
Manufacturer and workmanship warranties can save you thousands in unexpected repairs. Always clarify what’s covered—and for how long—before signing any contract.
- Manufacturer Warranties: Cover defects in the shingles themselves.
- Workmanship Warranties: Cover labor and installation issues.
Schedule Regular Maintenance
Preventive maintenance helps catch small issues early. Simple steps like inspecting flashing or cleaning gutters each season can prevent water damage and costly repairs.
Consider Energy-Efficient Options
Cool roof shingles reflect sunlight, reducing attic temperatures and lowering cooling costs in warmer months. For Cary and surrounding areas, this is especially valuable during humid summers.
Common Cost Myths About Shingle Roofs
Misunderstandings about roofing costs often cause homeowners to overpay—or cut corners where they shouldn’t. Let’s set the record straight.
- Myth 1: “All Shingles Are the Same” Different shingle types perform differently depending on material, weight, and weather resistance. Cheap shingles may save you initially but can lead to early failure.
- Myth 2: “DIY Roofing Saves Money” Roofing requires safety equipment, precision installation, and warranty compliance. Improperly installed shingles can void coverage and cause expensive leaks.
- Myth 3: “You Only Need to Replace the Damaged Areas” Patching may seem economical, but color matching and underlayment wear can make spot repairs less effective. In many cases, full replacement provides better long-term protection.
- Myth 4: “More Layers Mean More Protection” Adding new shingles over old ones can trap moisture and add unnecessary weight. Most professional installers recommend full removal for optimal results.
- Myth 5: “Roofing Is the Same Everywhere” Local weather patterns, building codes, and architectural styles influence both material choice and installation approach. A roofing solution ideal for Cary and surrounding areas may differ significantly from one suited to coastal climates.
Choosing the Right Roofing Partner
The roofing company you choose can make a bigger difference than any other factor in your total cost and satisfaction.
What to Look For
- Experience and Certification: Ask if your roofer is certified with brands like GAF or CertainTeed.
- Transparent Estimates: A detailed, line-by-line quote helps you see where your money goes.
- Local Reputation: Check reviews and talk with neighbors who’ve worked with the company.
- Insurance and Licensing: These protect you from liability in case of an accident.
Questions to Ask Before Hiring
- How long have you been installing roofs in Cary and surrounding areas?
- Can you provide proof of insurance and certifications?
- What warranty do you offer for workmanship?
- How do you handle cleanup and debris disposal?
Taking the time to vet your contractor ensures peace of mind and protects your investment for years to come.
When Is the Best Time to Replace a Shingle Roof?
Timing can play a significant role in project cost and efficiency. That’s why it’s best to understand the best time of year to replace the shingles on your roof.
Spring and Fall
These are the most popular times for roof replacements thanks to mild temperatures and predictable weather. Scheduling early often secures better availability and pricing.
Winter
Some homeowners assume roofing isn’t possible in winter, but modern materials and cold-weather installation techniques allow for year-round service—though scheduling flexibility helps avoid weather delays.
Summer
While demand peaks in summer, roofing companies are typically well-staffed. However, higher temperatures may increase crew fatigue, potentially affecting project speed.
In Cary and surrounding areas, late spring through early fall offers the best balance of weather stability and contractor availability.
Protect Your Home with Barkley Jensen Roofing
A new roof is more than an expense—it’s an investment in your home’s safety, comfort, and beauty. Understanding what influences shingle roof cost helps you plan realistically and choose a solution that fits both your budget and your long-term goals.
At Barkley Jensen Roofing, we help homeowners in Cary and surrounding areas make confident, informed decisions. From material selection to installation and cleanup, our team focuses on quality workmanship, clear communication, and lasting results.
If you’re ready to start planning your project or want a detailed estimate tailored to your home, contact us today to schedule your consultation.
Flat TPO Roofing (Benefits, Cost & Installation Guide)
10.28.2025
6 Min Read
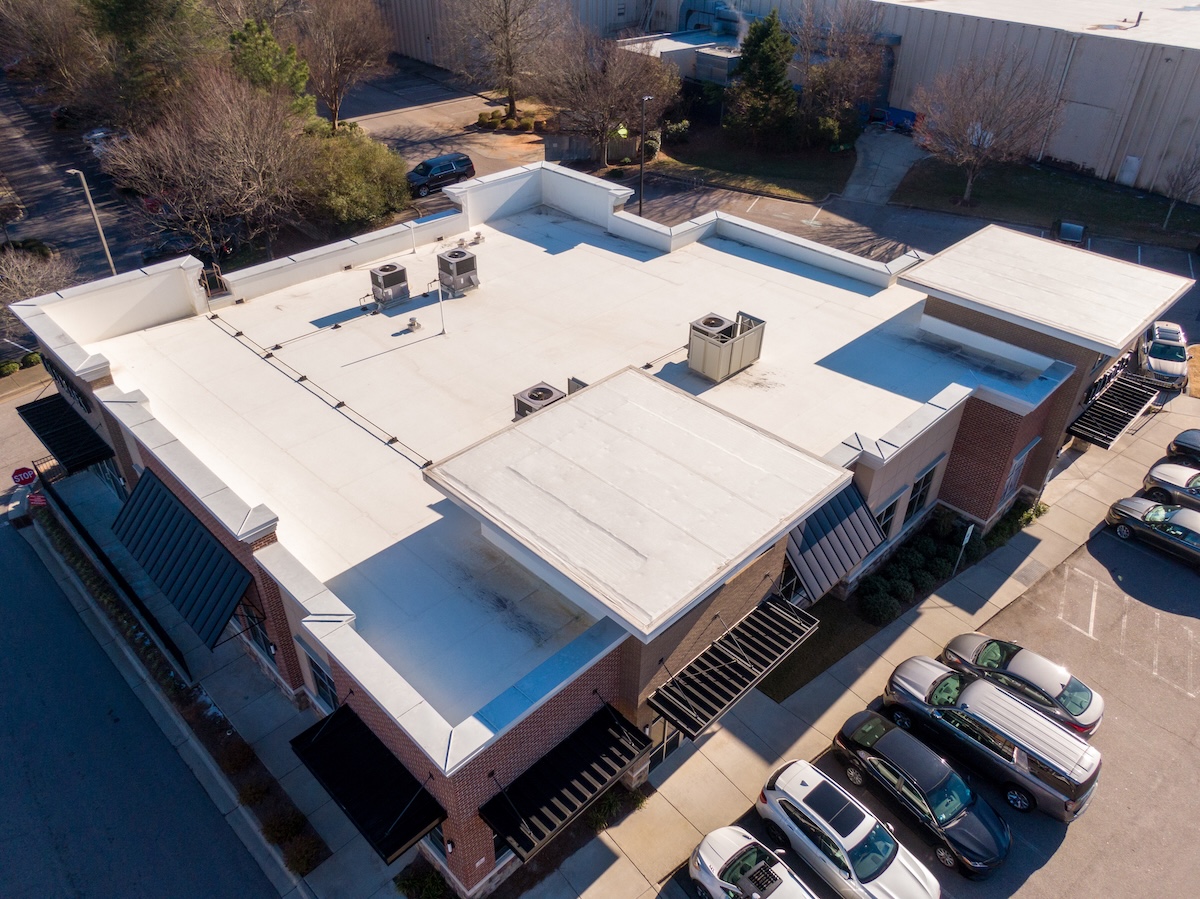
When it comes to durable and energy-efficient roofing solutions, tpo roofing stands out as a preferred choice for many commercial property owners. Understanding the advantages, cost considerations, and installation process of flat TPO roofing can help you make an informed decision that protects your building for years to come. If you are exploring options for your commercial property, learning more about this innovative roofing type is essential. For a closer look at roofing options tailored to commercial needs, check out this comprehensive overview of commercial roofing solutions.
- Discover the key benefits of flat TPO roofing and why it’s a popular option.
- Break down the typical costs involved in installing and maintaining TPO roofing systems.
- Understand the step-by-step installation process for flat TPO roofs.
- Explore factors that influence the longevity and performance of TPO roofing.
- Learn how flat TPO roofing compares with other commercial roofing materials available in the market.
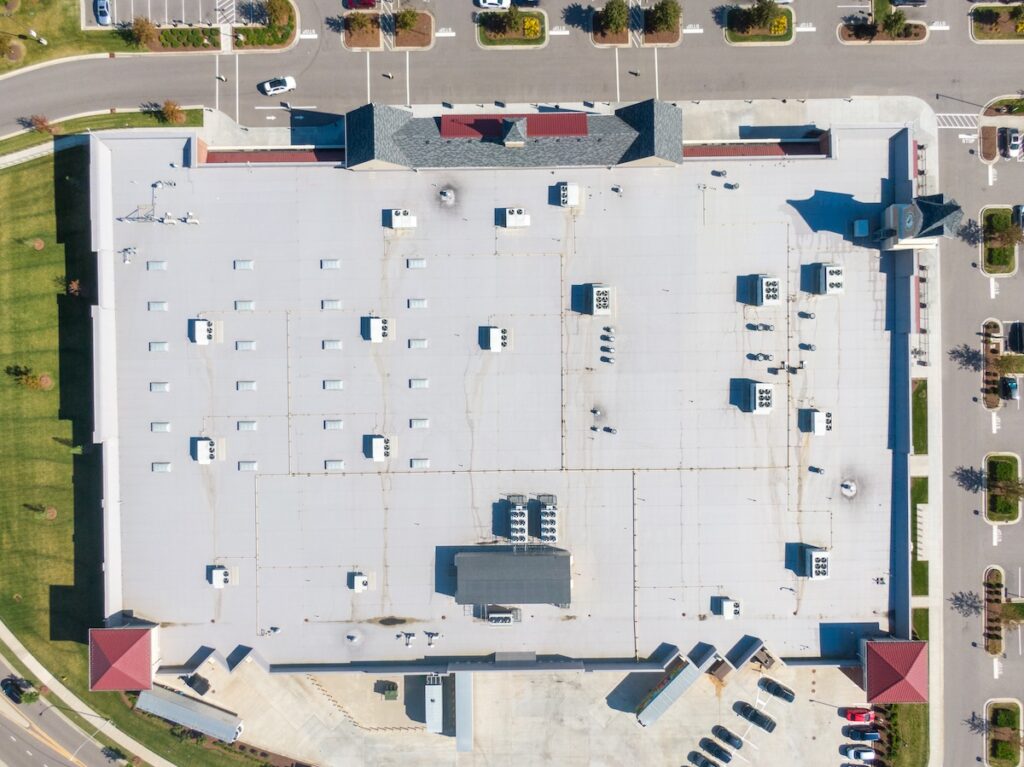
Why Flat TPO Roofing is an Important Choice for Commercial Buildings
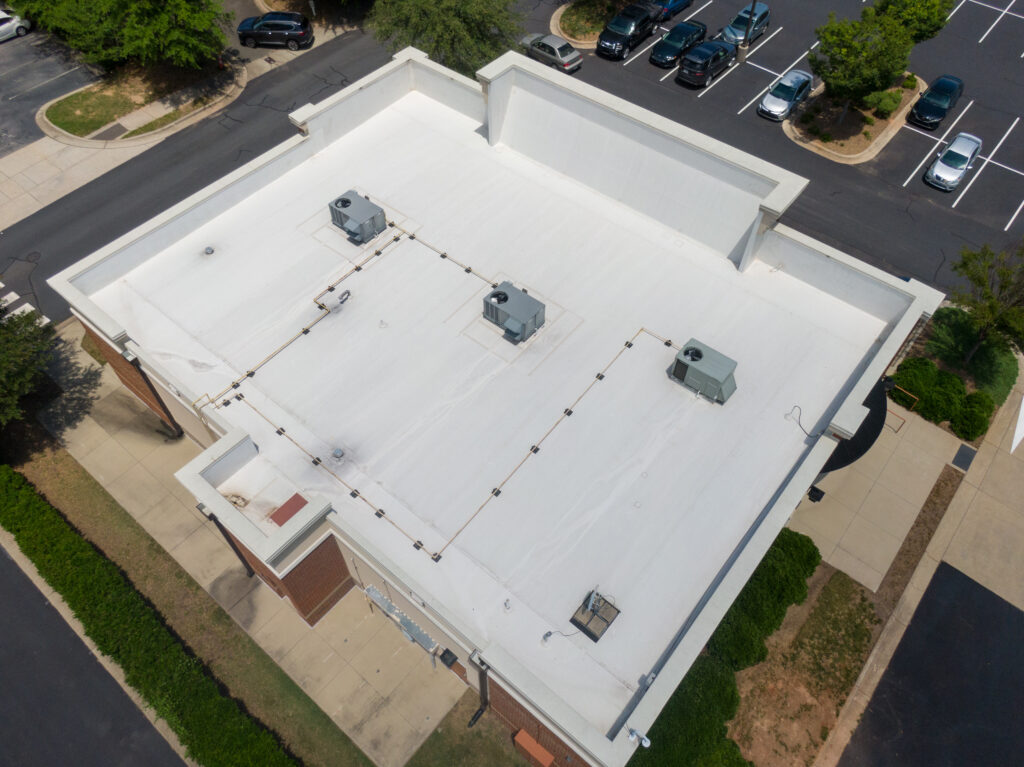
Flat TPO roofing has grown in popularity among commercial property owners due to its many practical benefits. This roofing type caters especially well to flat or low-slope roofs, which are common in commercial architecture. Choosing the right roofing material impacts not only the structural integrity of your building but also energy efficiency and maintenance costs over time.
- Energy Efficiency: TPO roofing reflects UV rays, significantly reducing cooling costs in hot climates.
- Durability: Designed to resist tears, punctures, and chemical exposure, TPO roofs can withstand harsh weather conditions.
- Cost-Effectiveness: Compared to other single-ply membranes, TPO offers excellent value with relatively lower installation and repair costs.
- Environmental Friendliness: TPO materials are recyclable and often manufactured without harmful additives.
- Ease of Installation: Lightweight sheets speed up the installation process, minimizing labor expenses and downtime.
5 Step Guide to Flat TPO Roofing Installation
Installing a flat TPO roof involves precise methods to ensure a watertight, well-sealed membrane that maximizes performance. Below are the major steps typically involved in installation to help you understand what to expect.
1. Roof Surface Preparation
The first step involves thoroughly cleaning and inspecting the existing roof substrate to ensure it is structurally sound and free of debris. Any damaged areas must be repaired to provide a smooth base for the membrane.
- Remove loose materials, dirt, and dust.
- Address any moisture or structural issues.
- Ensure the substrate is dry before proceeding.
2. Insulation Installation
Insulation layers improve the thermal performance of the roofing system. This step involves laying rigid foam boards or other insulation products over the prepared deck based on project specifications.
- Secure insulation mechanically or with adhesives depending on roof deck type.
- Ensure insulation joints are staggered to avoid thermal bridging.
- Level and smooth the surface for membrane application.
3. TPO Membrane Placement & Attachment
The flat TPO membrane is rolled out and positioned, typically spanning the entire roof area. Attachment methods vary and may include mechanical fasteners or adhesives depending on design requirements.
- Unroll membranes carefully without wrinkles or folds.
- Fasten or adhere sheets to the insulation securely.
- Ensure precise alignment to avoid seams strain.
4. Seaming and Heat Welding
Joining TPO sheets requires special heat-welding tools to melt and fuse the overlapping edges into a continuous, watertight surface. This process is critical for preventing leaks and enhancing roof performance.
- Use appropriate temperature controls to avoid overheating membrane.
- Inspect seams visually and perform adhesion tests.
- Apply pressures consistently for uniform welding.
5. Final Inspection and Detailing
After installation, the roof is examined for any imperfections or areas that require additional sealing or patching. Flashings, curbs, drains, and other penetrations receive precise detailing to maintain waterproofing integrity.
- Conduct water tests to confirm system performance.
- Ensure warranty compliance with manufacturer’s instructions.
- Clean the site and dispose of leftover materials responsibly.
Factors Influencing Flat TPO Roofing Longevity & Performance
Performance and lifespan of TPO roofs depend on various environmental and maintenance factors. Knowing these variables helps property owners optimize the return on investment and prolong the functional life of their roofing system.
- Installation Quality: Proper installation by experienced technicians is key for durability.
- Climate Conditions: High UV exposure, temperature fluctuations, and moisture levels affect TPO aging.
- Maintenance Routine: Scheduled inspections and prompt repairs address minor issues before they escalate.
- Material Thickness: Thicker membranes generally offer enhanced resistance to wear and damage.
- Use of Coatings: Reflective or protective coatings can extend roof life and improve energy performance.
Comparing Flat TPO Roofing With Other Commercial Roofing Options
Understanding how flat TPO roofing stacks up against alternative roofing materials helps you select the best fit for your building’s needs, budget, and desired lifespan.
TPO vs. EPDM Roofing
| Feature | TPO Roofing | EPDM Roofing |
| Material Composition | Thermoplastic polyolefin blend | Synthetic rubber membrane |
| UV Reflectivity | High reflectivity improves energy efficiency | Generally black, lower reflectivity |
| Seam Sealing | Heat-welded for strong seams | Seams glued or taped |
| Installation Ease | Lighter sheets ease installation | Flexible, but heavier to handle |
| Cost | Moderately priced | Typically less expensive |
TPO vs. PVC Roofing
| Feature | TPO Roofing | PVC Roofing |
| Chemical Resistance | Good resistance but less than PVC | Excellent chemical resistance |
| Cost | More cost-effective | Generally higher-priced |
| Flexibility | Moderate flexibility | Highly flexible membrane |
| Environmental Impact | More environmentally friendly options available | Contains plasticizers with potential environmental concerns |
FAQ’S
1. What is the lifespan of a TPO roof?
A properly installed TPO roof typically lasts 20 to 30 years. Its actual lifespan depends on factors like:
- Quality of the membrane (thickness: 45, 60, or 80 mil)
- Proper installation and seam welding
- Climate conditions and UV exposure
With regular inspections and maintenance, some high-quality TPO systems can even exceed 30 years.
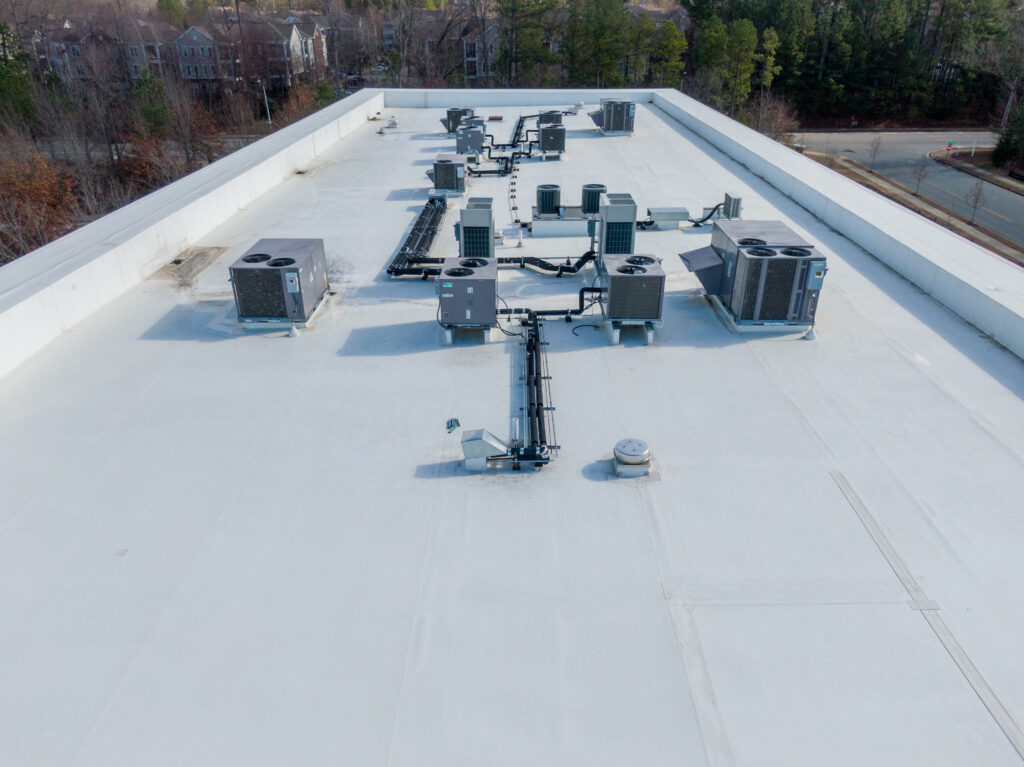
2. What maintenance does a TPO roof need?
- Biannual inspections (spring and fall) to check seams, flashing, and membrane integrity
- Cleaning debris, dirt, and standing water to prevent premature aging
- Checking for punctures or tears and repairing immediately
- Inspecting rooftop equipment (HVAC units, vents) to ensure no mechanical damage
- Re-sealing seams and edges if wear is detected
3. What colors are available?
- White (most popular — maximizes reflectivity and energy efficiency)
- Light gray
- Tan
Some manufacturers also offer custom colors like blue, green, or red for design consistency, though these may reduce reflectivity and cost more.
4. What are the disadvantages of a TPO roof?
- ⚠️ Heat-related wear: Prolonged exposure to high heat can cause seams or surfaces to weaken over time.
- 💧 Vulnerability to punctures: Thinner membranes can be damaged by foot traffic or falling debris.
- 🧱 Limited long-term track record: Compared to EPDM or PVC, TPO is relatively newer (since the 1990s), so data on 40+ year performance is limited.
- 💲 Installation quality matters: Poor seam welding or inadequate preparation can lead to leaks.
Why Choose Flat TPO Roofing for Your Commercial Property?
Choosing the right roofing system can significantly impact your building’s protection, energy efficiency, and operating costs. Flat TPO roofing offers a compelling balance of durability, environmental benefits, and cost-efficiency that makes it an excellent choice for commercial properties, especially those with flat or low-slope roofs. From professional installation to maintenance, each step matters for maximizing your roof’s lifespan.
For more information about reliable roofing options tailored to commercial properties, contact us today to discuss how flat TPO roofing can meet your specific needs.
How Long Does a Roof Inspection Take? (Timeline Explained)
10.21.2025
5 Min Read
Understanding how long does a roof inspection take is essential whether you are preparing to buy a new home, schedule routine maintenance, or address specific roof concerns. Roofing inspections provide crucial insights into the condition of your roof and help prevent costly repairs down the line. For those seeking expert advice and thorough evaluations, professional roofing services offer the expertise to ensure your roof stands the test of time.
- Discover the typical duration of roof inspections and what factors influence this timeline.
- Learn the step-by-step process professionals follow during a roof inspection.
- Understand the benefits of regular inspections and how they protect your property.
- Explore additional tips to prepare for your roof inspection to help streamline the process.
Why Knowing the Duration of a Roof Inspection Matters
Having a clear idea about the timeline of a roof inspection can help homeowners plan accordingly and make informed decisions. Roof inspections are not only about identifying visible damage but also about uncovering underlying issues that might not be apparent at first glance. Knowing how long the inspection typically takes ensures minimal disruption and sets the right expectations.
- Efficient Planning: Scheduling the inspection without affecting your daily routine.
- Cost Management: Understanding the inspection timeline can prevent unexpected expenses.
- Comprehensive Evaluation: Sufficient time ensures thorough inspection covering every critical area.
- Preventative Maintenance: Regular inspections identify problems early, saving long-term costs.
4 Step Timeline: How Long Does a Roof Inspection Take?
The duration of a roof inspection depends on several factors such as roof size, complexity, and accessibility. Below is a detailed breakdown of the typical process, which generally ranges from 30 minutes to a few hours.
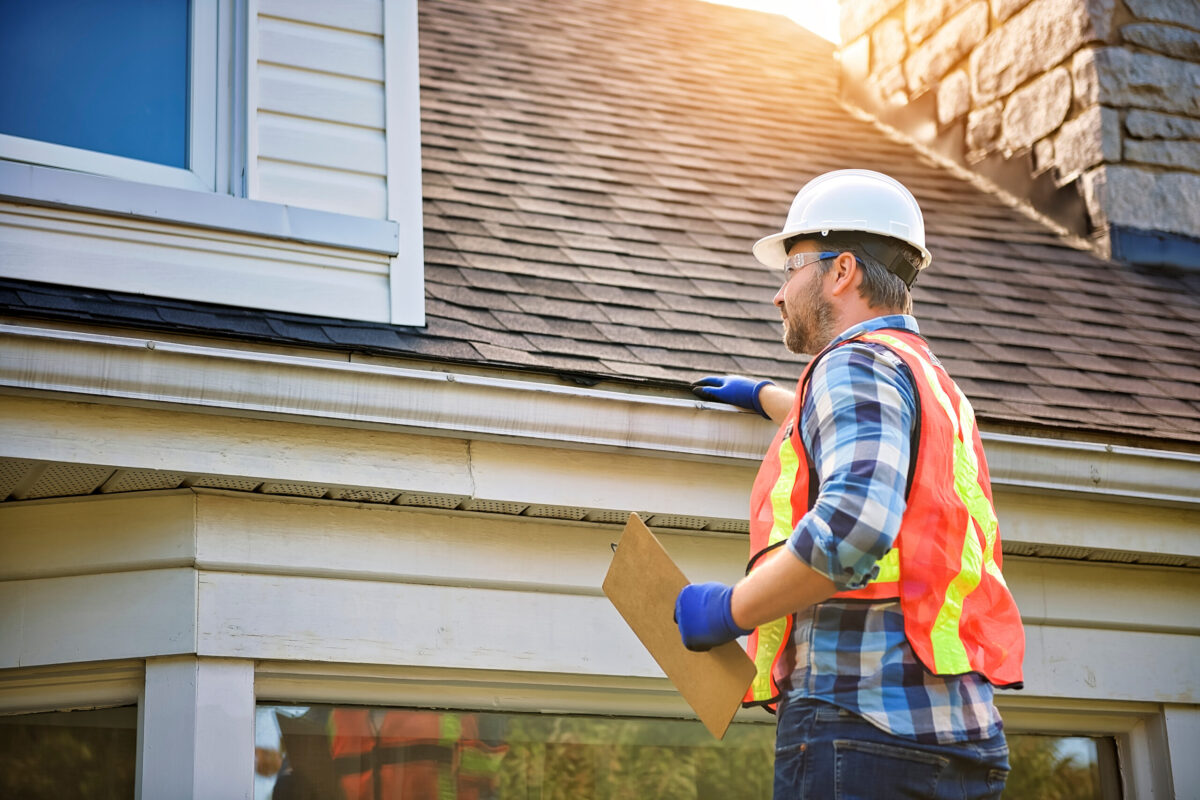
1. Initial Assessment and Walkthrough
Inspectors begin by visually examining the overall condition from the ground and using binoculars if necessary. This stage helps identify obvious issues like missing shingles or large debris.
- Duration: Approximately 10-20 minutes.
- Allows inspectors to plan the in-depth assessment needed.
- Establishes safety protocols depending on the roof condition.
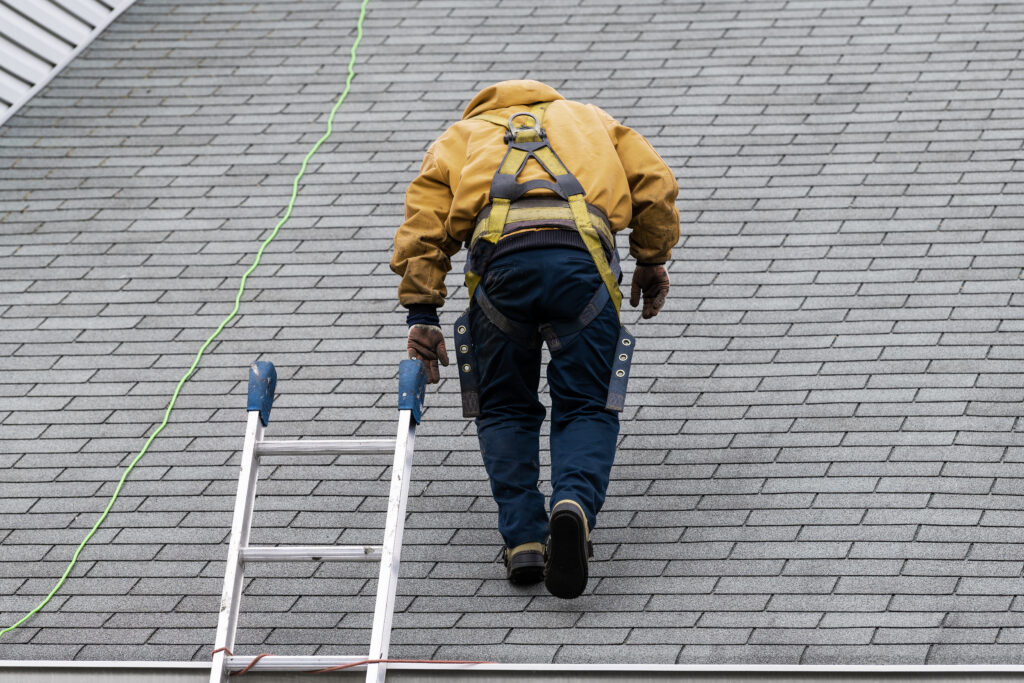
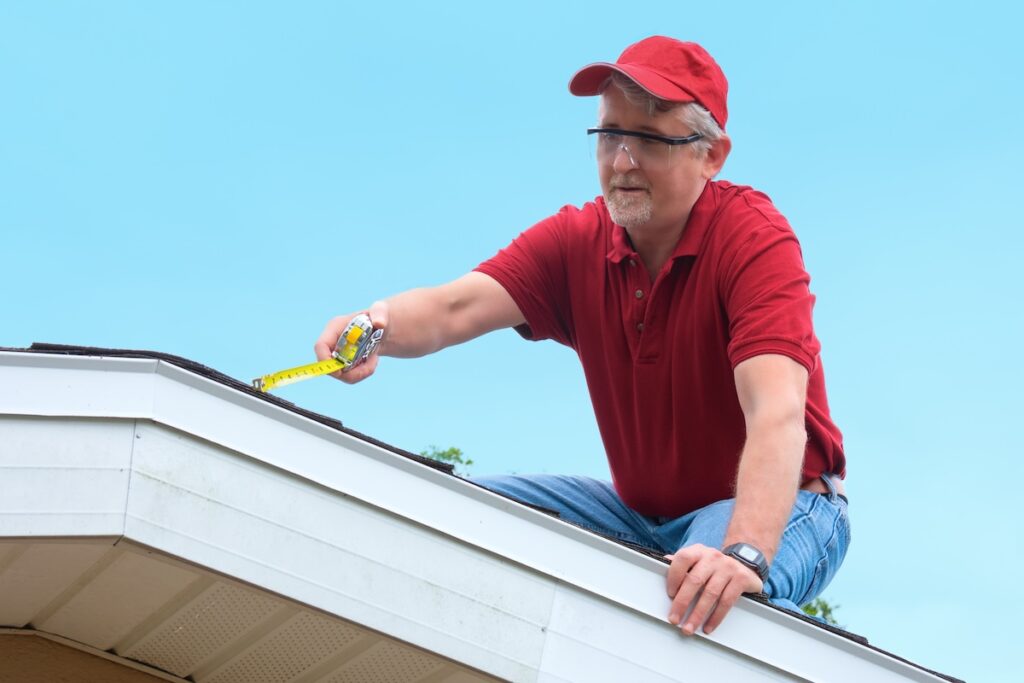
2. On-Roof Inspection
The most critical part where inspectors physically climb onto the roof to check for damage, leaks, structural weaknesses, and wear and tear. This step involves detailed observation of shingles, flashing, gutters, and ventilation.
- Duration: Roughly 30-60 minutes, depending on roof size.
- Includes testing for soft spots or potential water damage.
- Ensures examination of roof edges, valleys, and chimney areas.
3. Interior Inspection
Inspectors review the attic or ceilings inside the house for signs of penetration by water or pests, proper insulation, and ventilation efficiency.
- Duration: 15-30 minutes.
- Helps detect hidden leaks or moisture buildup.
- Complements the exterior findings for a full diagnosis.
4. Report Preparation and Consultation
After gathering all data, professionals compile a detailed report outlining the condition, necessary repairs, and estimated costs. They then discuss findings and recommendations with the homeowner.
- Duration: 20-40 minutes.
- May include photographic evidence and documentation.
- Opportunity for homeowners to ask questions and plan next steps.
Key Benefits of Comprehensive Roof Inspections
Regular and timely roof inspections offer wide-ranging advantages that extend beyond the inspection day itself. Understanding these benefits highlights the importance of maintaining a durable and effective roof system.
- Extended Roof Lifespan: Early detection of minor issues helps avoid major damage over time.
- Safety Assurance: Ensures your roof is structurally sound, reducing risks during severe weather.
- Insurance Compliance: Many insurance policies require proof of periodic inspections.
- Improved Home Value: Well-maintained roofs increase curb appeal and property value.
- Cost Savings: Identifying repairs early prevents costly replacements.
Preparing for Your Roof Inspection: Tips to Streamline the Process
Maximizing the efficiency of your roof inspection can be as simple as making a few preparations beforehand. These steps help the inspector work faster and more accurately, ultimately benefiting your home maintenance routine.
Clear Access and Landscaping
Trim back overgrown trees and bushes near the house to give inspectors unobstructed access to all parts of the roof. This minimizes the time spent navigating obstacles and potential damage risk.
Secure Pet Safety
Keep pets indoors or safely away during the inspection. This ensures both your animals’ safety and the inspector’s focus on their tasks without distractions.
Gather Previous Documentation
Have any prior roof repair or inspection records on hand. This background information helps inspectors understand the history and tailor their evaluation accordingly.
Prepare Questions and Concerns
Write down any specific issues you’ve noticed with your roof, such as leaks or noises. Communicating these details helps target inspection areas effectively.
Why Choose Professional Roofing Services in Your Area?
While DIY inspections may seem tempting, professional roofing experts provide thorough, safe, and accurate assessments backed by industry experience and specialized tools. Choosing seasoned professionals guarantees your roof receives the attention it deserves, minimizing any risks or overlooked issues.
Comparison Table: DIY vs Professional Roof Inspections
| Aspect | DIY Inspection | Professional Inspection |
| Safety | Risk of falls or injury without proper equipment | Fully insured and trained for safe roof access |
| Accuracy | Limited by experience and observation skills | Uses specialized tools and expertise for precise evaluation |
| Time Required | Can take hours if inexperienced | Typically under 2 hours with efficient methods |
| Report & Recommendations | No formal documentation provided | Detailed reports and clear next-step guidance |
For homeowners in the area, professional roof inspections not only improve safety and accuracy but also ensure compliance with local regulations and standards.
Your Roof Inspection Timeline Starts Here
Knowing how long does a roof inspection take empowers you to maintain your home proactively and avoid unexpected issues. Whether you’re scheduling routine maintenance or preparing for seasonal weather changes, understanding the process and benefits makes a big difference.
To protect your home with a comprehensive roof evaluation, contact us today for expert service inquiries and scheduling. Our professional team is ready to provide a thorough inspection with clear communication at every step.
7 Best Roofing Companies Holly Springs NC (Trusted Roofers)
10.14.2025
7 Min Read
A damaged roof isn’t just an inconvenience—it’s a risk to your home, comfort, and wallet. When you need help quickly, you should know which roofing companies Holly Springs NC you can trust for quality, speed, and lasting solutions. To see what high standards look like in action, you may review professional roofing services here and compare what you should expect.
Here’s what you’ll learn in this guide:
- Why choosing a trusted roofer in Holly Springs matters more than just price
- How local weather and building trends affect roofs in Holly Springs
- Profiles of excellent roofing contractors in Holly Springs, and what sets them apart
- Warning signs & common roofing scams in Holly Springs
- DIY vs professional repair: when each makes sense
- What to ask for in estimates, warranties, and how to evaluate bids
🏠 Why Trustworthy Roofing Companies Matter in Holly Springs

Holly Springs has been growing fast, with many homes built in recent decades. Roofs here face specific stresses, and choosing the wrong contractor can lead to repeated problems. Here are crucial benefits of picking a reliable local roofer:
- Long-Lasting Protection: Roofs must withstand strong summer sun, occasional hail storms, heavy rain, and seasonal humidity. Quality materials and correct installation extend lifespan.
- Prevent Costly Damage: Minor issues left unresolved (leaks, broken flashing, missing shingles) can lead to interior damage, mold, rot, or structural damage. Fixing early is far cheaper.
- Compliance & Permits: Local codes, HOA rules, and permit requirements in Holly Springs/Wake County demand contractors who follow the correct procedures. Unpermitted work or code violations can cost extra later.
- Value & Curb Appeal: A well-installed, visually appealing roof boosts home value and reduces homeowner insurance risk. Homes with subpar roofs often face lower resale value or buyer concern.
- Peace of Mind & Warranty: With the right contractor you get clear communication, timely repairs, proper cleanups, and real warranties that hold up over time.
🌦️ Local Weather & Roof Stress in Holly Springs
Before choosing a contractor, it helps to understand the specific environmental stresses your roof likely endures. Here are the main local factors:
- Humidity & Heat: Summers are hot and humid, which accelerates deterioration of asphalt shingles and causes fast wear on sealants and flashing due to expansion/contraction.
- Thunderstorms & Wind Events: Quick bursts of heavy rain, gusty winds, and sometimes hail can lift shingles, damage underlayment, or expose edges.
- Storm Damage Aftereffects: Even when damage isn’t obvious from the ground, leaks may start as interior issues some time after a storm.
- Rapid Growth & Builder-Grade Roofs: Many houses built in the 1990s or later use builder-grade roofing materials (often 3-tab shingles) that tend to reach their lifespan and begin showing wear.
- Seasonal Debris & Trees: Trees shed branches, leaves, and pine needles; gutters can clog; shade-covered areas promote moss or algae growth which undermines shingles over time.
🛠️ 7 Proven Local Roofing Contractors in Holly Springs
Here are several trusted local roofing companies in and around Holly Springs, NC. These are real firms, with local reputations, so you can compare their services, warranties, and reviews. Barkley-Jensen is listed first for reference, even if their primary base is elsewhere, to highlight what top service looks like.
1. Barkley-Jensen Roofing & Restoration
Known for handling insurance-related claims, storm damage, and full roof inspections. They emphasize craftsmanship, support during the process, and cleaning up thoroughly after work is done.
2. On Tops Roofing (Holly Springs)
With over 30 years in Holly Springs, On Tops handles both roof repairs and replacements. They’ve done many projects in local neighborhoods, working often with builder-grade roofs that are aging.
3. Pro Performance Roofing, LLC
Local Wake County contractor with 30+ years of experience. Offers roof repair, roof inspection, flashing/pipe boot repair, and works with insurance claims. Many positive local reviews for promptness and cleanup.
4. B & B Roofing, Inc.
Serving Holly Springs and surrounding Triangle areas for decades. Known for residential and commercial roofing, free estimates, solid track record, and good customer service.
5. Emerald Roofing NC
Offers tailored roof repair and replacement work, uses premium materials, and provides free inspections and estimates. They do metal, asphalt, and other materials.
6. Oak City Roofing
Specializes in leak repair, storm damage, gutter issues, and providing free consultations. They serve throughout the Triangle and are well-known for roof leak repairs in Holly Springs.
7. Apex Roofing & Restoration
Though headquartered elsewhere, they serve Holly Springs and focus on durable materials, quick repair work, and reliable warranties. Their services include both residential and commercial roofing and they are experienced with local weather effects.
⚠️ Red Flags & Common Scams in Holly Springs Roofing
Rapid growth and frequent hail or storm damage leave some homeowners vulnerable to shady offers. Here are warning signs and how to protect yourself:
- Storm-Chaser Pressure Sales: Contractors who arrive just after a storm, knock on doors, or pressure you to sign immediately may be out-of-town or less reliable. Insist on seeing a local license, business address, and references.
- Too-Good-to-Be-True Bids: If one quote is significantly lower than all others, question what’s being cut — materials quality, number of nails, underlayment, flashing, or cleanup.
- High Upfront Payments: Reputable roofers often require a deposit, but receivables for more than 30-40% before the job is underway can be risky.
- No Written Agreement or Warranty: Always get a written contract that outlines scope, materials, timeline, warranties (material + workmanship), and cleanup responsibilities.
- Insurance Misrepresentation: Beware contractors who advise exaggerating damage for insurance or making undocumented changes. Always review claim documents yourself and get independent assessments as needed.
🔍 DIY vs Professional Roof Repair: What’s Safe & What’s Not
Not all roofing work requires a pro—but knowing what is safe for DIY and what requires professional help is key.
DIY Repairs You Might Handle
- Replacing a few damaged or missing shingles (if safe to access)
- Cleaning gutters and clearing debris in roof valleys (using ladders safely)
- Temporary patching or securing a tarp over a leak until a professional arrives
Repairs That Should Be Left to Pros
- Flashing replacement around chimneys, skylights, vents—needs precision to avoid leaks
- Structural work (replacing rotted decking, repairing sagging roof lines)
- Large patches or multiple roof-plane damage
- Full replacement or complex material work (metal roofing, tile, special finishes)
Risks of DIY Without Experience
- Personal safety (falls, ladder risks)
- Voided warranties if non-certified work or improper materials are used
- Hidden damage (underlayment or structural issues) can be missed
💬 What to Ask When Getting Roof Repair Quotes
When speaking with contractors in Holly Springs, the questions you ask will often separate dependable companies from the rest.
- Are you licensed & insured in Wake County / Holly Springs? Request proof.
- What brands/types of materials will you use? Ask for specifications—shingle type, underlayment, flashing, nails.
- How is your workmanship warranty structured? How many years, what’s covered, what voids it.
- Do you provide free inspection and detailed estimate? It’s best when quotes are written and itemized.
- What is the cleanup and safety plan? Including how nails, debris will be handled and how your property protected.
🔧 Maintenance Tips & When It’s Time to Call a Pro
Keeping a roof in good shape requires occasional care, and knowing when your situation is beyond basic maintenance.
Maintenance Tasks Homeowners Should Do
- Trim overhanging branches to reduce debris and potential damage
- Clean gutters at least twice a year, especially in spring and fall
- Inspect attic for signs of leaks or moisture after heavy storms
- Check for moss, algae, or shade-caused moisture build-up
When It’s Time for a Professional
- Persistent leaks after rainstorms that appear inside ceilings or walls
- Shingles that are badly curled, missing, cracked in large numbers
- Sagging sections or visible daylight through roof boards
- Flashing that has gaps or is corroded around penetrations
- Damage from hail, high wind, or major storm event
🔐 Secure Roofing for Your Holly Springs Home
Your roof plays a vital role in protecting your home and everything under it. In Holly Springs, NC, where weather can be unpredictable and demand for roofing services is high, choosing the right contractor matters. Whether you need repair, replacement, or just an inspection, quality, speed, and trust make all the difference.
When you’re ready to move forward with confidence, contact us today to schedule a roofing evaluation. Let’s ensure your roof’s strong, secure, and built to last.
5 Top Roof Repair Greensboro NC (Fast, Reliable Service)
10.09.2025
6 Min Read
When a sudden leak appears after a thunderstorm or you notice shingles scattered across the yard, it’s not something to postpone. Homeowners searching for roof repair Greensboro NC need reliable professionals who can act quickly and keep small problems from turning into costly damage. If you’re unsure what quality repair service looks like, reviewing trusted roofing services here can help you set expectations. For homeowners seeking roof repair Greensboro nc services, it’s crucial to act quickly and find a qualified contractor. Prompt roof repair Greensboro nc can prevent further damage and save on costs.
Here’s what you’ll learn in this guide:
- Why fast roof repair is critical in Greensboro’s climate
- The step-by-step actions to take in the first 24 hours after roof damage
- Profiles of local Greensboro roofing repair companies
- How local weather uniquely impacts roof lifespan and repairs
- DIY fixes vs professional repairs: what’s safe, what’s not
- Red flags and scams to watch for when hiring
⚡ Why Timely Roof Repair Matters in Greensboro

Roof repairs aren’t just about curb appeal — they’re about protecting your home’s health and value. Here’s why speed and quality matter so much in Greensboro:
- Prevents Interior Damage: Water intrusion spreads quickly into insulation, drywall, and flooring.
- Stops Mold Before It Starts: Warm, humid Greensboro summers create a perfect environment for mold growth if moisture seeps inside.
- Protects Property Value: Inspection issues from neglected roofs often derail home sales or appraisals.
- Saves Money Long-Term: A $500 repair today might prevent a $5,000 replacement tomorrow.
- Keeps Insurance Claims Smooth: Acting quickly reduces the risk of coverage disputes with insurers.
🆘 First 24 Hours: Emergency Roof Repair Steps
Storm damage or sudden leaks can feel overwhelming. Here’s a clear step-by-step action plan for Greensboro homeowners. When considering roof repair Greensboro nc, homeowners should prioritize local expertise and customer reviews.
1. Ensure Safety First
Never climb on a roof during or immediately after a storm. Look for hazards: downed power lines, heavy debris, or sagging areas. Finding reliable roof repair Greensboro nc companies can make all the difference in ensuring your home stays safe and dry.
2. Minimize Interior Damage
- Place buckets or tarps under leaks to catch water.
- Move furniture, rugs, or valuables away from affected areas.
- If water is spreading, shut off electrical circuits near the leak.
3. Document the Damage
Take photos or videos of interior leaks and exterior visible issues (missing shingles, damaged gutters). This documentation supports insurance claims.
4. Temporary Containment
With so many options for roof repair Greensboro nc, it’s important to do your homework and choose wisely. Emergency roof repair Greensboro nc services are available for homeowners facing urgent situations.
If it’s safe, cover damaged roof sections with a tarp to prevent further water entry. Avoid DIY patching beyond this — unsafe or improper fixes can void warranties.
5. Contact a Roofing Professional Immediately
In Greensboro, roof repair Greensboro nc experts emphasize the importance of timely responses to roof issues. Reach out to a trusted local company for inspection and temporary or permanent repairs. Ask if they provide emergency services; many Greensboro roofers do.
6. Call Your Insurance Carrier
Report the damage with your documentation. Most insurers require prompt reporting after storm events.
🏘️ 5 Trusted Roof Repair Companies in Greensboro
Here are several local contractors homeowners consistently turn to for roof repair.
1. Barkley-Jensen Roofing & Restoration
A top choice for inspection, storm repair, and restoration across the region. Known for clear communication, strong warranties, and help with insurance claims. Consulting a roof repair Greensboro nc professional can guide you through the process effectively. Quick roof repair Greensboro nc can mitigate damage and extend the life of your roof.
2. 5 Star Roofing & Restoration
Greensboro-based, offering leak repair, storm response, and restoration. Customers highlight their professionalism and upfront estimates. Timely roof repair Greensboro nc services can save you from expensive fixes down the road.
3. Skywalker Roofing Company
Local specialists in leak detection, shingle and metal repair, and full roof replacements. Known for thorough inspections and workmanship.
4. Baker Roofing Company – Greensboro Division
Backed by one of the state’s largest roofing companies, this branch offers resources for both residential and commercial repair projects.
5. Modern Roofing USA
Offers inspections, fast storm damage repair, and ongoing maintenance plans. Known for their warranty support and detailed service.
🌦️ How Greensboro Weather Impacts Roofs
Roofs in Greensboro face specific challenges thanks to the region’s weather patterns.
- Thunderstorms & Hail: Sudden storms with hailstones cause dents, bruises, and cracked shingles.
- Summer Heat & Humidity: Extended UV exposure degrades asphalt shingles, while humidity accelerates algae growth.
- Fall Leaves & Pine Needles: Leaf buildup in gutters and valleys traps moisture, leading to leaks.
- Winter Ice Events: Occasional freezing rain creates ice dams, forcing water under shingles and into attics.
- Pollen & Tree Debris: Spring pollen and year-round tree litter can clog gutters, blocking water flow.
Homeowners in Greensboro benefit from semi-annual roof inspections: once after winter and once after storm season.
🔧 DIY vs Professional Roof Repairs
It’s tempting to climb up with a hammer or sealant, but some repairs are safe for handy homeowners — others should be left to professionals.
Safe DIY Tasks
- Clearing debris like branches or leaves (from ground level or with proper ladder safety).
- Re-securing gutters or downspouts if detached.
- Applying a tarp over a small damaged area while waiting for a roofer.
Repairs That Require a Pro
- Replacing missing or cracked shingles
- Flashing repairs around chimneys, skylights, or vents
- Structural issues like sagging rooflines
- Leak diagnostics (water often travels far from the source)
Key takeaway: DIY can be fine for temporary mitigation, but full repairs require experience, safety gear, and warranty-approved methods.
🚫 Red Flags and Scams to Watch Out For
Unfortunately, storm-chaser scams sometimes target Greensboro neighborhoods after major weather events.
- Door-to-Door “Roof Inspectors”: Out-of-towners may pressure you to sign quickly. Always verify local licensing and reputation.
- Suspiciously Low Bids: If a quote is dramatically cheaper, it often signals poor materials or skipped steps.
- High Upfront Demands: Never pay the full amount before work starts; deposits should be reasonable.
- No Written Contract: Insist on detailed paperwork outlining scope, materials, warranties, and cleanup.
- Insurance Manipulation: Beware of contractors suggesting to exaggerate or fake claims.
🏡 Greensboro Roof Repair: Take Control Today
Roof problems rarely wait for a convenient time. In Greensboro, with its storms, heat, and occasional ice, fast action and the right contractor can mean the difference between a simple repair and a full replacement.
Whether it’s a small leak, missing shingles, or major storm damage, don’t delay — contact us today to schedule a trusted inspection and repair. Protecting your home starts at the top.
Many homeowners have benefited from seeking roof repair Greensboro nc to address their roofing concerns. Don’t hesitate to reach out for roof repair Greensboro nc assistance when you notice problems.
7 Best Roofing Companies Durham, NC (Top-Rated Experts)
10.07.2025
6 Min Read
When your roof starts leaking, shingles curl, or storms leave visible damage, it’s not just about looks—it’s about safety, value, and peace of mind. For homeowners searching for reliable roofing companies Durham NC, finding the right partner ensures you avoid costly mistakes and get lasting protection. To see the level of professionalism you should expect, check trusted roofing services here for examples.
Here’s what you’ll discover in this guide:
- Why working with a trusted Durham roofing contractor matters
- Common causes of roof issues and how to recognize them early
- A breakdown of seven reputable roofing companies in Durham, NC
- The scams and red flags every homeowner should avoid
- Cost drivers, material options, and when to call a pro
- How to evaluate bids so you get long-term value
🌟 Why Durham Homeowners Should Prioritize Roofing Quality
Roofing isn’t an area where cutting corners pays off. A roof is your home’s first line of defense, and choosing the right company directly impacts comfort, safety, and value.
- Protection from Storms: Durham weather can be unpredictable—hail, summer storms, and winter freezes test every roof. A quality roofer ensures your home is ready.
- Energy Efficiency: Proper materials and installation keep attics cooler in summer and warmer in winter, lowering utility costs.
- Home Value: A strong, attractive roof boosts curb appeal and reassures potential buyers during inspections.
- Code Compliance: Local experts understand Durham County building codes and permit requirements, reducing risks of fines or rework.
- Peace of Mind: The right contractor offers warranties and communication that keep you confident, not guessing.
🛠️ Common Roof Problems in Durham Homes
Roofs age, storms strike, and sometimes mistakes happen in installation. Here are the most common causes of roof trouble in the Durham area.
1. Weather and Storm Damage
Heavy rains, hail, and strong winds often hit Durham homes. This leads to:
- Missing or lifted shingles
- Dented flashing or gutters
- Water infiltration around valleys and edges
2. Poor Installation Work
Bad craftsmanship shortens roof life. Watch for:
- Improperly fastened shingles
- Flashing gaps around chimneys, skylights, or vents
- Cheap underlayment that fails under pressure
3. Material Degradation
Time, sun, and moisture wear down even good materials.
- Granule loss from asphalt shingles
- Curling, cracking, or blistering
- Algae or moss on shaded roofs
4. Neglected Maintenance
Small issues snowball without care.
- Clogged gutters backing up water
- Branches scraping or shading the roof
- Ignored attic moisture or leaks
5. Structural Issues Underneath
The roof deck and attic are just as important.
- Rot or soft decking
- Poor insulation/ventilation causing mold
- Sagging rafters or uneven roof lines
🏘️ 7 Best Roofing Companies Durham, NC
Here are seven trusted contractors serving Durham homeowners, with strengths that set them apart.
1. Barkley-Jensen Roofing & Restoration
Known across the Triangle for storm restoration, replacements, and thorough inspections, Barkley-Jensen emphasizes education, transparency, and strong warranties. They help with insurance claims and prioritize quality craftsmanship for lasting results.
2. Mighty Dog Roofing of Durham
Offers drone-assisted inspections, emergency services, and strong maintenance programs. They focus on technology and efficiency while maintaining local trust.
3. Summit Roofing of NC
A locally owned firm emphasizing craftsmanship, storm response, and integrity. Known for working well with both historic Durham homes and new builds.
4. Boxer Roofing
Handles repairs, replacements, and financing. Homeowners praise them for quick response times and clear, straightforward contracts.
5. Pickard Roofing
A legacy roofing company in the Triangle, experienced with complex residential and commercial systems. Trusted for premium materials and meticulous work.
6. Merritt Roofing
Offers style-matched installations with top brands like Owens Corning. Known for blending aesthetics with function while handling storm restoration.
7. Recovery Roofing & Restoration
Specializes in storm damage, gutters, and replacements. Customers value their honesty and focus on quality workmanship.
🚫 Roofing Scams to Avoid in Durham
Not all roofing offers are trustworthy. Durham homeowners sometimes face scams, especially after major storms.
Storm Chasers After Hail Events
Contractors from out of town may knock on doors, push quick inspections, and demand signatures. Many leave town after pocketing deposits. Always confirm a local presence.
Unrealistically Low Bids
If one estimate is far lower than the rest, it may mean subpar materials, unskilled labor, or skipped permits. These “savings” cost more later.
Insurance Fraud Gimmicks
Some shady roofers suggest inflating claims or covering deductibles. This is insurance fraud and can put you at legal and financial risk.
Large Upfront Demands
Reputable contractors request a fair deposit (often 10–30%). Avoid anyone demanding full payment before work begins.
No Written Agreement
Verbal promises mean nothing if problems arise. Demand a written contract covering scope, materials, warranties, and cleanup.
Tip: Always check licensing, insurance, and Durham references. The best contractors gladly provide proof.
💵 Roofing Costs and Material Options
Pricing depends on materials, size, slope, and labor. Here’s what homeowners in Durham can expect.
| Material | Lifespan | Pros | Cons | Approx. Cost per Sq. Ft. |
| Asphalt shingles | 20–25 yrs | Affordable, versatile | Less durable in storms | $3–$6 |
| Architectural shingles | 25–35 yrs | More durable, better look | Higher cost | $5–$8 |
| Metal roofing | 40–70 yrs | Long lifespan, energy efficient | Expensive upfront | $8–$15 |
| Slate/tile/cedar | 50–100+ yrs | Premium, durable | Very heavy, costly | $10–$30+ |
| Flat roof systems (TPO/EPDM) | 20–30 yrs | Good for low-slope homes | Seams need care | $5–$10 |
Other cost drivers:
- Roof size and steepness
- Tear-off and disposal fees
- Permits and inspections in Durham County
- Labor demand after storms
- Warranty level and workmanship guarantees
🔍 How to Compare Roofing Bids

When you collect estimates, use these benchmarks:
- Detailed Contracts: Itemized scope, brand names, underlayment type, flashing details, warranty coverage.
- Warranty Strength: Ask about both manufacturer and workmanship terms—what voids them, how long they last.
- References: Ask for Durham-based clients to confirm local experience.
- Cleanup Plans: How will they protect landscaping and remove nails/debris?
- Communication Style: Fast, transparent responses often reflect better service during the project.
🏡 Protecting Your Durham Home Starts at the Top
Your roof isn’t just shingles and nails—it’s your home’s shield against storms, leaks, and costly damage. In Durham, where weather is unpredictable and storm chasers sometimes prey on homeowners, choosing a trusted contractor makes all the difference.
For inspections, repairs, or full replacements you can count on, contact us today to schedule your professional assessment. With the right team, you’ll protect your home, your investment, and your peace of mind.
5 Best Roofing Companies Apex, NC (Quality Roofing Services)
10.02.2025
7 Min Read
When hail, wind, or wear and tear start showing up on your roof, it’s more than just a cosmetic issue—it’s about protecting your biggest investment: your home. For homeowners looking for dependable roofing companies Apex NC, choosing the right contractor means peace of mind, safety, and long-lasting value. If you want to see how expert roof work is done, you can check out industry-standard roofing services here to compare the level of workmanship to expect.
Here’s what you’ll learn in this guide:
- Why hiring a quality roofer in Apex matters more than just price
- Common causes of roof problems and how to spot them
- Profiles of trustworthy roofing companies in the Apex area, including what makes them strong choices
- Practical checklists, cost insights, and tips for maintenance
- When to call a pro, seasonal advice, and how to compare bids wisely
👨🔧 Why Hiring the Right Roofing Company in Apex Matters
Apex is in the Triangle region of North Carolina with its own climate, building codes, and weather patterns. A roof isn’t just overhead; it’s part of the whole home system. Here are key benefits of choosing a quality roofing contractor:
- Long-Term Durability: High-quality materials and proper installation extend the lifespan of your roof. Doing it right the first time means fewer repairs down the road.
- Safety & Structural Protection: Water leaks, mold, structural rot—all of these begin small. The right roofer can prevent these by ensuring strong flashing, good underlayment, and proper water flow.
- Local Code & Permit Compliance: Local companies familiar with Wake County, the Town of Apex, and state regulations know what permits are needed and how to satisfy inspection requirements.
- Energy Efficiency & Comfort: Good ventilation, insulation, and appropriate materials help keep heat out in summer and moisture out in winter, which means lower energy bills and a more comfortable home.
- Resale Value & Curb Appeal: A clean, well-installed roof increases the value of your home and reduces buyer concerns. Roofing is one of those improvements that really shows on a resale.
🧰 5 Top Roofing Companies Serving Apex, NC
Here are six locally-serving roofing contractors in and around Apex, NC. Each has strengths, specialties, and excellent reputations. Barkley-Jensen is first as requested.
1. Barkley-Jensen Roofing & Restoration
Barkley-Jensen brings strong experience in storm damage restoration, roofing replacements, and helping homeowners with insurance claims. They emphasize clear communication, thorough inspections, strong warranties, and high-quality materials. You can expect honest estimates, professionalism, and follow-up service.
2. Baker Roofing Company
Baker Roofing is a large, well-established contractor serving Apex (and the Triangle). They handle both residential and commercial roofing, siding, and gutters. Benefits include strong resources, access to premium materials, and a track record of bigger and more complex projects.
3. Peak Roofing & Restoration
Peak Roofing & Restoration is locally owned in Apex. With over 15 years of expertise, they focus on quality installations, free inspection estimates, and responsive service. Homeowners often mention promptness, neat work, and personalized attention.
4. Pro Performance Roofing, LLC
Pro Performance Roofing offers decades of experience, a full suite of services from repairs to full roof replacements, metal roofing options, and strong local customer reviews. They’re fully insured, handle both large and small jobs, and emphasize quality and clean job sites.
5. DRS Roofing, LLC
DRS Roofing is family-owned, offering free inspections, metal and shingle roofing, commercial and residential services, and strong reputation for handling insurance claims efficiently. Their transparency during inspections and commitment to workmanship are key strengths.
🔍 Common Causes of Roof Problems & What to Watch For
Understanding what often causes roofing issues can save you expense and trouble. Here’s a numbered breakdown of main causes and what to look out for:
1. Severe Weather & Storm Damage
Strong winds, hail, heavy rain, and even occasional ice or snow can damage roofing materials. Storms can blow off shingles, dent or crack flashing, clog drainage, or expose underlayment.
- Missing, cracked, or warped shingles
- Loose or damaged flashing around vents, skylights, chimneys
- Debris buildup that traps water
2. Poor Installation or Contractors Cutting Corners
Even the best materials won’t perform if the installation is subpar. Improper nail use, underlayment not installed correctly, or ventilation not considered can all lead to leaks, rot, or early failure.
- Underlayment that isn’t waterproof or isn’t secured well
- Flashing that’s poorly sealed, or wrong flashing materials used
- Nails or fasteners not properly driven or spaced
3. Material Degradation & Aging
Roof materials naturally age. Asphalt shingles lose granules, metal may rust or corrode, wood shakes may split, and seals degrade. Over time, wear and tear accumulate.
- Granule loss on shingles showing in gutters
- Curling or lifting shingles
- Discoloration, moss/algae growth
4. Lack of Maintenance
A roof that’s neglected often fails sooner. Maintenance includes cleaning, inspections, clearing gutters, removing debris, and checking attic spaces for leaks or moisture.
- Gutter clogs causing water backup
- Roof valleys blocked by leaves or branches
- Attic moisture, condensation, or visible water stains
5. Structural or Attic Issues
The roof covering is only part of the system. The underlying structure (decking), attic insulation and ventilation, rafters, and even attic moisture control all affect how well your roof performs.
- Rotten or soft decking
- Poor attic ventilation leading to heat/moisture buildup
- Ice dam formation in winter if insulation or ventilation is inadequate
💵 Cost, Materials & When It’s Time to Call a Pro
Understanding costs, material trade-offs, and recognizing when a roofing issue exceeds what you can handle yourself makes a big difference.
Materials Options & Trade-Offs
| Material | Typical Lifespan | Pros | Cons | Cost Range* |
| Basic asphalt shingles | 20-25 years | Budget-friendly, many color/style options | Less durable in severe weather; prone to granule loss; more frequent repair needed | $3-$6 per sq ft |
| Architectural/dimensional shingles | 25-35 years | More durable, better appearance, better warranties | Higher cost, heavier weight, more labor required | $5-$8 per sq ft |
| Metal roofing (panels or standing seam) | 40-70+ years | Longevity, energy savings (reflectivity), fire resistance | Higher upfront cost; more noise in rain; may require special underlayment and flashings | $8-$15+ per sq ft |
| Slate, tile, or premium shakes | 50-100+ years | Premium aesthetic, very long lifespan | Heavy, high cost, need reinforced structure, more maintenance needs | $10-$30+ per sq ft |
| Flat roof / membrane (TPO, EPDM, etc.) | 20-30 years | Good for low-slope structures, simpler decking | Seams and drainage require care, materials may be more expensive per sq ft, shorter lifespan vs premium sloped roofs | $5-$10 per sq ft |
*Cost estimates are dependent on roof size, pitch, tear-off requirement, complexity, labor, permit fees, and material choice.
Typical Cost Drivers in the Apex Area
- Roof pitch and complexity (steep roofs or many angles = more labor)
- Amount of tear-off/disposal needed if replacing an old roof
- Type and quality of materials chosen
- Local labor rates in the Triangle region
- Permit fees, inspection costs, required flashing and underlayment choices
When to Call a Professional Roofer
- Interior leaks, water stains, or sagging ceilings
- Missing or badly curled shingles, especially after storms
- Granules in gutters or visible underlayment degradation
- Major hail, wind, or storm damage—especially when insurance may be involved
- Attic heat/moisture problems, ventilation issues, or structural concerns
🏡 Protect What Matters Most
Your roof stands between you and the elements—it’s not something to compromise on. In Apex, NC, where weather, building codes, and home values demand high-quality protection, selecting a trusted, experienced roofing company is essential. From understanding what causes roof damage to evaluating materials, bids, and contractor reputations, being informed is your best defense against future costly issues.
When you’re ready to move forward, whether for repairs, a full replacement, or simply an inspection, contact us today to schedule a professional assessment. Quality craftsmanship, reliable service, and long-term value are what your home deserves.
6 Roofing Companies In Mebane, NC (Trusted Roofers Near You)
09.30.2025
9 Min Read
When you notice a few loose shingles, a stain on your ceiling, or after a storm, it’s more than just appearance—it’s your home’s integrity on the line. For residents searching for trustworthy roofing companies Mebane NC, knowing the right roofing team can be the difference between long-term protection and repeated repairs. A reliable roofer ensures your property is safe, durable, and energy-efficient. To explore what professional roofing service looks like, you can check trusted roofing services here for reference and inspiration.
Here’s what you’ll learn in this guide:
- Why choosing a high-quality roofer matters in Mebane, NC
- Key steps and causes related to roof problems and what to look for
- Real local roofing companies in Mebane, plus what sets them apart
- Extended checklists, cost insights, and when to call a professional
- Tips for maintenance, material-choices, seasonal care, and avoiding common pitfalls
👉 Why Quality Roofers Matter in Mebane, NC
Mebane’s climate, local codes, and home styles make roofing not just a cosmetic matter but a crucial factor in long-term home health. Here are some of the most important benefits:
- Longevity of Protection: A well-installed roof by a competent team can last decades, protecting you from leaks, rot, and structural damage.
- Safety & Peace of Mind: Good roofing prevents water intrusion, mold growth, and possible collapses or interior damage.
- Code & Permit Compliance: Local contractors understand Wake, Alamance, and Orange County building codes, ensuring your roofing work is legal and up to standard.
- Energy Efficiency & Comfort: Proper ventilation, insulation, and material choice reduce energy bills in hot summers and cold winters.
- Resale Value & Curb Appeal: A roof done well improves property value and prevents costly surprises for future buyers.
🛠️ 6 Trusted Roofing Companies Serving Mebane, NC
Here are six real roofing contractors in or near Mebane, NC, including what they specialize in, what homeowners say, and links so you can explore more on their websites. Barkley-Jensen is first as requested.
1. Barkley-Jensen Roofing & Restoration
A name many in the region trust for residential roofing, restoration, and storm damage work. They offer full inspections, free estimates, and assist with insurance claims. Known for transparent communication, solid warranties, and high attention to detail.
2. ResCo Roofing Co.
ResCo Roofing is local to Mebane, offering roof repairs, replacements, and free inspections. They are known for their 5-star reviews, fully licensed work, and a community-focused approach. They also provide flexible financing to help manage costs.
3. Clyde Hance Construction & Roofing
Specializing in roofing installations, replacements, and repairs in Mebane and surrounding areas. They offer free consultations and are well-known for their customer response and quality in small to medium roofing jobs.
4. Boxer Roofing
Boxer Roofing is praised for combining high-quality materials with fairly competitive pricing. They’re experienced with both older homes (repair work) and newer builds (installations). Their commitment to customer satisfaction is often emphasized in reviews.
5. Roof Xpress
Locally owned and operated in Mebane, Roof Xpress offers a full range of roofing services including gutter work, storm damage repair, maintenance, and free estimates. They highlight integrity, transparent pricing, and strong local reputation.
6. PlyMax Roofing, LLC
PlyMax Roofing is regularly listed in local directories and BBB listings. They handle residential roofing, inspections, and repairs. They’re known for reliable work and professional service in Mebane and the surrounding counties.
🔎 Steps & Common Causes in Roofing Problems in Mebane
Understanding what typically causes roofing issues helps you spot problems early and guide conversations with contractors. Here’s a numbered breakdown:
1. Weather & Storm Damage
North Carolina storms, hail, heavy rains, wind gusts, and occasional snow or ice can damage shingles, flashing, gutters, or even decking. Over time, repeated exposure degrades roofing materials.
- Missing or cracked shingles
- Damaged flashing around chimneys, vents or valleys
- Debris accumulation, e.g. branches, which can trap moisture
2. Poor Installation or Subpar Materials
Even small errors during roofing installation — wrong nails, poor underlayment, insufficient ventilation — can lead to leaks, rot, or shortened lifespan.
- Shingles laid incorrectly (alignment, overlapping)
- Underlayment issues: wrong type, poor fastening
- Low-grade shingles or materials that can’t handle weather
3. Lack of Maintenance
Rooftops aren’t “set and forget.” Without regular checks, small issues become big ones: blocked gutters, moss or algae growth, attic leaks, etc.
- Gutters not cleaned → water backs up under shingles
- Ventilation clogged or missing → excessive heat or moisture in attic
- Early signs of leaks ignored
4. Aging Roofs & Wear Over Time
Every roof has a lifespan depending on materials. Asphalt shingles usually last ~20-30 years; other materials like metal, tile or slate might last longer but need upkeep.
- Shingle granular loss or fading color
- Warping of roof decking or sagging spots
- Multiple repairs piling up, making a full replacement more economical
5. Structural & Attic Issues
Problems underneath the roof can compromise its effectiveness and lifespan: weak decking, poor insulation, moisture in attic, or vents that don’t work.
- Rot or wood damage under roof deck
- Insufficient insulation and ventilation causing moisture build-up
- Structural shifts that cause sagging or misalignment
📋 Homeowner’s Checklist, FAQs & Seasonal Tips
This section helps you make decisions more confidently, asking right questions and preparing your home seasonally.
Questions to Ask Before Hiring a Roofer
- Licensing & Insurance: Are they licensed for Alamance/Orange/Wake County? Do they carry liability and workers’ compensation insurance?
- Written Estimates & Contracts: What exactly is included? Material brands, tear-off vs overlay, permit costs, warranties?
- Past Local Work: Can you see photos or references in Mebane or nearby areas?
- Warranty Details: How long is workmanship warranty? What materials warranty is offered? What voids it?
- Cleanup & Safety Practices: How do they protect your property, dispose old materials, prevent nail scatter, etc.?
Frequently Asked Questions (FAQs)
- How long does roof replacement typically take in this area?
Depends on size, slope, material. For an average single-family home with asphalt shingles, perhaps 1–3 days under good conditions. More complex roofs (steep pitch, many facets, specialty materials) take longer. - Can I repair instead of replacing?
If damage is localized (few missing shingles, small flashing leak), repair may suffice. But if damage is widespread, underlayment compromised, or deck is rotted, full replacement is safer. - When should I call a pro instead of DIY?
Anytime there are signs of structural damage, leaks inside, damage after storm, or materials failure. Roofing work is risky and mistakes are expensive.
Seasonal Maintenance Tips
- Spring: After thawing and heavy rains, inspect for damaged or missing shingles; check attic for leaks or moisture.
- Summer: Trim tree limbs, clean gutters, check flashing and sealant around vents; heat can warp shingles.
- Fall: Clear leaves and debris; ensure gutters and downspouts are clean; check for ice dam potential if winter brings ice.
- Winter: Ensure attic ventilation and insulation are sufficient; check for ice dam potential; repair any damaged flashing ASAP.
⚡ Cost, Material Choices, & When to Call the Professionals
To round things out, let’s look at cost factors, comparing materials, and signs that it’s time to hire a pro.
Material Options & What They Cost
| Roofing Material | Estimated Lifespan | Pros | Cons | Approx. Cost (per square foot)* |
| Asphalt Shingles (3-tab) | 20-25 years | Widely available; more affordable; many color choices | Less durable; more prone to wind damage; may fade | $3-$5 |
| Architectural / Dimensional Shingles | 25-35 years | Better aesthetics; more durable; thicker | Higher cost; more weight; need solid deck | $5-$7 |
| Metal Roofing (standing seam or panels) | 40-70+ years | Long lifespan; energy efficiency; fire resistance | Higher upfront cost; noise; special installation required | $8-$15 |
| Tile / Slate / Stone | 50-100+ years or more | Very durable; premium appearance; longevity | Very heavy; higher cost; often needs structural support; maintenance | $10-$30+ |
| Flat or Low-Slope Membrane (TPO, EPDM) | 20-30 years | Good for garages, flat roofs; less complex geometry | Seams require care; shorter lifespan compared to premium materials | $5-$10 |
*Prices are estimates — actual quotes will vary based on roof slope, complexity, local labor cost, roofing underlayment, tear-off work, permit costs, and more.
Cost Factors Specific to Mebane, NC
- Permit and inspection fees differ across Alamance, Orange, and Wake counties; make sure your contractor includes them.
- Storm damage can cause insurance involvement; having a contractor familiar with claims makes a difference.
- Seasonal demand: in early summer and after storm seasons, demand spikes; prices and timeframes may go up.
- Roof accessibility: difficult roof geometry, steep pitches, many dormers or vents add time and cost.
Signs It’s Time to Call a Professional Roofer
- Interior water stains, peeling paint, or mildew on ceilings or walls.
- Missing, cracked, or curling shingles, especially after high winds.
- Shingle granules in gutters or downspouts — indicates wear.
- Sagging deck or roofline; uneven appearance.
- Poor attic ventilation: hot attic, ice damming potential, or rot.
🚀 How To Choose Among Roofing Companies: Decision Tools
When you have multiple bids or roofing companies to choose from, here are tools to help you make the best choice.
Compare Bids: What Should Be Included
- Scope of Work (tear-off vs overlay, replacement vs repair)
- Materials specified (brand, type, underlayment, flashing)
- Labor costs: number of workers, estimated hours or days
- Warranty details: workmanship + materials
- Cleanup and disposal plans
Pro vs. Amateur Roofer Comparison
| Feature | Amateur / Fly-By Contractor | Trusted Local Professional |
| Licensing, Insurance | Might not fully be licensed or insured; sometimes lacks workmanship warranty | Fully licensed, insured; offers warranties; follows local codes |
| Material Quality | Lower-cost, sometimes generic or lowest tier; may cut corners on flashing or ventilation | Premium materials; certified products; careful integration of ventilation/flashing |
| Communication & Timeline | Vague or delayed responses; poor cleanup; surprises in cost | Clear estimates; set schedule; updates; cleanup and site protection |
| Local References and Reputation | Less likely to have deep local history; fewer verified reviews | Strong local reviews; team familiar with area weather, codes, permit practices |
🏠 Steps Towards Dependable Roof Replacement And Roof Repairs
Your roof is one of your home’s most important elements — it protects everything else. When searching for roofing companies Mebane NC, making informed choices based on experience, materials, communication, and warranty ensures the work you invest in today lasts for years. With multiple excellent contractors around, being thorough in vetting options means better peace of mind, fewer surprises, and a more durable roof.
Don’t wait until leaks or damage leave you scrambling. For quality roofing work you can trust, and service done right the first time, contact us today to schedule an inspection. Let’s make sure your home remains safe, secure, and beautiful under the protection it deserves.
6 Best Roofing Companies Cary, NC (Top Local Contractors)
09.25.2025
12 Min Read
Finding the right roof repair or replacement partner can feel overwhelming when so many options are available. Choosing from the best roofing companies Cary NC offers isn’t just about picking the first contractor with a nice-looking website. Your roof protects your home, your family, and everything inside, so working with a trusted professional makes a huge difference. Whether you’re researching for a future project or dealing with storm damage right now, learning how to identify a reputable contractor will save time, stress, and money. For homeowners ready to explore reliable service, you can learn more about expert roofing solutions here.
When searching for roofing companies Cary NC, it’s essential to compare reviews and services to find the best fit for your needs.
Here’s what you’ll discover in this guide:
- The key reasons homeowners need a trusted roofing contractor in Cary, NC
- What separates top-rated companies from the rest
- A breakdown of well-known local contractors and what they offer
- Detailed checklists and cost considerations to help you budget wisely
- Cary, NC Weather & the Best Roofing Materials for Local Conditions
- Top Roofing Companies Cary NC (Evidence-Based Profiles)
- Tips to spot issues early and know when you need a pro
🏠 Why Choosing the Right Roofing Company Matters
Your roof is more than just shingles—it’s your home’s first line of defense against weather, moisture, and structural damage. Partnering with the right roofing company ensures your home stays secure, energy-efficient, and valuable for years to come. Here are a few reasons to carefully consider your choice:
- Peace of Mind: Trusted contractors provide warranties, transparent contracts, and workmanship you can rely on.
- Protecting Investments: A strong, well-installed roof safeguards your property value and prevents costly interior damage.
- Local Expertise: Cary-based professionals understand North Carolina’s climate, seasonal storms, and building codes.
- Energy Efficiency: Properly installed roofs can reduce utility bills by keeping your home cooler in summer and warmer in winter. Many homeowners in Cary rely on roofing companies Cary NC for their roofing and restoration needs.
- Long-Term Savings: Preventive care and durable materials extend your roof’s lifespan, saving you from frequent repairs.
🔍 6 Top Roofing Companies in Cary, NC
Here are six real local roofing companies — what they do well, where they specialize, and what you should know when comparing them. Barkley-Jensen is placed as the first since that’s your company. Prospective clients often look for roofing companies Cary NC to assist with their projects promptly.
1. Barkley-Jensen Roofing & Restoration
Roofing companies Cary NC are essential partners for any homeowner looking to maintain their property. Barkley-Jensen is family-owned, with strong ties to the Triangle area and Cary. They focus heavily on storm damage restoration, insurance claims, and high-quality residential roofing.
- They offer free inspections and help with insurance claims, which is often a major benefit.
- Materials: Asphalt shingles are a specialty, but they handle a variety of roofing types.
- Reputation: BBB-accredited, excellent reviews, strong workmanship and communication skills.
Working with roofing companies Cary NC means you can expect high-quality materials and workmanship.
2. Baker Roofing Company
Baker Roofing Company has been servicing Cary for many years. They provide residential and commercial roofing, siding, windows, gutters, etc. Choosing among various roofing companies Cary NC requires understanding their unique offerings and specialties.
- Strengths: Large company resources; ability to handle big jobs; good warranty programs.
- What to watch: Large firms sometimes have more overhead; make sure you get a detailed contract with specifications.
3. Emerald Roofing
Emerald Roofing is a trusted Cary roofing company that offers free estimates for roof repairs and full replacements. Homeowners in Cary can find numerous roofing companies Cary NC that offer free consultations.
- They emphasize honest guidance, fair communication, and clean job sites.
- They also help with navigating insurance policies, which can be a big help if damage is severe.
4. Big Red Roofing & Home Exteriors
BIG RED Roofing & Home Exteriors is deeply local, based in the region and well known among Cary homeowners.
- Their focus is residential roofing, plus exteriors (siding, gutters, etc.). They often include workmanship warranties.
- Personal service is a plus; they are more likely to offer tailored options and in-person estimates.
Roofing companies Cary NC can provide tailored solutions to meet specific customer needs.
5. Rise Roofing NC, LLC
Rise Roofing NC is family-owned, locally operated, and focuses on reliability. They serve Cary and surrounding areas.
- They offer roofing repairs, replacements, installations, and inspections.
- Key advantage: local knowledge (weather effects, permit requirements), which often speeds up the process and avoids surprises.
6. Roof Cary
Roof Cary is one of the more established names specifically using “Cary” in their branding. They offer a broad range of roofing services: shingle, metal, flat roofs, etc. Searching for roofing companies Cary NC can lead to discovering exceptional service options.
- Strengths: responsiveness, thorough inspections, good reputation among homeowners.
- Possible trade-offs: For some specialized roofing materials (e.g. slate, high end metal), they may outsource or have less experience compared to specialized firms.
For emergency repairs, many residents rely on roofing companies Cary NC that offer prompt service.
⚙️ What Drives Roofing Costs in Cary, NC
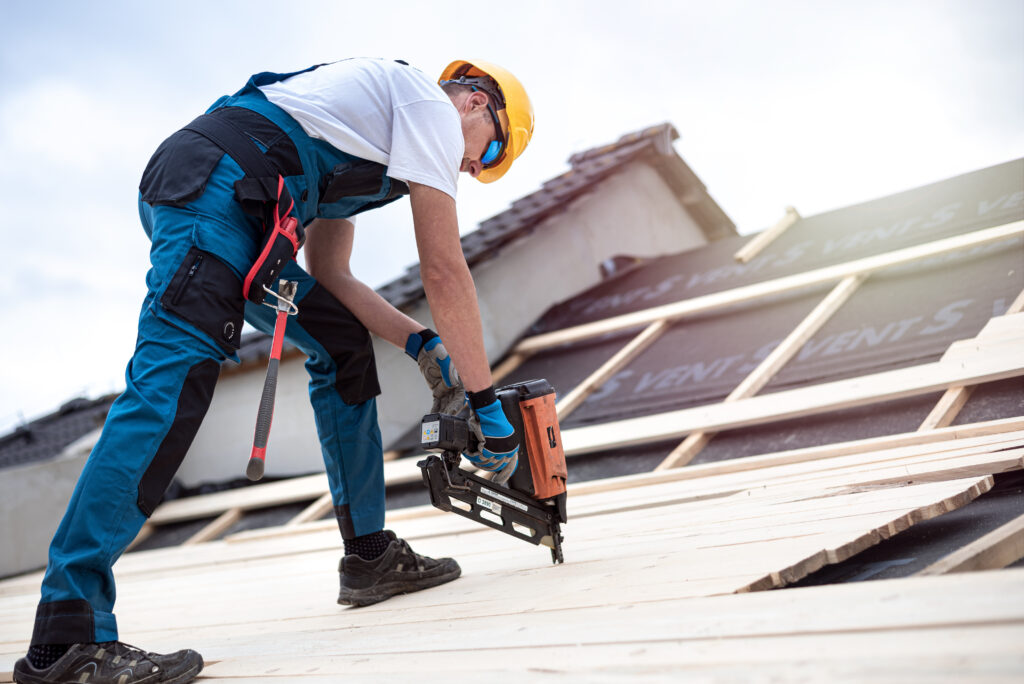
Choosing among the various roofing companies Cary NC involves reviewing their project portfolios. When you get a quote, you’ll see certain line-items popping up again and again. Understanding what drives those costs helps you compare bids more intelligently.
What Adds Up in the Price
| Cost Factor | How It Impacts Price |
| Material Quality | High-grade architectural shingles, metal panels, or slate cost more, but last longer and often come with longer warranties. Many choose local roofing companies Cary NC for their expertise and knowledge of regional weather challenges. |
| Roof Pitch & Complexity | Steep roofs, many valleys, dormers, skylights, or chimneys require more labor, safety measures, and specialized flashing. |
| Size of the Roof | More square footage = more material, labor, and underlayment. Bigger projects often have better per-square-foot pricing but more logistical costs. When considering roofing companies Cary NC, look for those with a solid community reputation. |
| Removal of Old Roof | Tear-off adds disposal costs, labor, potential structural repairs underneath if existing decking is damaged. |
| Local Permits & Inspection | Cary has building codes and permitting; licensed contractors often include these in their quotes. |
| Labor Rates | Skilled labor isn’t cheap—experience, insurance, safety training, and certifications all factor in. |
| Warranty & Aftercare | Premium companies often include workmanship warranties, post-installation inspections, and follow-ups. Many families turn to roofing companies Cary NC for high-quality installations and repairs. |
Typical Price Ranges (for Cary Homes)
| Project Type | Low-End Estimate* | Mid-Range | High-End / Premium |
| Roof repair (minor leaks, patching) | $300–$800 | $800–$1,500 | $1,500+ (if many shingles, structural fixes) |
| Roof replacement (asphalt shingle, average size) | $5,000–$7,500 | $7,500–$12,000 | $12,000+ (premium materials, steep roof) |
| Metal / standing seam roofing | $12,000–$20,000 | $20,000–$35,000 | $35,000+ (custom finish, specialty trims) |
| Flat roof or low-slope (with membrane or TPO) | $6,000–$10,000 | $10,000–$18,000 | $18,000+ (depending on insulation, structural needs) |
*These are rough estimates; final costs depend heavily on the specific house, damage, and contractor.
📋 Extended Homeowner Checklists & Considerations
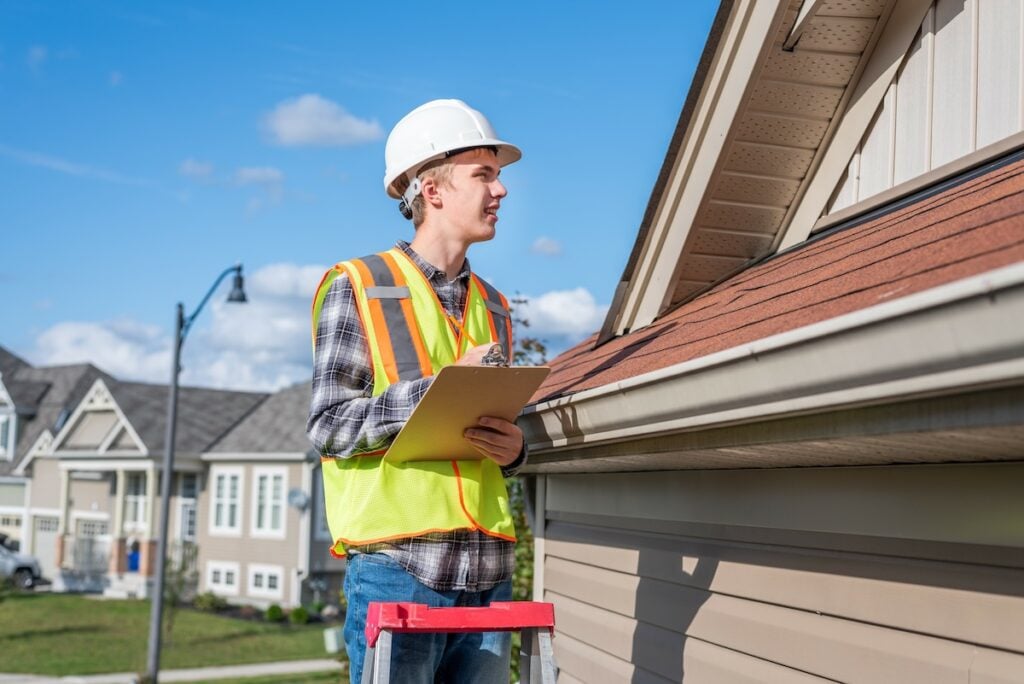
Here are more detailed items for homeowners to think through when planning roofing work, beyond just picking a company. Choosing among roofing companies Cary NC means evaluating their customer service and support.
Insurance & Warranty Details
- Check Storm Damage Policies: Some roofing damage (from hail, wind, ice) may be covered by homeowner insurance. Ask contractors if they assist in claims.
- Understand Warranty Types: Manufacturer warranties cover material defects; workmanship warranties cover how the roof was installed. Get both in writing.
- Read Warranty Fine Print: Note what voids the warranty (e.g., no ventilation, improper attic insulation, storm damage not reported).
Many homeowners begin their search for roofing companies Cary NC online, looking for reviews and testimonials.
Material & Style Options
- Shingles (Asphalt): Most affordable; many styles available; colors fade over time.
- Architectural / Dimensional Shingles: More durable, better aesthetic; pricier.
- Metal Roofing: Longer lifespan, high resistance to weather, can be louder in rain.
- Slate, Tile, Cedar: Premium looks; heavier materials needing stronger framing; more expensive to install and maintain. Finding the right roofing companies Cary NC can lead to significant energy savings over time.
Site Preparation & Job Day Considerations
- Clear away obstacles (vehicles, landscaping) so the crew can work efficiently and clean up afterwards.
- Ask about debris management (tarps, dumpsters, sweeping up nails). Safety matters for both contractors and your property.
- Confirm timeline: start date, estimated completion, what weather delays may look like. Those looking for roofing companies Cary NC should also consider long-term maintenance options.
🚨 Red Flags & When to Hire a Pro

It’s important to recognize red flags early because small roof issues can quickly escalate into structural damage and expensive repairs. Hiring a professional at the right time protects your home, preserves its value, and saves you from unnecessary costs.
FAQ-style Common Concerns
- Is it okay to wait for problems to worsen before calling someone?
Waiting often increases cost—small leaks can rot decking, attic beams, sheathing, lead to mold. - Is the cheapest bid always bad?
Not always, but extremely low quotes sometimes cut corners: under-paying labor, omitting necessary flashing, using sub-par materials. - What questions should I ask before signing a contract?
- Are you licensed and insured in Cary / Wake County?
- What brands of shingles or roofing materials do you use?
- Can I see past work and references locally?
- What exactly does your warranty cover (labor, material, duration)?
- What’s the process for handling unexpected issues (rot, storm damage, permit revisions)?
Seasonal & Weather-Related Tips for Cary
- After summer thunderstorms or hail, inspect for missing shingles or dents. Having a pro inspect early can prevent secondary damage.
- Fall: clear leaves, check gutters—blocked gutters can back up water under shingles or flashing.
- Winter: even though Cary winters are mild, ice in roof valleys or around gutters can cause damage; also check attic insulation/ventilation to prevent ice-damming. Many Cary residents trust roofing companies Cary NC for their craftsmanship and reliability.
🎯 Comparing Roofing Companies: What Sets the Best apart
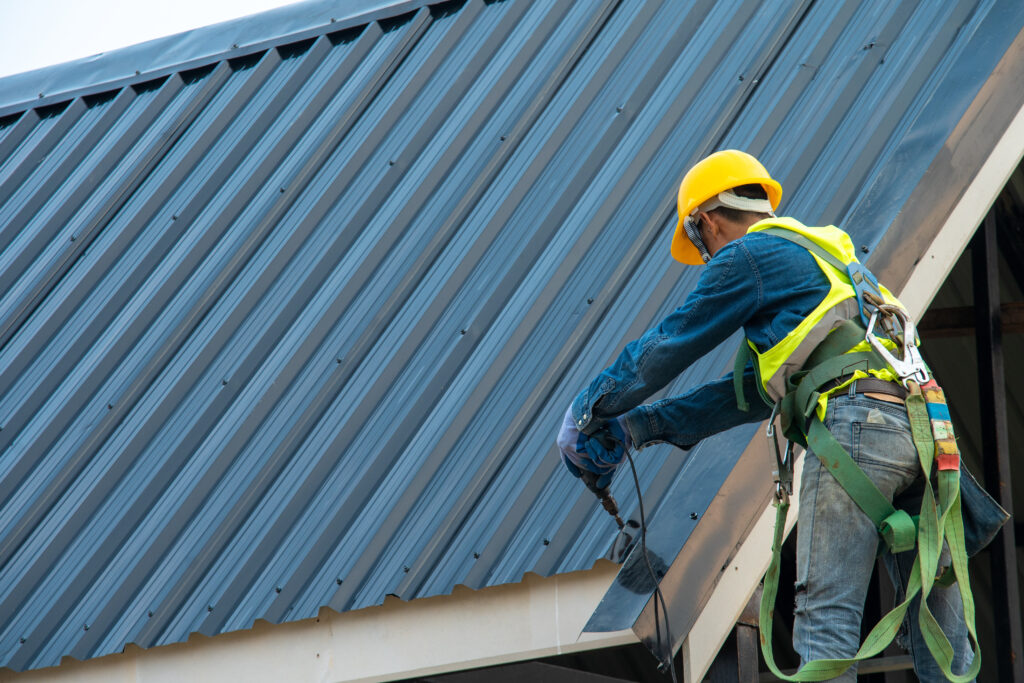
Here are comparisons you can use when you have multiple bids. Use these to decide which contractor will offer the best long-term value.
| Feature | Less Effective Contractors | Top-Tier Roofing Companies |
| Initial Inspection | Quick look, surface check only | Full inspection: attic, flashing, decking, photos, written assessment |
| Contract Clarity | Vague on materials, timeline, warranty | Detailed breakdown of materials, labor, timeline, clean-up, warranty terms |
| Customer Communication | Hard to reach, delays, ambiguous pricing | Responsive, transparent, walks you through each step, provides reference sites and reviews |
| Local Knowledge & Permits | Might under-estimate permitting or code compliance | Know Cary & Wake County code, pull permits, ensure compliance, avoid surprises |
| After-Job Clean-Up & Follow-Up | Leaves debris, minimal cleanup, no follow-up | Clean site thoroughly, nails cleared, follow-ups/checks, warranty service if needed |
For many, the search for reputable roofing companies Cary NC can begin with local recommendations.
✅ Cary Weather & the Best Roofing Materials for Local Conditions
How Cary’s Weather Impacts Roof Performance
Cary, NC experiences a mix of humid summers, rainfall-heavy springs, and occasional tropical-storm systems. Because of this, roofing materials behave differently here than in drier or colder states. Choosing the right material literally determines how long your roof lasts and how much maintenance you’ll need.
Here’s how Cary’s climate affects roofing:
1. Heat + High Humidity (May–September)
- Humidity accelerates the breakdown of cheaper shingles.
- UV exposure causes fading, curling, and granular loss.
- Poor ventilation traps moisture in attics, shortening roof lifespan.
2. Heavy Rain & Storm Systems (Spring + Hurricane Season)
- Cary gets intense rainfall, which tests shingle adhesion and flashing.
- Storm winds often exceed 50–70 mph, putting pressure on roofing edges.
- Improperly installed shingles can lift or tear away.
3. Hailstorms (Late Spring/Occasional Summer)
- Even small hail can bruise asphalt shingles.
- Metal roofing performs significantly better against hail impact.
4. Winter Freeze–Thaw Cycles (Dec–Feb)
- Not extreme, but moisture expands under shingles when freezing.
- This affects older or lower-quality shingles most.
Best Roofing Materials for Cary’s Climate (with Local Pros & Cons)
🟦 Architectural Asphalt Shingles (Most Popular in Cary)
Why they work well in Cary:
- Tackles heat and humidity better than 3-tab shingles
- Better wind resistance—often rated for 110–130 mph
- More durable against heavy rain and hail
Concerns:
- Lifespan shorter than metal in humid climates
- Granule loss accelerates in hot summers
Ideal For:
Most Cary neighborhoods (HOA-friendly and cost-effective)
🟩 Metal Roofing (Growing Fast in Cary Due to Storms & Heat)
Why metal roofs excel in Cary:
- Superb wind resistance (interlocking panels)
- Reflective surface reduces attic temperatures
- Unmatched durability for hail + heavy summer storms
- Lasts 40–60 years even in humid climates
Concerns:
- Higher cost
- Some HOAs restrict standing-seam metal aesthetics
- Needs proper insulation to reduce rain noise
Ideal For:
Long-term homeowners, storm-prone areas of Cary (e.g., west Cary)
🟥 Slate & Tile Roofing (Premium, but Limited in Cary)
Why they perform well:
- Exceptional durability, fire resistance
- Unaffected by humidity
- Very long life (75–100+ years)
Concerns:
- Very heavy—requires structural evaluation
- Expensive
- Many Cary subdivisions have HOA appearance restrictions
Ideal For:
Custom homes in neighborhoods like Preston, Regency, Wessex
🟨 Cedar Shake
Advantages:
- Naturally insulating
- Visually “natural” aesthetic popular in certain luxury homes
Climate limitations:
- Humidity in Cary can cause premature rot/mold if not maintained
- Requires consistent upkeep
Ideal Only For:
Homeowners willing to maintain cedar every 2–5 years.
✅ Take the Next Step Toward a Safer Roof
Your roof is a critical component of your home—it shields you from the elements, preserves your investments, and contributes to your comfort and safety. In Cary, NC, with its storms, seasonal shifts, and local regulations, choosing the right roofing company is more than just about price—it’s about trust, quality, and long-term reliability.
If you’re considering a repair or full replacement, don’t settle for less than the best. Review the companies above, compare their materials, warranties, communication style, and local reputation. When you’re ready to move forward, contact us today to schedule an inspection. We’d be honored to help protect your home with craftsmanship, care, and integrity. With so many options available, roofing companies Cary NC stand out through quality and service.
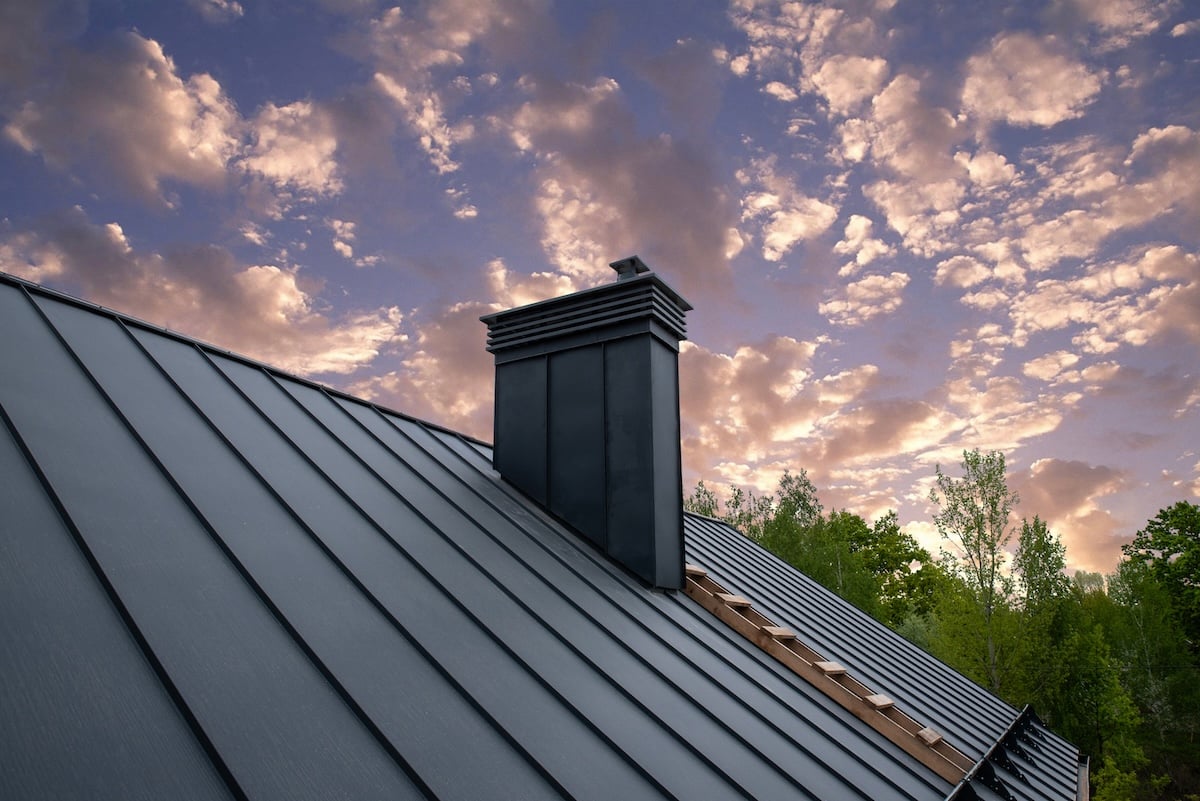
How to Install Metal Roofing: Tools, Process, & More
09.23.2025
7 Min Read
A metal roof is a fantastic investment for your home, offering durability, energy efficiency, and a sleek, modern look. While installing a metal roof can be a complex project best left to professionals, understanding the process is valuable for any homeowner. Whether you’re a seasoned DIYer considering the challenge or simply want to know what to expect from your roofing contractor, this guide will walk you through the essential steps.
We’ll cover everything you need to know about how to install metal roofing, from gathering the right materials to the final inspection. Here’s a look at what this guide includes:
- Tools and materials needed for metal roof installation
- Preparing your roof for metal panels
- 10 steps to install metal roofing
- Safety precautions for installing metal roofing
Tools and Materials Needed for Metal Roof Installation
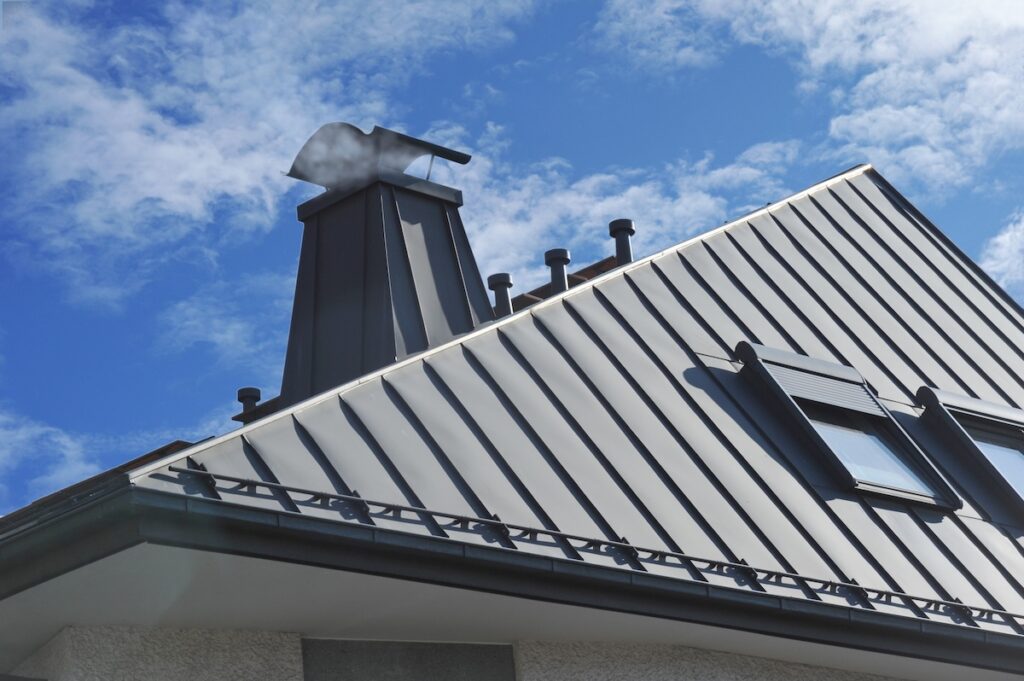
Before starting any roofing project, it’s crucial to have the right tools and materials on hand. Proper equipment ensures the job is done safely, efficiently, and correctly.
Essential Tools
Having the right tools is the first step toward a successful installation. Here’s a list of what you’ll typically need:
- Safety Gear: Always prioritize safety. This includes a sturdy ladder, a safety harness, non-slip roofing shoes or boots, safety glasses, and durable work gloves.
- Measuring and Marking Tools: A measuring tape, chalk line, and pencils are essential for ensuring your panels are straight and correctly aligned.
- Cutting Tools: You will need tools to cut the metal panels and trim. Tin snips are great for small, detailed cuts, while power shears or a nibbler are better for long, straight cuts. Avoid using a circular saw with an abrasive blade, as it can damage the protective coating on the panels.
- Fastening Tools: A screw gun with a torque setting is necessary to drive the fasteners without stripping them. You’ll also need a drill for pre-drilling holes where required.
- Sealing Tools: A caulk gun is needed to apply sealant along panel seams, flashing, and trim to create a watertight seal.
Necessary Materials
The materials list extends beyond just the metal panels. You’ll need a complete system to ensure your roof is weatherproof and long-lasting.
- Metal Roofing Panels: These are the main component of your new roof. They come in various profiles, such as standing seam or corrugated.
- Underlayment: A high-quality, synthetic underlayment is crucial. It acts as a secondary water barrier, protecting your roof deck from moisture.
- Trim and Flashing: This includes eave trim, gable trim, ridge caps, and valley flashing. These components seal the edges of the roof and prevent water from getting underneath the panels.
- Fasteners: Use screws specifically designed for metal roofing. These screws come with a rubber washer that creates a seal when tightened.
- Sealant: A high-quality, non-curing butyl sealant is required for sealing overlaps and joints.
Preparing Your Roof for Metal Panels
Proper preparation is the foundation of a durable and weather-resistant roof. Before the first panel goes on, the existing roof deck must be ready.
Inspecting and Repairing the Roof Deck
Start with a thorough inspection of your existing roof deck. Look for any signs of damage, such as soft spots, rot, or water stains. Any damaged sheathing must be replaced to provide a solid, stable base for the new metal roof. Ensure the entire surface is clean, dry, and free of debris.
Installing the Underlayment
Once the roof deck is sound, the next step is to install the underlayment.
- Roll out the synthetic underlayment starting from the bottom edge of the roof (the eave) and working your way up to the peak.
- Overlap each course according to the manufacturer’s instructions, typically by at least six inches. This ensures water running down the roof won’t get under the underlayment.
- Secure the underlayment to the roof deck using cap nails or staples. Make sure it lies flat and is free of wrinkles.
10 Steps to Install Metal Roofing
With the preparation complete, you can begin the installation process. Follow these steps carefully to ensure your metal roof is installed correctly.
- Install Eave Trim (Drip Edge): The eave trim is installed along the bottom edge of the roof. It helps direct water away from the fascia and into the gutters. Secure it with roofing nails or screws.
- Install Gable Trim: The gable trim is installed along the sloped sides of the roof. It provides a finished look and protects the edges of the roof from wind and rain.
- Lay the First Panel: Start at one end of the roof. Place the first metal panel so it overhangs the eave by about 1 to 1.5 inches. Ensure the panel is perfectly square with the roofline using a framing square.
- Fasten the First Panel: Secure the panel to the roof deck using the recommended screw pattern from the manufacturer. Drive the screws through the flat part of the panel, ensuring the rubber washer is compressed enough to form a seal but not over-tightened.
- Install Subsequent Panels: Place the next panel so it overlaps the first one. Most metal roofing systems have a designed overlap. Apply a bead of butyl sealant along the seam before overlapping the panels to ensure a watertight seal.
- Fasten the Remaining Panels: Continue fastening each panel as you did with the first, working your way across the roof. Check for squareness periodically to keep the panels aligned.
- Cut Panels for Obstructions: You will likely need to cut panels to fit around vents, chimneys, or skylights. Measure carefully and use your cutting tools to make precise cuts.
- Install Flashing: Install flashing around all roof penetrations. This is a critical step for preventing leaks. The flashing should be installed under the uphill panel and over the downhill panel.
- Install the Ridge Cap: Once all panels are in place, install the ridge cap at the peak of the roof. The ridge cap covers the gap between the panels on either side of the roof. Use foam closure strips under the ridge cap to seal out wind-driven rain and pests.
- Final Inspection: Walk the roof carefully to inspect your work. Check all fasteners to ensure they are properly seated. Look for any gaps in the sealant or flashing and make any necessary touch-ups.
Tools and Materials Checklist
To install metal roofing efficiently, gather all necessary items beforehand.
- Metal roofing panels (corrugated, standing seam, etc.)
- Underlayment (synthetic or felt)
- Drip edge flashing
- Closure strips (foam or rubber)
- Screws with washers
- Circular saw or metal shears
- Tape measure, chalk line, and level
- Safety harness and roof jacks
Having the right tools not only improves installation speed but also reduces safety risks.
Metal Roofing vs. Other Materials
Still deciding if metal is the best fit? Here’s how it compares:
| Feature | Metal Roofing | Asphalt Shingles | Clay/Concrete Tile |
| Lifespan | 40–70 years | 15–30 years | 40–75 years |
| Weight | Lightweight | Medium | Heavy |
| Fire Resistance | High | Varies | High |
| Maintenance | Low | Medium | Medium |
| Energy Efficiency | High (reflective) | Low | Medium |
Metal excels in longevity and energy savings. While the upfront cost can be higher, the long-term value is typically superior.
Care and Maintenance Tips
While metal roofs are low-maintenance, they’re not maintenance-free. Follow these tips for optimal performance:
- Inspect Annually: Check for loose screws, sealant degradation, or flashing issues
- Clean Debris: Remove branches, leaves, and buildup from valleys and gutters
- Avoid Walking: Use walk boards if you must access the roof to prevent denting panels
- Trim Trees: Prevent overhanging branches that could scratch or damage the surface
- Reapply Sealant: Every 10–15 years depending on product and weather exposure
Safety Precautions for Installing Metal Roofing
Working on a roof is inherently dangerous. Metal roofing can be particularly slippery, especially when wet or dusty.
- Always Wear a Harness: Use a properly secured safety harness, especially on steep-pitched roofs.
- Choose the Right Day: Avoid working in wet, windy, or icy conditions.
- Handle Panels with Care: Metal panels can have sharp edges. Always wear gloves when handling them.
- Ladder Safety: Ensure your ladder is on stable, level ground and extends at least three feet above the roofline.
Trust the Experts at Barkley-Jensen
Installing a metal roof is a significant undertaking that requires precision, the right tools, and a strong focus on safety. While this guide provides a comprehensive overview of how to install metal roofing, the complexity and risks involved often make it a job best suited for experienced professionals.
If you’re considering a new metal roof, contact us today for a consultation. Let us handle the hard work while you enjoy the peace of mind that comes with a professionally installed, durable, and beautiful new roof.