


Barkley-Jensen Roofing & Restoration
How Much Does Vinyl Siding Cost? (5 Considerations for 2025)
09.16.2025
7 Min Read
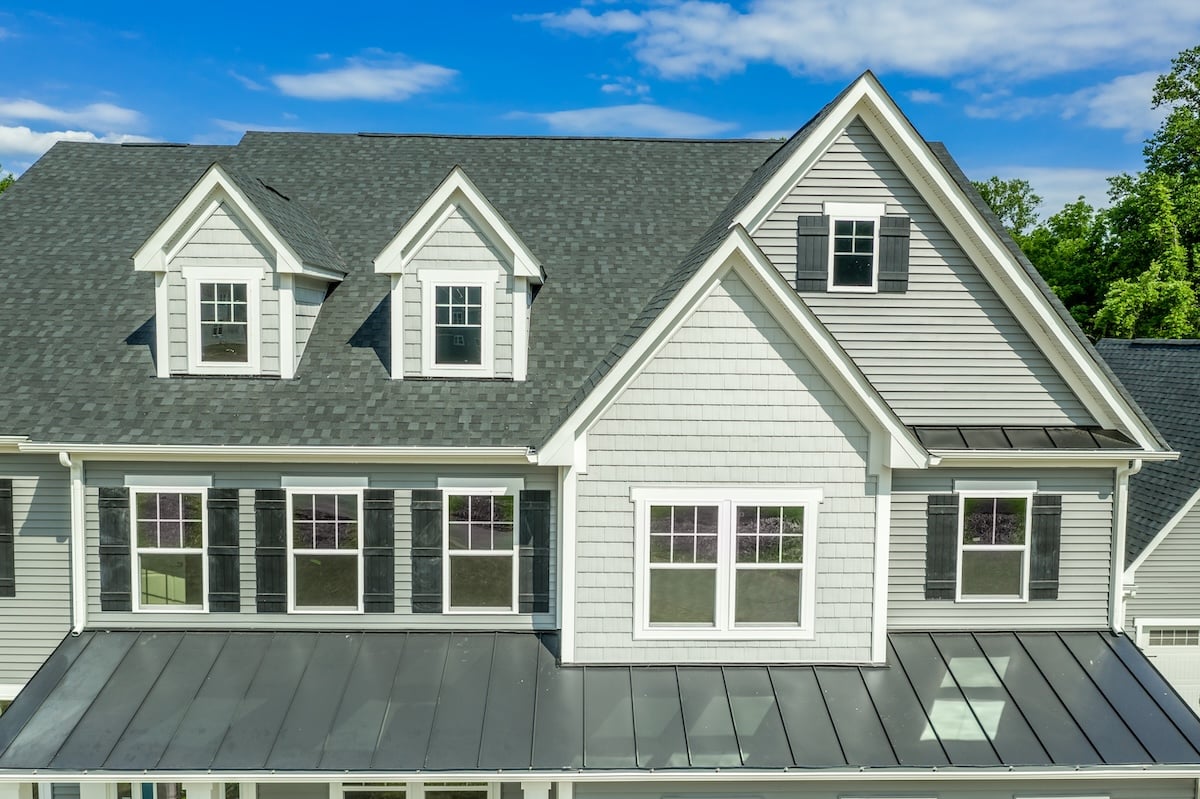
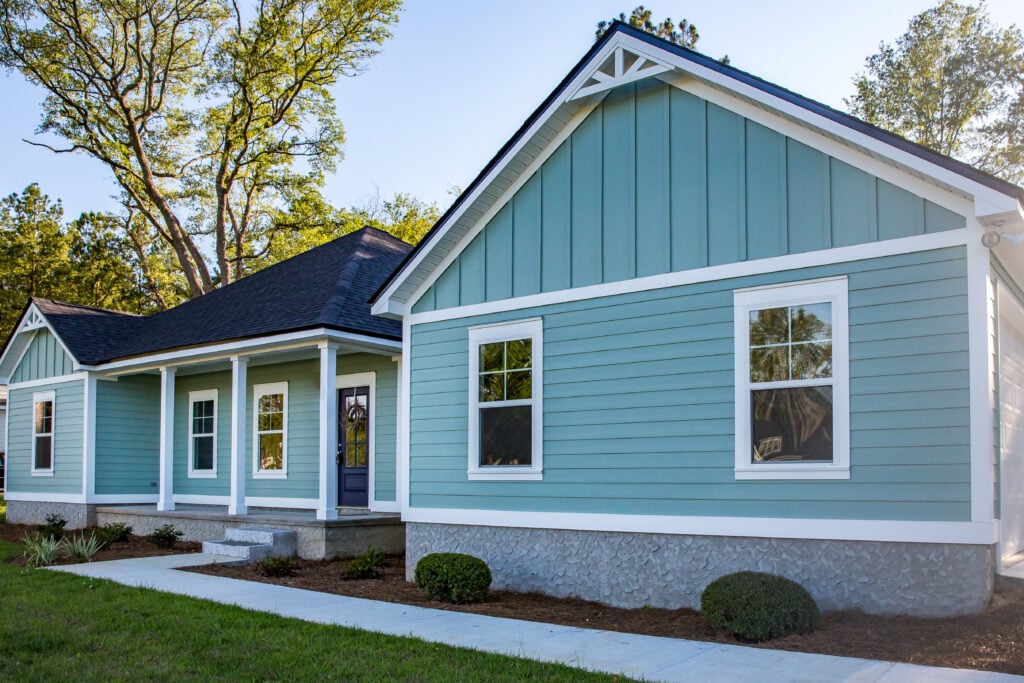
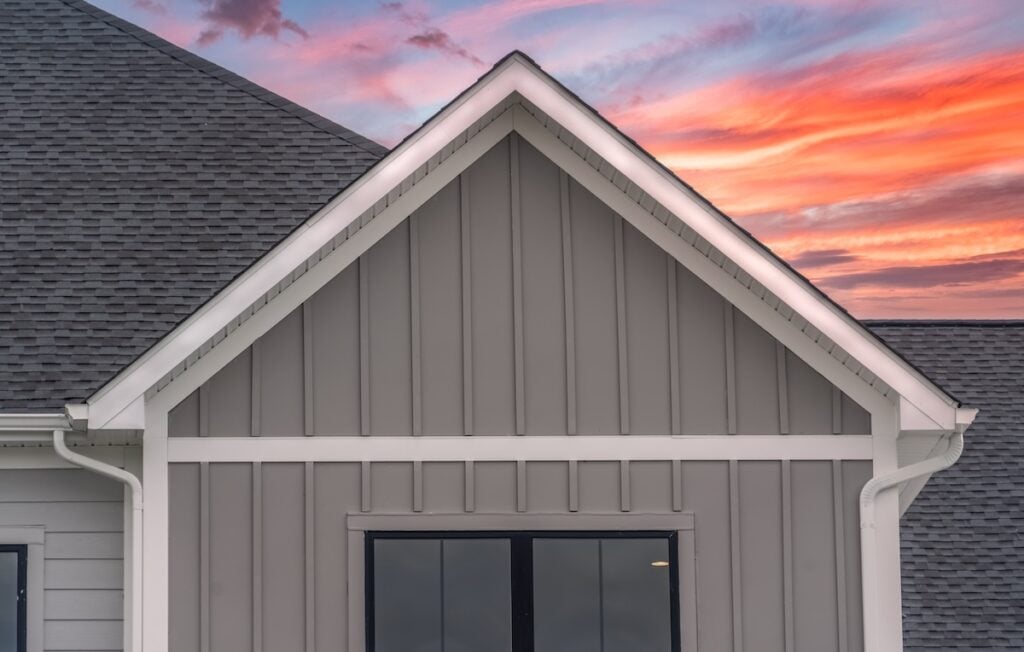
Planning a siding upgrade for your home? You’re probably wondering about vinyl siding cost and what factors will impact your budget. Vinyl remains one of the most popular exterior choices for North Carolina homeowners, offering excellent durability, low maintenance, and attractive curb appeal at a reasonable price point.
Whether you’re dealing with storm damage, updating your home’s appearance, or replacing aging siding, understanding the complete vinyl siding cost picture helps you make informed decisions. This guide covers everything you need to know about vinyl siding costs, from material expenses to installation factors that affect your final investment.
Here’s what we’ll explore:
- Material costs and quality grades
- Installation expenses and labor considerations
- Key factors that influence pricing
- Cost-saving strategies for your project
- When to consider professional installation
🔎 Understanding Vinyl Siding Material Costs
The cost of vinyl siding materials varies significantly based on quality, style, and manufacturer.
- Basic vinyl siding cost typically ranges from $3 to $7 per square foot for materials alone.
- Premium vinyl siding can cost $8 to $12 per square foot.
- Thicker siding (0.044 to 0.046 inches) offers better insulation and durability but comes at a higher cost.
Quality Grades Make a Difference
- Standard vinyl siding is budget-friendly with decent durability and appearance.
- Mid-grade options feature improved color retention and weather resistance.
- Premium vinyl siding mimics natural materials, offers enhanced warranties, and provides superior thickness.
💵 Installation Costs and Labor Factors

Professional installation typically adds $2 to $5 per square foot to your vinyl siding cost, depending on your location and the complexity of your project. Several factors influence installation expenses:
Project Complexity Affects Pricing
Simple ranch-style homes with minimal architectural features cost less to side than multi-story houses with dormers, bay windows, or intricate trim work. Each corner, window, door, and architectural detail requires additional cutting, fitting, and finishing work.
Existing siding removal adds another layer of expense. If your current siding needs to be stripped before installation, expect to pay an additional $1 to $3 per square foot for removal and disposal.
Regional Labor Variations
Labor costs vary significantly across North Carolina. Urban areas like Raleigh, Durham, and Charlotte typically see higher installation rates than rural communities. Seasonal demand also impacts pricing, with spring and summer months often commanding premium rates.
👉 5 Key Cost Considerations for Vinyl Siding
Understanding the key cost factors for vinyl siding helps you budget effectively and avoid unexpected expenses. From material quality to installation fees, these considerations ensure you make informed decisions for your home improvement project.
1. Home Size and Square Footage
The most obvious factor in vinyl siding cost is your home’s total square footage. Most contractors calculate pricing based on “squares” (100 square feet sections). A typical 2,000 square foot home requires approximately 20 squares of siding material.
Don’t forget to account for waste factor. Most projects require 10-15% additional material to accommodate cuts, mistakes, and future repairs. Your contractor should include this in their estimate.
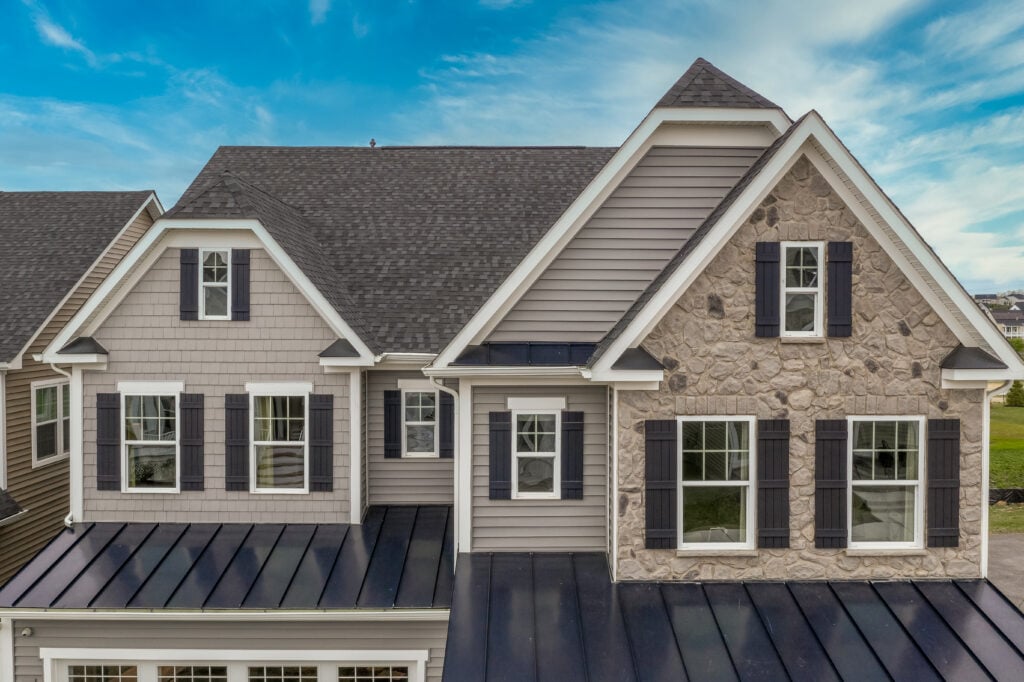
2. Siding Style and Profile
Different vinyl siding profiles carry different price points:
- Horizontal lap siding: The most economical option, resembling traditional wood clapboard
- Vertical siding: Slightly more expensive, offering a distinctive architectural look
- Shake and shingle styles: Premium pricing for textured appearance that mimics cedar shakes
- Board and batten: Higher-end option with pronounced vertical lines and shadow effects
3. Color and Finish Options
Basic white and light colors typically cost less than bold or dark hues. Dark colors require special formulations to prevent fading and thermal expansion, adding to the material cost. Specialty finishes like wood grain textures or matte surfaces also command premium pricing.
4. Insulation and Energy Efficiency Features
Insulated vinyl siding costs significantly more than standard options—typically $2 to $4 additional per square foot. However, the energy savings and improved comfort often justify the extra investment, especially in North Carolina’s climate with hot summers and variable winters.
5. Additional Components and Trim Work
Don’t overlook the cost of essential accessories:
- Trim boards around windows and doors
- Corner posts and J-channels
- Soffit and fascia materials
- Starter strips and finishing pieces
- Flashing and weather barriers
These components typically add 15-20% to your total material costs but are essential for proper installation and long-term performance.
💵 Cost-Saving Strategies for Your Siding Project
Smart planning can help you manage vinyl siding costs without compromising quality. Consider timing your project during off-peak seasons when contractors offer competitive rates. Fall and winter installations often provide better pricing than peak spring and summer months.
Getting multiple quotes from licensed, insured contractors helps you understand local pricing and identify the best value. However, remember that the lowest bid isn’t always the best choice—quality installation matters more than rock-bottom pricing. A nice tip when learning about vinyl siding cost.
Working with Insurance Claims
If storm damage prompted your siding replacement, your homeowner’s insurance may cover significant portions of the cost. Document all damage thoroughly and work with contractors experienced in insurance claims to maximize your coverage.
👨🔧 When Professional Installation Makes Sense
While DIY installation might seem like a way to save money, vinyl siding installation requires specific skills, tools, and knowledge of building codes. Improper installation can lead to moisture problems, energy inefficiency, and voided manufacturer warranties. Always, professional expertise will be worth the vinyl siding cost.
Professional installers bring expertise in:
- Proper moisture barrier installation
- Correct fastening techniques that allow for thermal expansion
- Trim work that creates clean, finished appearances
- Local building code compliance
- Warranty protection for both materials and labor
🏠 Planning Your Vinyl Siding Investment
Vinyl siding cost is a significant investment in your home’s protection and appearance. While costs vary based on numerous factors, understanding these variables helps you budget appropriately and make informed decisions about materials and installation approaches.
Ready to explore vinyl siding cost options for your home? Contact our experienced team today for a detailed consultation and accurate cost estimate tailored to your specific project needs.
FAQ’S
1. Is vinyl siding cheaper than paint?
Vinyl siding is not cheaper upfront, but it can be cheaper long-term.
Painting a home costs $1–$4 per sq. ft., while vinyl siding installation costs $4–$12 per sq. ft..
However, paint needs to be redone every 5–10 years, while vinyl siding lasts 20–40+ years with little maintenance.
Short-term: paint is cheaper. Long-term: vinyl siding often costs less overall.
2. Is vinyl the cheapest siding?
Yes. Vinyl siding is one of the most affordable siding materials available today.
Typical installed prices range from $4–$8 per sq. ft., making it cheaper than wood, fiber cement, engineered wood, stucco, brick, or stone.
For most homeowners, vinyl offers the best balance of low cost, low maintenance, and durability.
3. What is the downside of painting vinyl siding?
Painting vinyl siding is possible, but it comes with notable downsides:
- It can void the manufacturer warranty.
- Dark colors may cause the siding to warp or buckle from heat.
- Paint typically needs to be reapplied every 5–7 years, unlike factory-finished vinyl.
- Peeling and fading are common because vinyl expands and contracts with temperature.
Painting vinyl is a short-term fix and usually costs more over time than replacing the siding.
4. What is the least expensive type of siding?
The least expensive siding option for most homes is standard vinyl siding, costing $4–$8 per sq. ft. installed.
Other lower-cost options include aluminum siding and T1-11 plywood, but these usually require more maintenance and don’t last as long.
Vinyl siding cost remains the best low siding option when considering durability, energy efficiency, and long-term value.
Emergency Roof Repair: 8 Steps to Schedule, Tarp, & Repair
09.11.2025
7 Min Read
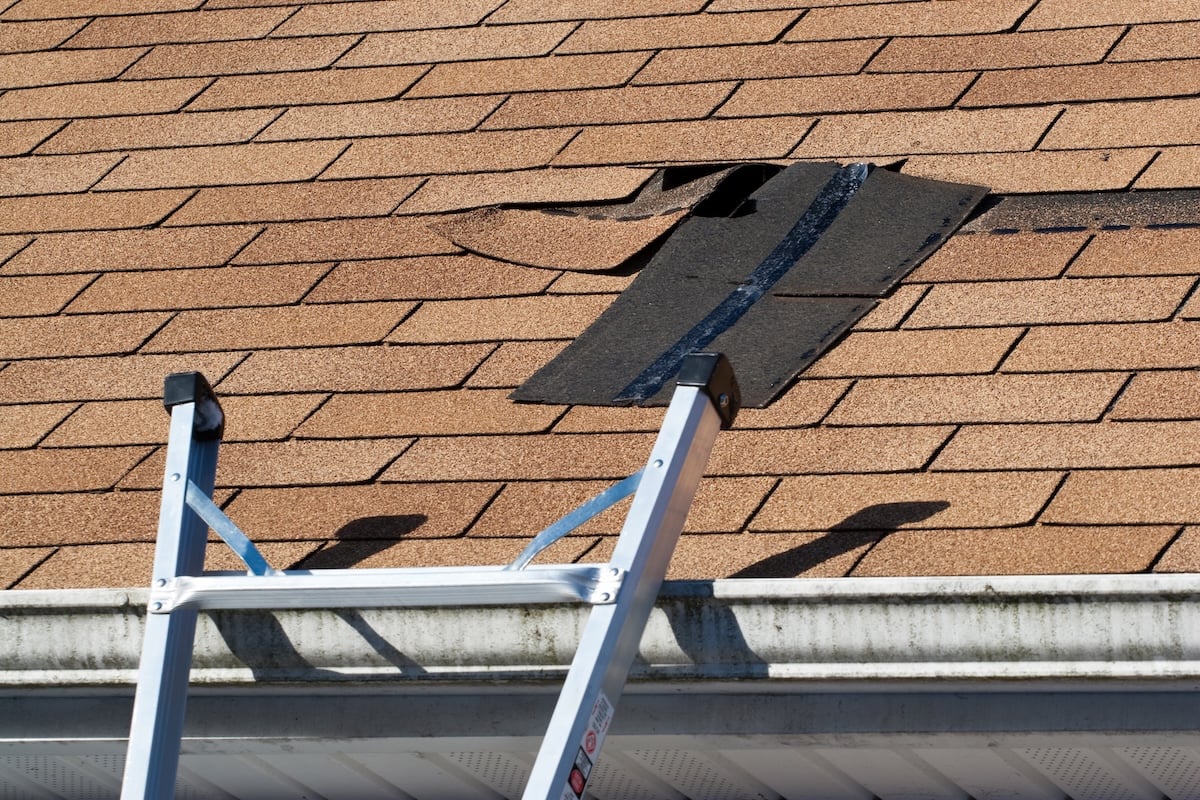
Roof emergencies never happen at convenient times. Severe storms can tear off shingles, falling trees can punch holes through your roof, and sudden leaks can threaten your home’s interior. When your roof is compromised, swift action protects your property from further damage and keeps your family safe.
Here’s what we’ll cover in this emergency roof repair guide:
- Recognizing roof emergencies and when to take immediate action
- Emergency safety measures to protect your home and family
- 8 essential steps for scheduling, tarping, and repairing roof damage
- Professional vs. DIY considerations for emergency repairs
- Prevention strategies to minimize future roof emergencies
- Working with insurance for storm damage claims
🔎 Identifying a Roof Emergency

Not every roof issue requires emergency intervention, but certain situations demand immediate attention. A roof emergency threatens the structural integrity of your home or poses safety risks to your family.
Immediate roof emergencies include:
- Large holes or openings in the roof deck
- Multiple missing or severely damaged shingles
- Active leaks during or after storms
- Sagging or compromised roof structure
- Fallen trees or large branches on the roof
- Exposed underlayment over significant areas
Signs that indicate emergency roof repair:
- Water stains appearing on ceilings or walls
- Visible daylight through the roof structure
- Granules from shingles collecting in gutters
- Loose or hanging gutters and downspouts
- Cracked or split shingles across large roof sections
Quick identification helps you respond appropriately. When in doubt, contact roofing professionals who can assess the severity and recommend the best course of action.
🦺 Safety First: Emergency Response Priorities
Your safety takes priority over property protection. Never attempt roof repairs during active storms, high winds, or when conditions are unsafe.
Immediate safety steps:
- Move family members away from damaged areas
- Turn off electricity to affected rooms if water is present
- Place buckets or containers under active leaks
- Avoid walking under damaged roof sections
- Document damage with photos from ground level
When to evacuate:
Consider temporary relocation if your roof has sustained major structural damage. Compromised roofing systems can collapse without warning, especially when waterlogged or supporting additional weight from debris.
Professional emergency services can evaluate structural integrity and determine whether your home remains safe for occupancy.
✅ 8 Steps to Schedule, Tarp, & Repair Your Roof
Knowing how to properly schedule, tarp, and repair your roof can prevent further damage and protect your home from costly issues. These steps are essential for maintaining the safety and longevity of your roof, especially during emergencies.
1. Document the Damage Thoroughly
Take detailed photos and videos of all visible damage from multiple angles. Include close-up shots of specific problem areas and wide shots showing the overall scope of damage. This documentation supports insurance claims and helps contractors provide accurate estimates.
Photograph damage from inside your home as well, including water stains, ceiling damage, and any personal property affected by leaks.
2. Contact Your Insurance Company Immediately
Report roof damage to your insurance provider as soon as possible. Many policies require prompt notification of storm damage or emergency situations. Provide your documentation and request guidance on approved contractors or emergency services.
Ask about coverage for temporary repairs and whether you need approval before proceeding with emergency tarping or other protective measures.
3. Secure Emergency Tarping Services
Professional emergency tarping prevents additional water damage while you arrange permanent repairs. Quality tarping involves more than simply throwing a tarp over damaged areas – it requires proper securing techniques and materials designed for roof applications.
Emergency tarping should extend well beyond the damaged area and be properly anchored to prevent wind uplift. Professional services have the equipment and expertise to install tarps safely and effectively.
4. Schedule Professional Inspection
Arrange for a comprehensive roof inspection with certified roofing professionals. Even damage that appears minor from ground level may indicate more extensive problems requiring immediate attention.
Professional inspectors can identify hidden damage, assess structural integrity, and provide detailed repair recommendations. This inspection forms the foundation for accurate repair estimates and insurance claims.
5. Obtain Multiple Repair Estimates
Contact several reputable roofing contractors for detailed repair estimates. Compare not only pricing but also proposed repair methods, materials, and timelines. Emergency situations sometimes lead to rushed decisions, but taking time to compare options ensures quality results.
Verify that contractors are licensed, insured, and experienced with emergency roof repairs. Check references and online reviews before making your selection.
6. Arrange Temporary Housing if Necessary
If damage is extensive or repairs will take several days, consider temporary accommodation arrangements. Some insurance policies cover additional living expenses when your home becomes uninhabitable due to covered damage.
Coordinate with your insurance adjuster to understand coverage limits and approved expenses for temporary housing.
7. Supervise Repair Work and Quality Control
Stay involved throughout the repair process. Professional contractors welcome questions and regular communication about progress and any unexpected issues discovered during repairs.
Quality emergency roof repair includes proper material installation, adequate ventilation, and attention to weatherproofing details that prevent future problems.
8. Schedule Follow-up Inspection
After emergency repairs are complete, schedule a follow-up inspection to ensure all work meets local building codes and manufacturer specifications. This final check confirms that your roof is ready to protect your home through future weather events.
Keep detailed records of all repair work, including warranties on materials and labor.
👨🔧 Professional vs. DIY Emergency Repairs
Emergency roof situations test the limits of DIY capabilities. While homeowners can handle some temporary protective measures, most emergency roof repair requires professional expertise and specialized equipment.
Safe DIY emergency measures:
- Placing buckets under interior leaks
- Moving furniture away from damaged areas
- Covering exposed areas with plastic sheeting (from inside only)
- Clearing debris from gutters and downspouts
Leave to professionals:
- Walking on damaged or wet roofing surfaces
- Installing emergency tarps on steep or high roofs
- Removing large debris or fallen trees
- Structural repairs or reinforcement
- Electrical work related to roof damage
Professional emergency services have safety equipment, insurance coverage, and expertise to handle dangerous situations safely and effectively.
🏠 Preventing Future Roof Emergencies
While some roof emergencies result from unpredictable severe weather, many can be prevented through regular maintenance and proactive care.
Preventive maintenance strategies:
- Schedule annual professional roof inspections
- Clean gutters and downspouts regularly
- Trim tree branches away from roofing surfaces
- Replace damaged or missing shingles promptly
- Ensure adequate attic ventilation and insulation
Warning signs to address early:
- Loose or damaged flashing around chimneys and vents
- Cracked or curling shingle edges
- Moss or algae growth on roofing surfaces
- Granule loss from asphalt shingles
- Sagging gutters or fascia boards
Regular maintenance costs far less than emergency repairs and helps your roof perform reliably for its full expected lifespan.
📑 Working with Insurance for Emergency Repairs
Understanding your insurance coverage helps you navigate emergency repair situations more effectively. Most homeowner’s policies cover sudden damage from storms, fallen trees, and other covered perils, but coverage details vary significantly between policies.
Key insurance considerations:
- Report damage immediately to avoid coverage issues
- Keep receipts for all emergency protective measures
- Work with adjusters to document repair scope accurately
- Understand your deductible and coverage limits
- Get approval for major repair expenses when required
Some policies include coverage for reasonable emergency protective measures, such as professional tarping services, even before formal claim approval.
🤝 Trust Barkley-Jensen for Your Emergency Roof Repair Needs
When roof emergencies strike, you need experienced professionals who understand the urgency and can respond quickly with effective solutions. At Barkley-Jensen Roofing & Restoration, we’ve built our reputation on prompt emergency response and quality workmanship that protects North Carolina homes.
Ready to schedule your emergency roof repair? Contact Barkley-Jensen Roofing & Restoration today for prompt, professional service you can trust. Our team stands ready to protect your home and restore your peace of mind.
Wind Damage to Roof? (6 Steps to Manage Roof Storm Damage)
09.09.2025
6 Min Read
North Carolina weather can be unpredictable, and strong winds are a common concern for homeowners. When a severe storm hits, your roof is the first line of defense, but it can also take the biggest hit. Dealing with wind damage to roof systems can feel overwhelming, but knowing what to do immediately after a storm can prevent further issues and streamline the repair process.
This guide will walk you through the essential steps to take when you suspect your roof has been damaged by wind. We’ll cover everything from initial safety checks to navigating insurance claims, ensuring you have the information you need to protect your home. Here’s what we’ll discuss:
- Common signs of wind damage to a roof
- What to do after discovering roof wind damage
- How professional roofers can help
- The importance of timely roof repairs
- Navigating the insurance claim process
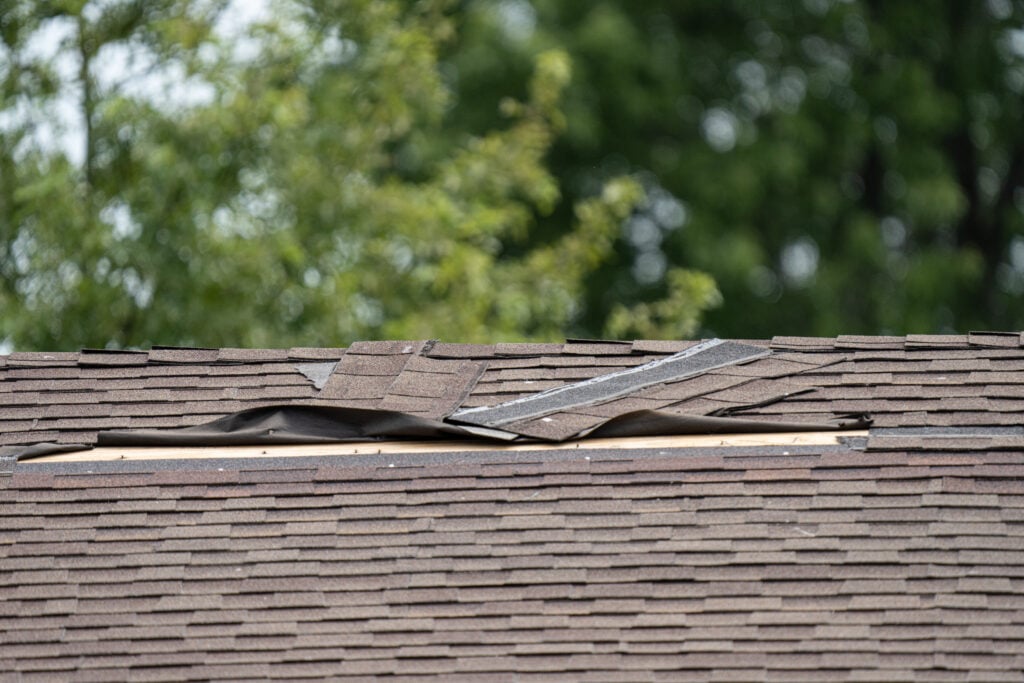
🔎 Common Signs of Wind Damage to a Roof
After a storm passes, it’s a good idea to check your property for any signs of damage. While some issues are obvious, others can be subtle. Knowing what to look for can help you identify problems early before they lead to more significant headaches like water leaks or structural damage.
Missing or Damaged Shingles
This is one of the most common and visible signs of wind damage. Walk around your property and look for:
- Bare Patches: Areas on your roof where shingles are completely gone.
- Shingles in Your Yard: Finding shingles on the ground is a clear indicator that your roof has lost some of its protective covering.
- Curled or Lifted Shingles: High winds can lift the edges of shingles, breaking the sealant that holds them down. These lifted shingles are vulnerable to being torn off in future storms and can allow water to seep underneath.
- Creased or Cracked Shingles: Wind can bend shingles back, causing a horizontal crease. This damages the shingle’s integrity and makes it susceptible to breaking.
Gutter and Downspout Damage
Your gutters are also susceptible to wind. Look for sections that are dented, detached, or sagging. You might also find an excessive amount of shingle granules—the sandpaper-like material that coats asphalt shingles—in your gutters. A large accumulation of these granules often means your shingles are aging or have been damaged, losing their protective layer.
Indoor Signs of a Leak
You don’t have to climb on your roof to spot signs of damage. Check inside your home, particularly in the attic, for:
- Water Stains: Discoloration on ceilings or walls is a classic sign of a roof leak.
- Damp Insulation: If your attic insulation feels wet, it’s a strong indication that water is getting in from above.
- Mold or Mildew Growth: A musty smell or visible mold growth points to a persistent moisture problem, likely stemming from a compromised roof.
👉 What to Do After Discovering Roof Wind Damage

Finding damage can be stressful, but taking a calm and methodical approach will help you manage the situation effectively. Here are the six steps you should follow if you suspect your roof has wind damage.
6 Steps to Manage Roof Storm Damage
- Prioritize Safety: Your safety is the top priority. Do not climb onto a potentially damaged roof, especially if it’s wet or the storm is ongoing. Debris, downed power lines, and structural instability can all pose serious risks. Conduct your initial inspection from the ground.
- Document Everything: Before any repairs are made, thoroughly document the damage. Take clear photos and videos from multiple angles, both of the roof itself (from a safe distance) and any debris in your yard, like fallen branches or missing shingles. Also, take pictures of any interior damage, such as water stains on the ceiling. This documentation will be crucial for your insurance claim.
- Perform Temporary Fixes (If Safe): If you have minor damage and it’s safe to do so, you can make temporary repairs to prevent further water intrusion. This might involve covering a damaged area with a tarp. However, for anything more than a simple covering, it’s best to wait for a professional. Avoid attempting any repairs that put you at risk.
- Contact Your Insurance Company: Report the damage to your homeowner’s insurance provider as soon as possible. They will guide you on the next steps and likely schedule an adjuster to visit your property to assess the damage. Have your policy number and the documentation you’ve collected ready.
- Call a Trusted Roofing Contractor: Contact a reputable roofing company, like Barkley-Jensen Roofing & Restoration, for a professional inspection. A professional roofer has the training and equipment to safely assess the full extent of the damage, some of which may not be visible from the ground.
- Review Estimates and Plan Repairs: Your chosen contractor will provide a detailed estimate for the necessary repairs. Review this carefully and compare it with the assessment from your insurance adjuster. Once you understand the scope of work and have coordinated with your insurance, you can schedule the repairs.
🤝 How Professional Roofers Can Help

A professional roofing contractor is your most valuable partner when dealing with wind damage. Their expertise goes beyond simply fixing the problem. At Barkley-Jensen, our team provides a comprehensive service that includes:
- Thorough Inspections: We conduct a detailed inspection to identify all visible and hidden damage, ensuring nothing is overlooked.
- Detailed Reporting: We provide a comprehensive report of our findings, complete with photos, which you can use for your insurance claim.
- Expert Repairs: Our skilled technicians use high-quality materials and proven techniques to restore your roof’s integrity, ensuring it can withstand future weather events.
- Insurance Claim Assistance: We have extensive experience working with insurance companies and can help you navigate the claims process to ensure you receive the support you deserve.
👨🔧 Trust Barkley-Jensen for Your Roofing Needs
When your home has suffered from storm damage, you need a team you can rely on to get the job done right. At Barkley-Jensen Roofing & Restoration, we are “customer service obsessed.” We treat every home as if it were our own, providing clear communication, detailed guidance, and superior craftsmanship from the first call to the final inspection. Our deep understanding of North Carolina’s weather challenges means we know exactly what it takes to restore your roof and protect your property for years to come.
If you have experienced wind damage to your roof, don’t wait. Contact Barkley-Jensen today for a same-day inspection and let our trusted team restore your peace of mind.
Fascia Board Replacement: 7 Step Guide for Homeowners
09.04.2025
8 Min Read
Your home’s fascia boards serve as the protective barrier between your roof and the elements, but when they start showing signs of wear, replacement becomes essential for maintaining your property’s structural integrity. This comprehensive guide will walk you through everything you need to know about fascia board replacement, from identifying damage to completing the installation process.
- Understanding fascia board replacement and its importance
- Signs you need a fascia board replacement
- Fascia board replacement vs repair: How to Know Which You Really Need
- Tools and materials required
- Step-by-step fascia board replacement process
- Professional installation vs. DIY considerations
- Maintenance tips to extend fascia board life
⚠️ Signs Your Fascia Boards Need Replacement
Recognizing when your fascia boards need replacement can save you from extensive water damage and structural problems. Several warning signs indicate it’s time for fascia board replacement. If you notice sagging or pulling away, it may be time to call roofing contractors in Cary for an expert inspection.
Visible Rot and Decay: Wood fascia boards are particularly susceptible to rot, especially in areas with high moisture exposure. Look for soft, spongy areas, dark discoloration, or sections where you can easily push your finger through the board.
Pest Damage: Carpenter ants, termites, and other insects often target damaged fascia boards. You might notice small holes, sawdust-like debris, or actual insect activity around your roofline.
Sagging or Pulling Away: If your fascia boards are pulling away from the roof structure or appear to sag, this indicates serious structural compromise that requires immediate attention.
Paint Issues: Persistent paint problems, including peeling, blistering, or areas where paint won’t adhere properly, often signal underlying moisture damage that may necessitate board replacement.
Gutter Problems: Gutters that frequently come loose, sag excessively, or don’t drain properly may indicate fascia board issues, as damaged boards can’t provide adequate support.
Fascia Board Replacement vs Repair: How to Know Which You Really Need

Not all fascia problems require a full replacement. In many cases, homeowners can save time and money by repairing only the damaged portion—but only if the underlying structure is still sound. Here’s a simple way to determine what’s appropriate for your home:
When Fascia Repair Is Enough
You can usually repair the fascia if the damage is:
- Localized, such as a small soft spot, minor rot, or a single cracked board.
- Cosmetic, like peeling paint, discoloration, or slight warping.
- Caused by a one-time issue, such as a clogged gutter or a small roof leak that has already been fixed.
- Limited to the surface, meaning the wood is still firm when probed with a screwdriver.
Good repair examples:
Filling small holes, treating early-stage rot, replacing a short 4–6 ft section, repainting, or sealing.
When Full Fascia Board Replacement Is Necessary
Replacement is the right choice when:
- Rot has penetrated deeply and the board feels soft or crumbles under light pressure.
- You see extensive water damage across multiple sections of the roofline.
- The fascia is bowing, sagging, or pulling away from the rafters.
- Insects or pests have damaged the wood beyond surface-level treatment.
- There is repeated moisture exposure due to faulty flashing, improper gutter slope, or missing drip edge.
- Soffits or rafter tails show signs of decay, meaning structural components are affected—not just the fascia.
In these cases, spot-repair won’t solve the problem. Replacing the fascia ensures the damage doesn’t spread and restores the roofline’s structural integrity.
Pro Tip: Fix the Root Cause
Before repairing or replacing, always inspect:
- Gutters and downspouts
- Roof flashing and drip edge
- Ventilation around the soffit
- Any signs of roof leaks
If these issues aren’t corrected, even new fascia boards will eventually fail again.
🛠️ Tools and Materials Required
Successful fascia board replacement requires the right tools and materials. Having everything ready before you start will make the project go much smoother. The right tools are important, but many homeowners prefer leaving the job to professional roofing services in Raleigh for guaranteed results.
Essential Tools:
- Circular saw or miter saw
- Hammer and nail set
- Screwdriver or drill
- Level
- Measuring tape
- Safety glasses and gloves
- Ladder or scaffolding
- Pry bar
- Chalk line
Materials Needed:
- Replacement fascia boards (sized to match existing)
- Galvanized nails or screws
- Wood filler (for wood boards)
- Primer and exterior paint
- Caulk for sealing gaps
- Flashing if needed
✅ 7 Step Fascia Board Replacement Process
Replacing fascia boards is essential to protect your home’s roofline and prevent water damage. A proper replacement process ensures long-term durability and enhances overall curb appeal.
1. Safety Preparation and Assessment
Begin by ensuring your work area is safe and accessible. Set up sturdy ladders or scaffolding, and have someone spot you when working at height. Remove any gutter sections attached to the fascia boards you’re replacing.
2. Remove Damaged Fascia Boards
Carefully remove the old fascia boards by pulling out nails or screws and trusted roof repair in Knightdale teams can handle the job safely.. Use a pry bar to gently separate boards from the rafter tails. Take care not to damage the roof structure or surrounding materials during removal.
3. Inspect and Repair Rafter Tails
Once the old fascia is removed, inspect the rafter tails for damage. Look for signs of rot, insect damage, or structural issues. Make necessary repairs before installing new boards to ensure a solid foundation.
4. Measure and Cut New Boards
Measure each section carefully and cut your replacement boards to length. Make precise cuts to ensure proper fit and professional appearance. For corners, you’ll need to make angled cuts for proper joining.
5. Install New Fascia Boards
Position the new boards against the rafter tails and ensure they’re level and properly aligned. Secure with appropriate fasteners, spacing them every 16 inches along the board. Use a nail set to drive nail heads slightly below the surface.
6. Seal and Finish
Fill nail holes with wood filler if using wood boards. Apply caulk to seal gaps and joints. Prime and paint the boards with high-quality exterior paint to protect against weather damage.
7. Reinstall Gutters
Once the fascia board replacement is complete and any paint has dried, reinstall your gutter system. Ensure proper alignment and secure attachment to the new fascia boards.
👨🔧 Professional Installation vs. DIY Considerations
While fascia board replacement can be a DIY project for experienced homeowners, several factors should influence your decision about professional installation. If you’d rather not tackle the work yourself, check out our full fascia board replacement guide for insights before calling a contractor.
DIY Advantages: Cost savings on labor, ability to work at your own pace, and satisfaction of completing the project yourself make DIY appealing for many homeowners.
Professional Benefits: Professional contractors bring experience, proper tools, and insurance coverage. They can identify underlying problems you might miss and ensure code compliance. Professional installation often comes with warranties that protect your investment.
When to Call Professionals: Consider professional installation if you’re uncomfortable working at height, lack the necessary tools, discover extensive structural damage, or need to coordinate with other roofing work.
💡 Maintenance Tips to Extend Fascia Board Life
Proper maintenance can significantly extend the life of your fascia boards and prevent premature replacement needs.
Regular Inspections: Examine your fascia boards at least twice yearly, looking for signs of damage, loose fasteners, or paint deterioration. Early detection allows for minor repairs instead of full replacement.
Gutter Maintenance: Keep gutters clean and properly functioning to prevent water overflow that can damage fascia boards. Ensure proper drainage and fix any leaks promptly.
Paint Maintenance: Maintain a proper paint finish to protect wood fascia boards from moisture penetration is as important as choosing the best roof shingles to complement and protect your roofline.. Touch up any damaged areas immediately and repaint every few years as needed.
Trim Vegetation: Keep trees and shrubs trimmed away from your roofline to improve air circulation and reduce moisture accumulation that can lead to rot and pest problems.
Address Issues Promptly: Don’t delay repairs when you notice problems. Small issues can quickly become major problems that require extensive fascia board replacement.
Trust the Experts for Your Roofing Needs
Fascia board replacement is just one aspect of maintaining your home’s roofing system and reviewing gutter installation cost can help you plan your roofing budget effectively. While this guide provides the knowledge you need to understand the process, successful completion often requires professional expertise and experience.
Don’t let damaged fascia boards compromise your home’s protection. Contact Barkley-Jensen Roofing & Restoration today for a professional assessment and discover why homeowners throughout North Carolina trust us with their most important roofing needs.
Flat Roof Replacement Cost: What to Expect In 2025
09.02.2025
8 Min Read
Planning a flat roof replacement can feel overwhelming, especially when you’re trying to budget for this major investment. Whether you own a commercial building or have a flat roof on your residential property, understanding the costs involved helps you make informed decisions and avoid unexpected expenses.
This comprehensive guide covers everything you need to know about flat roof replacement cost, from material options and labor expenses to the factors that influence your final bill. We’ll break down the numbers, explore your options, and help you understand what to expect when it’s time to replace your flat roof.
Here’s what we’ll cover:
- Average flat roof replacement costs by material type
- Key factors that affect your total project cost
- Different flat roof material options and their benefits
- Signs it’s time for a replacement vs. repair
- How to choose the right roofing contractor
- Financing options for your flat roof project
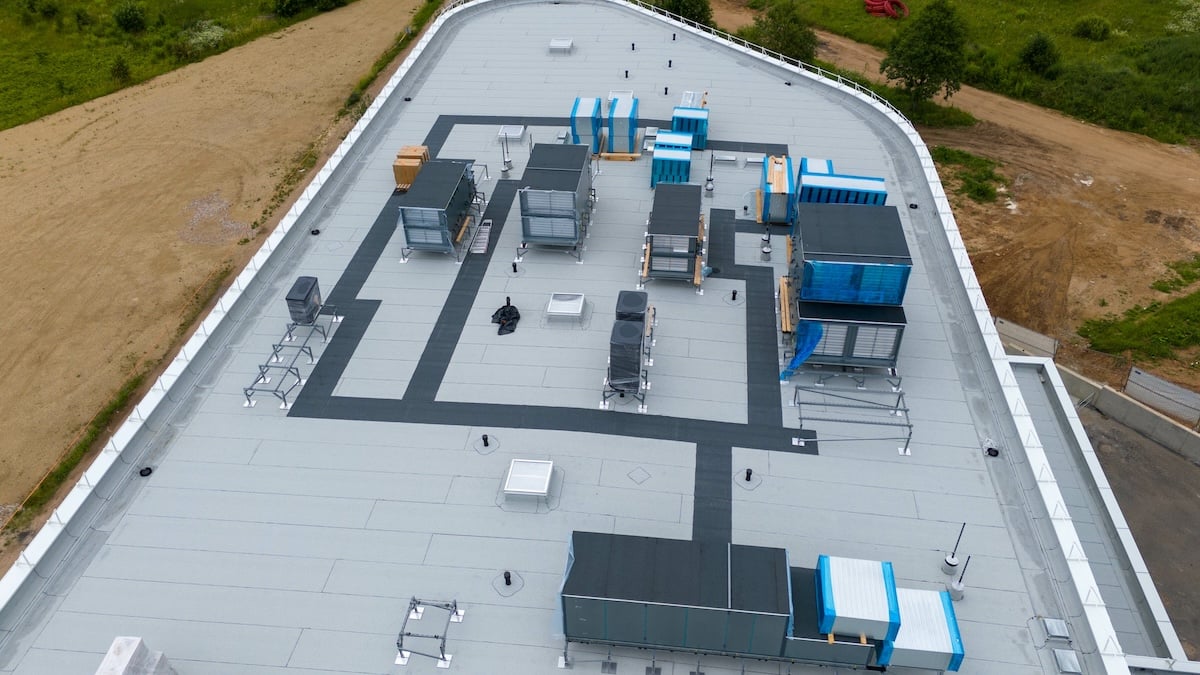
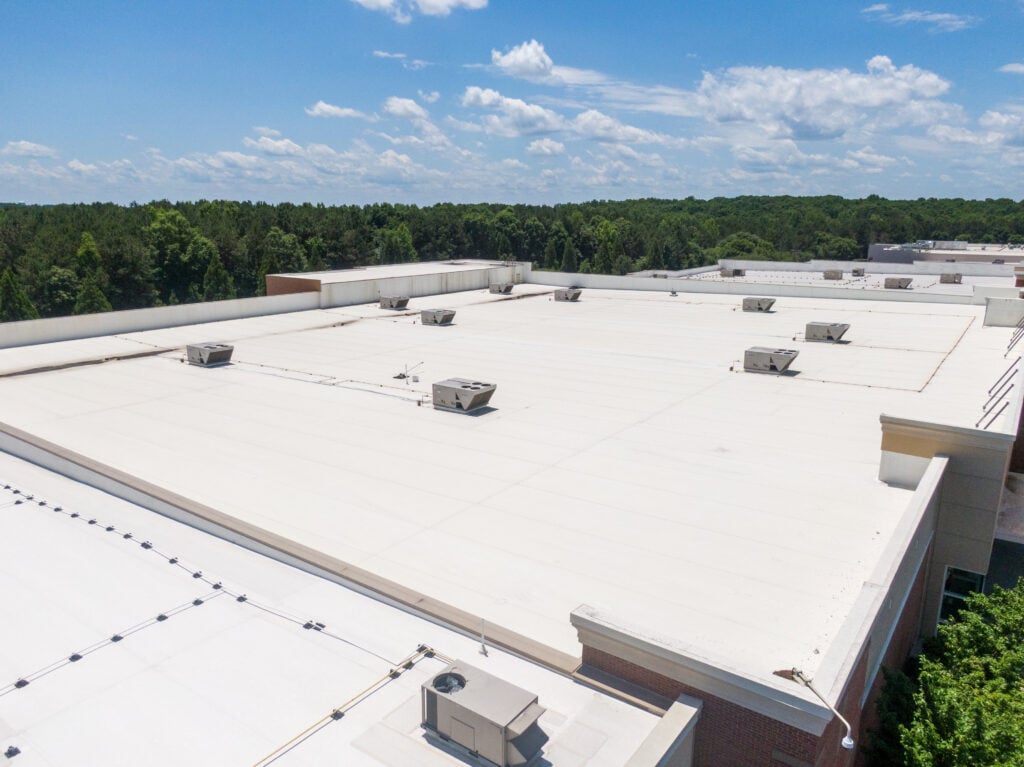
💸 Average Flat Roof Replacement Costs
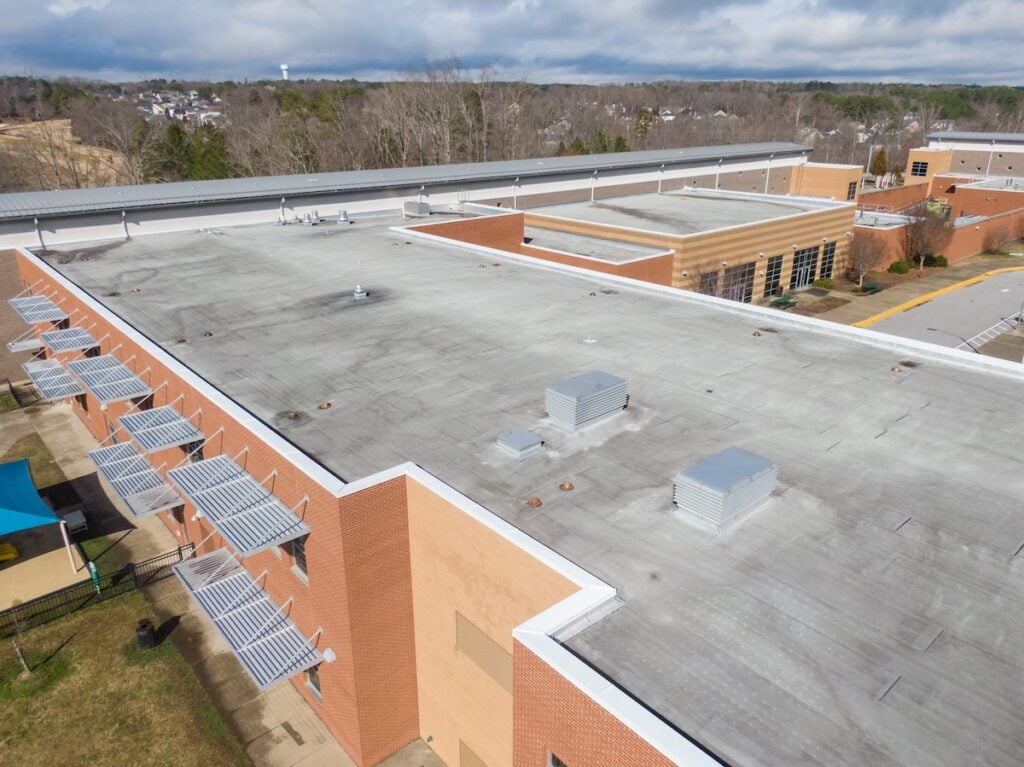
Flat roof replacement costs vary significantly based on several factors, but understanding the general price ranges helps you prepare for this investment. Here’s a breakdown:
- General Costs: Most homeowners and business owners can expect to pay between $3 and $12 per square foot for a complete flat roof replacement, including materials and labor.
- For a 1,000 Square Foot Roof: Costs typically range from $3,000 to $12,000. Premium materials and complex installations can increase costs to $15-$20 per square foot for high-end systems.
Most homeowners can expect costs between $3–$12 per sq. ft., but working with trusted roofing contractors in Cary ensures accurate estimates and reliable workmanship.
Material Costs:
The type of roofing material you select is one of the biggest drivers of cost. For commercial flat roofing replacements or new installations, we have different options, including BUR, TPO, EPDM, Modified Bitumen, or Spray Polyrethane Foam, for you to choose the one that suits your business’s purposes the most. Each material offers a different balance of durability, performance, and price, allowing you to choose the best option for your budget.
- Built-up Roofing (BUR): Budget-friendly, starting at $3-$5 per square foot.
- Single-Ply Membranes (TPO or EPDM): Typically cost $5-$8 per square foot.
- Modified Bitumen or Spray Polyurethane Foam: High-performance options ranging from $6-$12 per square foot.
Labor Costs:
Labor is a significant portion of any roofing project, often accounting for the majority of the total expense. These costs are determined by the expertise of the crew, the complexity of the installation, and the local market conditions.
- Labor typically accounts for 60-70% of the total project expense.
- In North Carolina, experienced roofing contractors charge between $2-$6 per square foot, depending on roof complexity and market conditions.
🏢 Flat Roof Material Options and Pricing
Understanding your material options is crucial for making the right choice for your property and budget. Each type of flat roofing system offers different benefits, lifespans, and price points.
Built-Up Roofing (BUR)
Built-up roofing remains one of the most economical options for flat roof replacement. This traditional system uses multiple layers of roofing felt and asphalt, topped with gravel or mineral surfacing. BUR systems typically cost $3-5 per square foot and can last 15-20 years with proper maintenance.
Single-Ply Membranes
EPDM (rubber membrane) and TPO (thermoplastic polyolefin) are popular single-ply options. EPDM costs approximately $4-7 per square foot and offers excellent durability and weather resistance. TPO, known for its energy efficiency and heat-reflective properties, ranges from $5-8 per square foot.
Modified Bitumen
This enhanced asphalt system provides superior flexibility and weather resistance compared to traditional BUR. Modified bitumen typically costs $5-9 per square foot and offers a lifespan of 20-25 years. The material comes in self-adhering or torch-applied varieties and many property owners choose local roofing in Knightdale for installation and long-term maintenance.
Spray Polyurethane Foam (SPF)
SPF systems create a seamless, monolithic roof surface that provides excellent insulation properties. While more expensive at $6-12 per square foot, SPF roofs can last 25-30 years and offer significant energy savings over time.
👉 7 Factors That Affect Flat Roof Replacement Cost
Several key factors influence your flat roof replacement cost, and understanding these variables helps you plan and budget effectively.
1. Roof Size and Complexity
Larger roofs typically benefit from economies of scale, with per-square-foot costs decreasing as size increases. However, complex roof designs with multiple levels, penetrations, or irregular shapes increase labor time and material waste, driving up costs.
2. Existing Roof Condition
If your current roof requires extensive structural repairs or multiple layer removal, expect higher costs. Some roofs can accommodate a new system over the existing one, while others need complete tear-off and disposal, which adds $1-3 per square foot to your project. Extensive structural repairs or multiple tear-offs may be needed—making a commercial roof inspection essential before budgeting replacement.
3. Structural Requirements
Older buildings may need structural reinforcement to support new roofing systems. This is particularly important when upgrading from lightweight materials to heavier options or when adding insulation layers.
4. Insulation Needs
Adding or upgrading insulation during replacement improves energy efficiency but increases upfront costs. Insulation typically adds $1-4 per square foot to your project, depending on the type and thickness required.
5. Local Building Codes and Permits
Building permit costs vary by location but typically range from $100-500 for residential projects and $500-2,000 for commercial buildings. Some areas have specific requirements for insulation, fire resistance, or wind uplift that affect material selection and costs.
6. Seasonal Timing
Roofing contractors often offer lower rates during slower seasons (late fall through early spring). However, weather conditions may limit installation options during certain times of year.
7. Contractor Experience and Location
An top-notch roofing company like us will have proper licensing and insurance, which, although, may charge premium rates, will provide better workmanship and warranty coverage. Labor costs also vary significantly by geographic location.
⚠️ Signs You Need Replacement vs. Repair
With a commercial roof inspection, you will determine whether your flat roof needs complete replacement or can be repaired affects your budget planning significantly. Here are key indicators that replacement is necessary:
Replacement Indicators:
- Age over 20 years with multiple previous repairs
- Widespread membrane deterioration or cracking
- Persistent leaks despite multiple repair attempts
- Standing water covering more than 25% of the roof surface
- Significant structural sagging or damage
- Energy costs increasing due to poor insulation performance
While flat roofs often require replacement after 20+ years, pitched homes may benefit from upgrading to the best roof shingles for long-lasting protection.
Repair Considerations:
Minor issues like isolated leaks, small membrane tears, or localized ponding water can often be addressed through targeted repairs. However, if repair costs exceed 25-30% of replacement cost, replacement typically provides better long-term value.
It is also crucial to consider the entire roofing system, not just the membrane. For flat or low-slope commercial roofs, repairs should extend to critical components like scuppers, internal drains, and gutters. Addressing these related issues ensures water is properly diverted, preventing leaks and protecting your commercial investment.
👨🔧 Choosing the Right Contractor
Reliable contractors provide detailed estimates, from roof work to add-ons like gutter installation cost so you understand the full scope of your project. Your contractor choice significantly impacts both project cost and long-term satisfaction. Here’s what to look for when evaluating roofing professionals:
Essential Qualifications:
- Valid state licensing and local business permits
- Comprehensive general liability and workers’ compensation insurance
- Manufacturer certifications for your chosen roofing system
- Strong local reputation with verifiable references
- Detailed written estimates and contracts
Red Flags to Avoid:
- Door-to-door solicitation or high-pressure sales tactics
- Requests for full payment upfront
- Significantly low bids compared to other contractors
- No local business address or proper licensing
- Reluctance to provide references or proof of insurance
Quality contractors provide detailed written estimates that break down material and labor costs, specify warranty terms, and outline project timelines. They should also be able to explain different material options and help you choose the best system for your specific needs and budget.
💵 Financing Your Flat Roof Replacement
Given the significant investment required for flat roof replacement, many property owners explore financing options to manage costs effectively.
Available Financing Options:
- Traditional bank loans or lines of credit
- Contractor financing programs
- Home equity loans or lines of credit
- SBA loans for commercial properties
- Energy efficiency rebates and tax credits
Many roofing contractors, including Barkley-Jensen Roofing & Restoration, offer financing programs that can help spread costs over time. These programs often feature competitive rates and flexible terms tailored to roofing projects.
🏠 Making the Right Investment for Your Property
Flat roof replacement represents a significant investment, but understanding the costs involved helps you make informed decisions. Remember that the lowest bid isn’t always the best value—focus on contractors who provide quality materials, skilled installation, and comprehensive warranties.
Ready to get started on your flat roof replacement project? Contact Barkley-Jensen Roofing & Restoration today for a comprehensive inspection and detailed estimate. Our experienced team will assess your current roof condition, explain your options, and provide the transparent pricing information you need to make the right decision for your property.
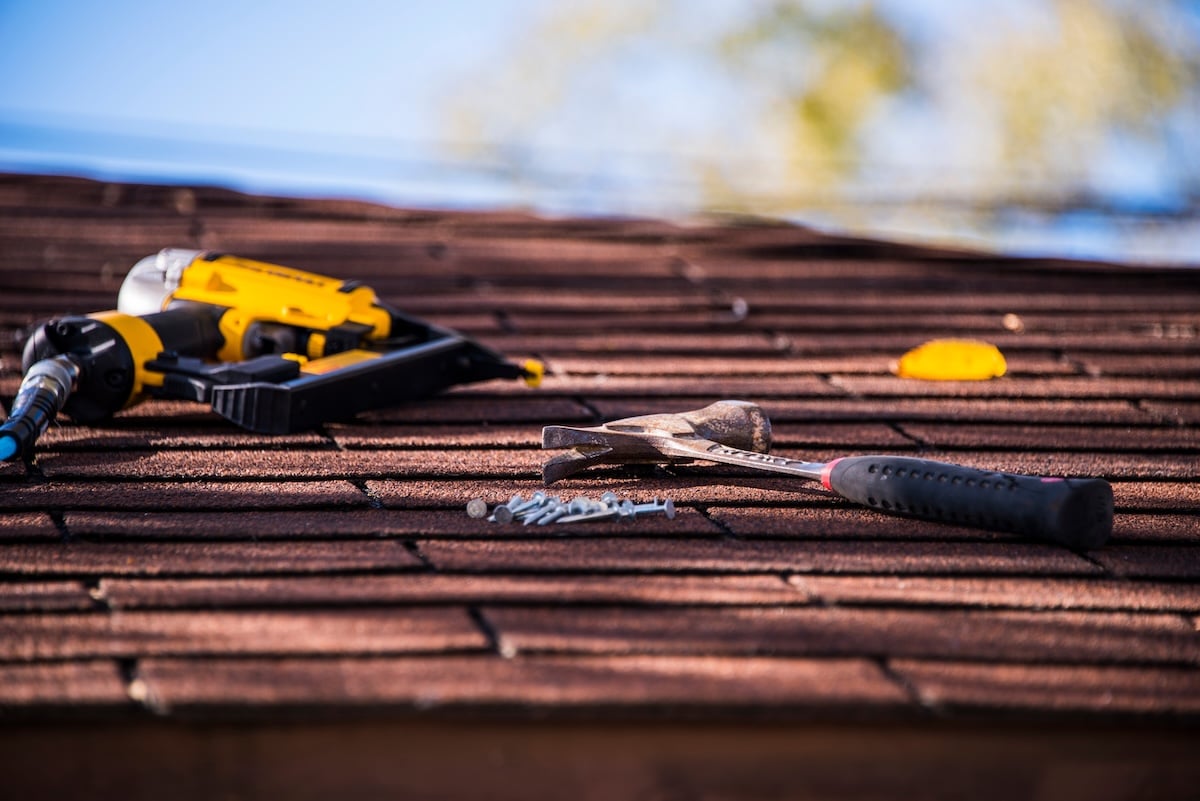
7 Best Roofing Tools to Have on Hand (DIY, Maintenance…)
08.28.2025
6 Min Read
Whether you’re planning a major roofing project or simply want to handle routine maintenance, having the right roofing tools makes all the difference. The right equipment ensures your safety, improves work quality, and can save you time and money on professional services.
This comprehensive guide covers essential roofing tools for various projects, from basic maintenance tasks to more complex DIY repairs. We’ll explore the must-have equipment that every homeowner should consider, along with specialized tools for specific roofing projects, be it a maintenance service, a small repair, or even a full roof replacement. Here’s what we’ll cover:
- Essential safety equipment for roofing work
- Basic roofing tools every homeowner needs
- Tools for different roofing materials
- Maintenance and storage tips
- When to call professional roofers
Essential Safety Equipment
Safety should always be your top priority when working on any roofing project. Before you even think about other roofing tools, make sure you have proper safety equipment.
- Fall Protection Systems: Use OSHA-approved safety harnesses, lanyards, and roof anchor points to prevent serious injuries. Comfort is key for extended wear.
- Proper Footwear: Wear non-slip roofing boots with good tread for grip on various materials. Steel-toed options offer extra protection from falling objects.
- Ladder Safety Equipment: Equip ladders with stabilizers and standoffs, and ensure they are rated for your weight plus materials. Always use a sturdy, well-maintained ladder.
Basic Roofing Tools Every Homeowner Needs
Having basic roofing tools is essential for homeowners to address minor repairs and prevent small issues from turning into costly damage. These tools ensure you’re prepared to maintain your roof’s condition, while also being a good ally for emergency repairs of roof damage caused by hailstorms or strong winds.
Hand Tools for General Roofing Work
- Roofing hammer: Specialized hammer with a magnetized nail holder, hatchet blade, and balanced weight for roofing tasks.
- Utility knives: Essential for cutting shingles and underlayment; keep extra blades handy due to wear.
- Chalk lines: Ensure straight, visible guidelines with bright, weather-resistant chalk.
Measuring and Layout Tools
- Measuring tapes: Extend 25-50 feet with standout capability; some include magnetic tips for metal work.
- Speed squares: Multi-purpose tool for marking angles, guiding saws, and layout work.
- Roofing squares: L-shaped tools ideal for ensuring angles and measurements in complex projects.
Top 7 Roofing Tools for Your Toolkit

Every homeowner should have a basic set of roofing tools. Here are the essential ones you need to get started.
1. Quality Roofing Hammer
A specialized roofing hammer with magnetic nail holder and hatchet blade streamlines installation work. The proper weight and balance reduce fatigue during extended use.
2. Safety Harness System
Never compromise on fall protection. A complete harness system with lanyard and anchor points protects you from serious injury during any roof work.
3. Pneumatic Nail Gun
For homeowners tackling significant roofing projects, a pneumatic nailer dramatically increases installation speed while ensuring consistent nail placement and depth.
4. Roofing Shovel
Essential for tear-off work, a quality roofing shovel makes removing old materials much easier. In particular for shingles repairs, this tool is a great way to for The specialized design protects the roof deck while efficiently removing shingles.
5. Utility Knife with Extra Blades
Sharp blades are crucial for clean cuts in shingles and underlayment. Stock up on replacement blades, as roofing materials dull them quickly.
6. Chalk Line Tool
Maintaining straight installation lines is critical for professional-looking results. A quality chalk line tool with bright, durable chalk ensures visible guidelines.
7. Extension Ladder with Stabilizers
Safe roof access requires a proper ladder setup. Extension ladders with stabilizers provide secure access while protecting gutters and siding.
Tools for Different Roofing Materials

Using the right tools for different materials ensures proper roofing installation and long-lasting durability. It also helps avoid damage to materials, saving time and money on repairs.
Asphalt Shingle Tools
Asphalt shingles require specific roofing tools for best results. Standard roofing hammers work well, but pneumatic nailers designed for shingles provide faster, more consistent installation. Utility knives with hook blades cut shingles cleanly.
Metal Roofing Equipment
Metal roofing demands specialized tools. Metal snips in left, right, and straight-cutting varieties handle different cut types. Seamers and crimpers create proper joints and connections. Drill drivers with metal-cutting bits install screws efficiently.
Tile and Slate Tools
Heavy roofing materials like tile and slate require robust equipment. Tile rippers remove damaged tiles without breaking adjacent ones. Wet saws cut tiles and slate precisely. Heavy-duty nail pullers remove fasteners from thick materials.
Maintenance and Storage Tips
Proper care extends the life of your roofing tools significantly. Clean tools after each use, removing debris and moisture that can cause rust or damage. Oil moving parts regularly to prevent corrosion and ensure smooth operation.
- Blade maintenance: Keep cutting tools sharp through regular sharpening or blade replacement. Dull tools are dangerous and produce poor results.
- Storage solutions: Protect tools from moisture and damage. Tool bags designed for roofing work organize equipment while protecting it during transport. Climate-controlled storage prevents rust and deterioration.
- Regular inspection: Check safety equipment like harnesses, lanyards, and ladders for wear, damage, or expired certifications. Replace any safety equipment that shows signs of wear immediately.
DIY vs. Pro Installation: Is It Worth Doing It Yourself?
While DIY roofing can save money, it’s not always the best choice for every situation.
| Factor | DIY Roofing | Professional Roofing |
| Cost | Lower upfront | Higher labor costs |
| Skill Required | Moderate to high | Licensed and trained experts |
| Time | Several weekends possible | Usually completed in 1–3 days |
| Risk | Higher personal injury risk | Covered by insurance/safety gear |
| Warranty Options | Limited or none | Manufacturer and labor coverage |
If you’re working on a shed, garage, or small patch job, DIY can work great. But for full re-roofing or complex slopes, hiring experts like Barkley-Jensen Roofing is typically the smarter move.
Trust the Professionals at Barkley-Jensen
While having quality roofing tools helps with maintenance and minor repairs, major roofing projects require professional roofing expertise. At Barkley-Jensen Roofing & Restoration, we combine years of experience with professional-grade equipment to deliver exceptional results.
For any roofing project, from a simple repair to a full replacement, a professional touch is the key to ensuring quality and longevity. Our team is equipped to handle the unique challenges of any roof, providing an accurate assessment, a detailed plan, and a flawless installation.
Ready to discuss your roofing project? Contact Barkley-Jensen Roofing & Restoration today for a professional consultation. Let our expertise and professional-grade equipment protect your most important investment—your home.
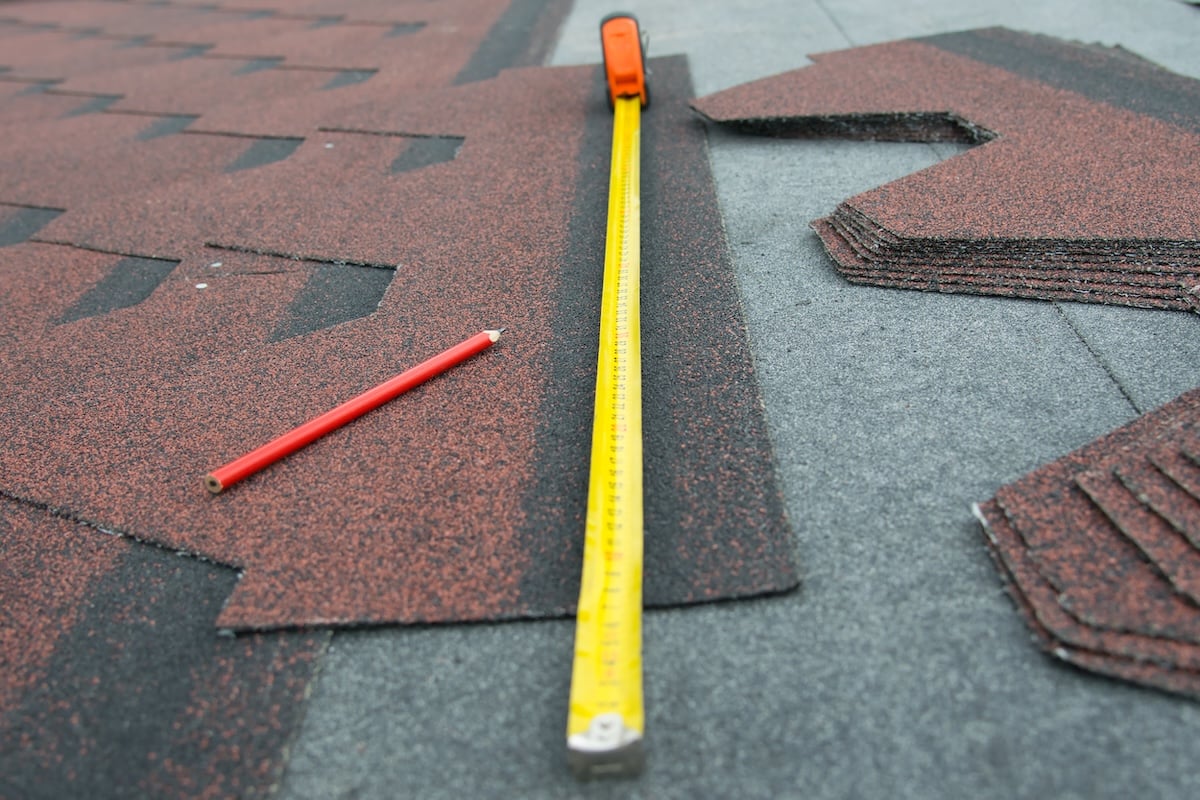
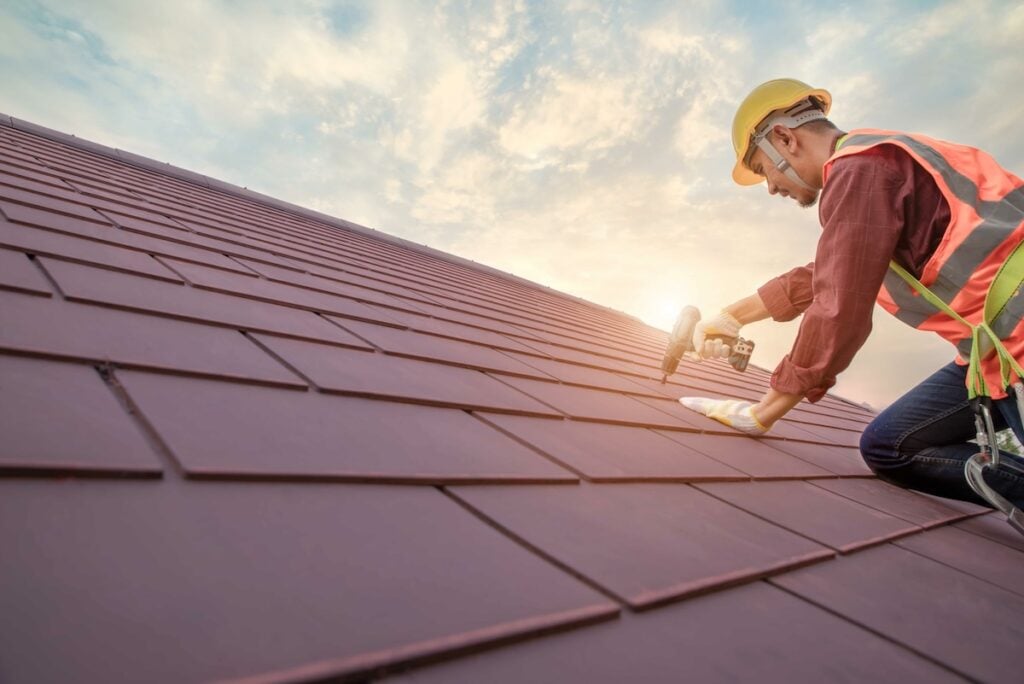
How to Measure a Roof for Shingles: 7 Step Guide
07.29.2025
9 Min Read
Measuring your roof for shingles might seem overwhelming, but with the right approach and tools, you can get accurate measurements for your roofing project. Whether you’re planning a DIY installation or preparing for professional estimates, understanding how to measure a roof for shingles will help you budget effectively and ensure you order the right amount of materials.
This comprehensive guide will walk you through everything you need to know about roof measurement, from essential tools and safety considerations to detailed calculation methods. We’ll cover:
- Essential tools and safety equipment needed for roof measurement
- Step-by-step measurement process for different roof types
- How to calculate square footage and convert to roofing squares
- Common measurement mistakes and how to avoid them
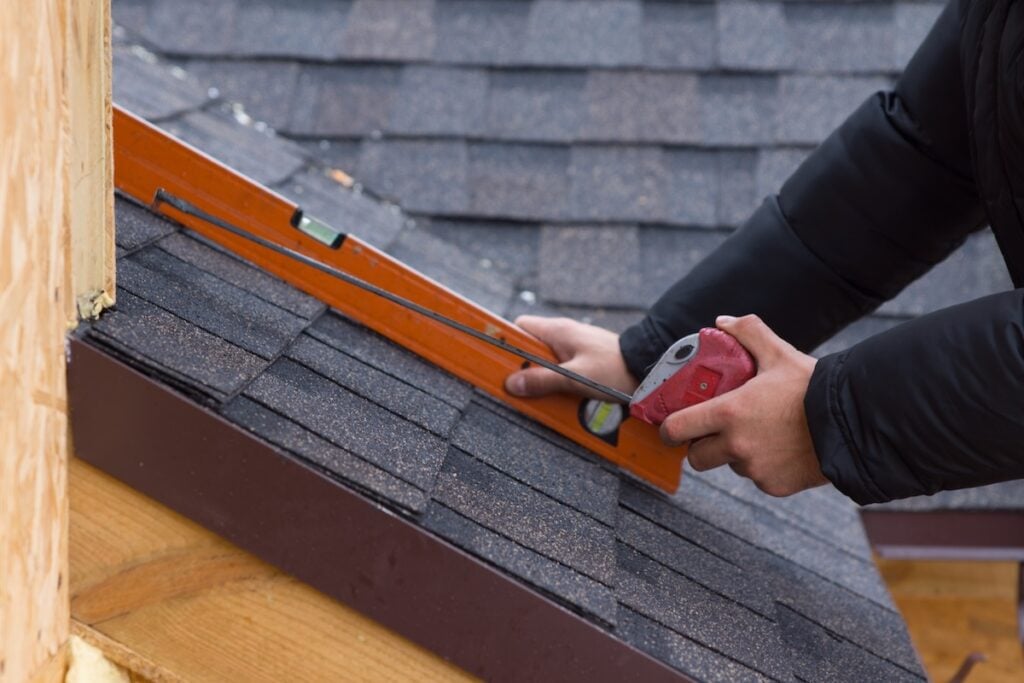
The Right Tools for Measuring Your Roof
Before you begin measuring your roof for shingles, gather the essential roofing tools to ensure accuracy and safety. Having proper equipment makes the difference between precise measurements and costly mistakes. Many homeowners rely on trusted roofing services in Cary for professional guidance and inspections.
Required Measuring Tools:
- 25-foot measuring tape (minimum)
- Calculator or smartphone with calculator app
- Notepad and pencil for recording measurements
- Graph paper for sketching your roof layout
- Ladder (if measuring from the roof)
- Digital camera or smartphone for reference photos
Safety Equipment:
- Non-slip shoes with good grip
- Safety harness and rope (for steep roofs)
- Hard hat
- Work gloves
- Someone to spot you while on the ladder
Optional but Helpful:
- Laser measuring device for long distances
- Drone with camera (for aerial measurements)
- Binoculars for ground-level observations
- Roofing square or speed square
✅ 7 Steps to Measure a Roof for Shingles
Follow this detailed process to accurately measure your roof for shingles. These steps work for most residential roof types and provide the foundation for calculating material needs and calculate roof shingles required.
1. Create a Roof Sketch
Start by drawing a simple outline of your roof as seen from above. Include all roof sections, marking approximate dimensions and angles. This sketch will act as your measurement map, helping you stay organized and ensure no areas are overlooked during the process.
2. Measure Each Roof Section
Work methodically and measure each distinct roof plane separately:
- Measure the length of each roof section along the eave (the lower edge).
- Measure the width by finding the distance from the eave to the ridge (the peak of the roof).
- Record all these measurements clearly on your sketch, labeling each section.
- Take photos of any complex or hard-to-measure areas for reference later. This step ensures accuracy, especially for irregular roof shapes.
If you’re unsure about angles or complex roof planes, roofing experts in Raleigh can ensure accurate measurements.
3. Calculate Individual Section Areas
For rectangular sections, multiply the length by the width to determine the area in square footage. For triangular sections, use the formula: (base × height) ÷ 2. Make sure to calculate each section one at a time for better accuracy. Label and list these areas on your sketch to keep track of your progress.
4. Account for Roof Pitch
The roof pitch impacts the actual surface area due to the slope. Use pitch multipliers to adjust your measurements:
- A 4/12 pitch requires multiplying by 1.054, while a 6/12 pitch uses 1.118, and so on.
- Refer to the correct multiplier for your roof slope to ensure your calculated square footage reflects the true surface area.
5. Add All Sections Together
Once you’ve calculated the surface area for each section, sum them all together to get the total roof square footage. This number represents the complete surface area of your roof that requires asphalt shingles or other materials.
6. Convert to Roofing Squares
To simplify material estimation, convert your total square footage into roofing squares (1 roofing square = 100 square feet). Divide the total square footage by 100. For example, if your roof measures 2,400 square feet, you’ll need 24 roofing squares.
7. Add Waste Factor
Account for additional material needed due to waste from cuts, overlaps, and starter strips. Add 10-15% extra to your total. For simpler roofs, 10% should suffice, but more complex roofs with multiple angles and intersections may require closer to 15%. This ensures you don’t run out of materials during installation. For homes with steep slopes or multiple ridges, consulting Knightdale roofers helps ensure you order the right amount of material.
Ground-Level Measurement Methods
Not comfortable climbing on your roof? You can still get accurate measurements from the ground using these proven techniques for measuring your roof for shingles.
Aerial Measurement Method
Satellite imagery services like Google Earth can help you measure your roof’s outline from above. While not as accurate as direct measurements, this method is a handy starting point for estimating basic roof dimensions, especially for simpler roof shapes.
Mathematical Calculation Method
You can calculate your roof area by measuring your home’s footprint from the ground and factoring in the roof pitch. This method works best for straightforward designs like gable roofs, where the pitch is easy to determine and apply in calculations.
Drone Measurement
Drones provide a modern and effective way to measure your roof. By capturing high-resolution images from multiple angles and using measurement apps, you can achieve detailed and accurate dimensions without climbing on the roof.
Professional Measurement Services
Many roofing companies include free measurement services as part of their estimate process. This is the most accurate option and keeps you safely on the ground while professionals roofers handle the calculations.
Common Measurement Mistakes to Avoid
Even experienced DIYers make measurement errors when learning how to measure a roof for shingles. Avoid these common pitfalls to ensure accurate calculations.
Not Accounting for Pitch
Roof pitch plays a big role in determining the actual surface area of a roof. Ignoring pitch multipliers can lead to significant underestimations. For example, a 6/12 pitch roof has approximately 12% more surface area than its flat horizontal footprint. Always account for pitch to ensure accurate material estimates. Along with precise measurements, choosing the best roof shingles ensures long-lasting protection and value.
Forgetting Complex Areas
Details like dormers, bay windows, and roof intersections are easy to overlook but can add significant square footage to the total roof area. Miscalculating or ignoring these features can result in running out of materials or underestimating costs. Be thorough when including these areas in your calculations. Overlooking roof edges and trim can also affect accuracy—issues often tied to fascia board replacement.
Inadequate Waste Factor
Ordering only the exact amount of materials calculated leaves no room for cutting errors, damaged pieces, or unexpected repairs. To avoid delays or shortages, always include a waste factor—typically 10–15%—in your material order, depending on the complexity of the project.
Ignoring Safety
Skipping proper safety equipment or attempting to take roof measurements in unsafe conditions can lead to avoidable accidents and serious injuries. Always prioritize safety by using the right tools, harnesses, and procedures to protect yourself and others on the job.
Mixing Up Units
Mixing up units of measurement—like confusing linear feet with square feet or neglecting to convert measurements into the proper units—can lead to major calculation errors. Always double-check that your measurements are consistent and in the correct units before proceeding.
Not Double-Checking
Measurement errors can quickly add up and compound through calculations, leading to costly mistakes. Always take the time to verify your measurements, review your math, and recalculate totals to ensure accuracy before placing orders.
When Do You Need a Roof Measurement?
The question of how to measure a roof for shingles isn’t just for homeowners doing a DIY project. They are a fundamental first step for almost any roofing project, big or small. Knowing your roof’s exact square footage, pitch, and dimensions is essential for getting accurate quotes and ensuring the project is completed efficiently.
Here are the most common scenarios that require a precise roof measurement:
- For a New Installation: Whether for new construction or a complete tear-off and re-installation, a detailed measurement ensures you order the exact amount of materials needed. This prevents costly waste from over-ordering and delays from under-ordering.
- For Roof Replacement: Even if a roof isn’t new, you’ll need its dimensions to plan for a full roof replacement. This measurement will be used to calculate material costs, labor hours, and the scope of work.
- For Repairs and Patches: While a small repair may not require a full roof measurement, understanding the dimensions of the affected area is critical. This helps a professional determine how much material is needed and how to properly integrate a patch without affecting the surrounding shingles.
- For Insurance Claims: After a storm or other severe damage, an accurate roof measurement is a key component of the insurance claim process. Having detailed registration of the damage and the reparation process is key to guaranteeing how to get insurance to pay for roof replacement. With proper guidance, you can ensure you get the full value of your claim. Accurate dimensions are also crucial for estimating repairs, such as understanding flat roof replacement cost.
- For Budgeting and Quotes: Before you even hire a contractor, having a basic measurement can help you get a preliminary cost estimate. This allows you to set a realistic budget and compare quotes more effectively.
How Roof Size Affects Material Choice and Cost
Understanding your roof’s measurements also helps you make smarter decisions about shingles. Beyond quantity, size plays a role in which products may be the best fit for your home.
| Roof Size | Material Options | Considerations |
| Under 1,500 sq. ft. | Architectural shingles, 3-tab shingles | Lower waste factor, cost-effective |
| 1,500–3,000 sq. ft. | Architectural shingles, metal options | Greater material variety, moderate cost |
| Over 3,000 sq. ft. | Designer shingles, premium products | Higher upfront cost, long-term value |
Larger roofs amplify the cost of labor, delivery, and cleanup. They also make proper measurement even more critical, especially when ordering bulk materials.
Trust Barkley-Jensen for Your Roofing Needs
Accurately measuring a roof for roofing shingles is an essential step in any roofing project, but it’s just the beginning. At Barkley-Jensen Roofing & Restoration, we go beyond measurements to deliver roofing solutions tailored to your home and built to withstand North Carolina’s unique weather conditions. With years of experience, unmatched craftsmanship, and a commitment to clear communication, our team has earned the trust of homeowners across central and eastern North Carolina.
When it comes to your roof, don’t leave anything to chance—trust the experts who put precision and customer satisfaction first. Contact Barkley-Jensen Roofing & Restoration today for your free roof measurement and estimate, and let us help you protect your home with a roof built to last.
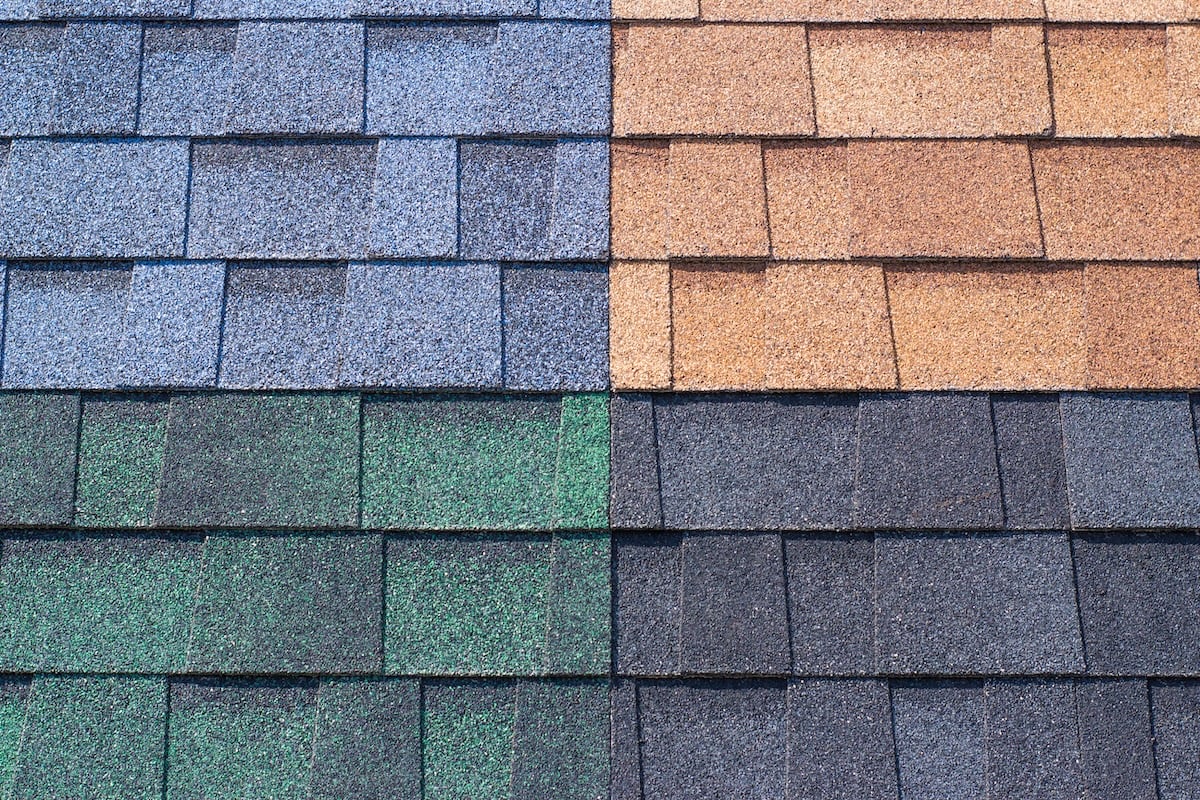
5 Best CertainTeed Shingle Colors for 2025 (Style Guide)
07.22.2025
8 Min Read
Choosing the right shingle color for your home can feel overwhelming. With CertainTeed’s extensive palette of options, homeowners often wonder which colors will best complement their home’s architecture while maintaining long-term appeal and value. The right choice goes beyond personal preference—it involves understanding how different CertainTeed shingle colors interact with your home’s exterior elements, the local climate, and current design trends.
This comprehensive guide explores the top CertainTeed shingle colors for 2025, examining how each option can transform your home’s curb appeal. We’ll cover:
- Understanding CertainTeed’s color collections collections
- Popular CertainTeed shingle colors that enhance different architectural styles
- Tips for coordinating shingle colors with siding, trim, and landscaping
- Long-term considerations for resale value and maintenance
🤔 Understanding CertainTeed’s Color Collections

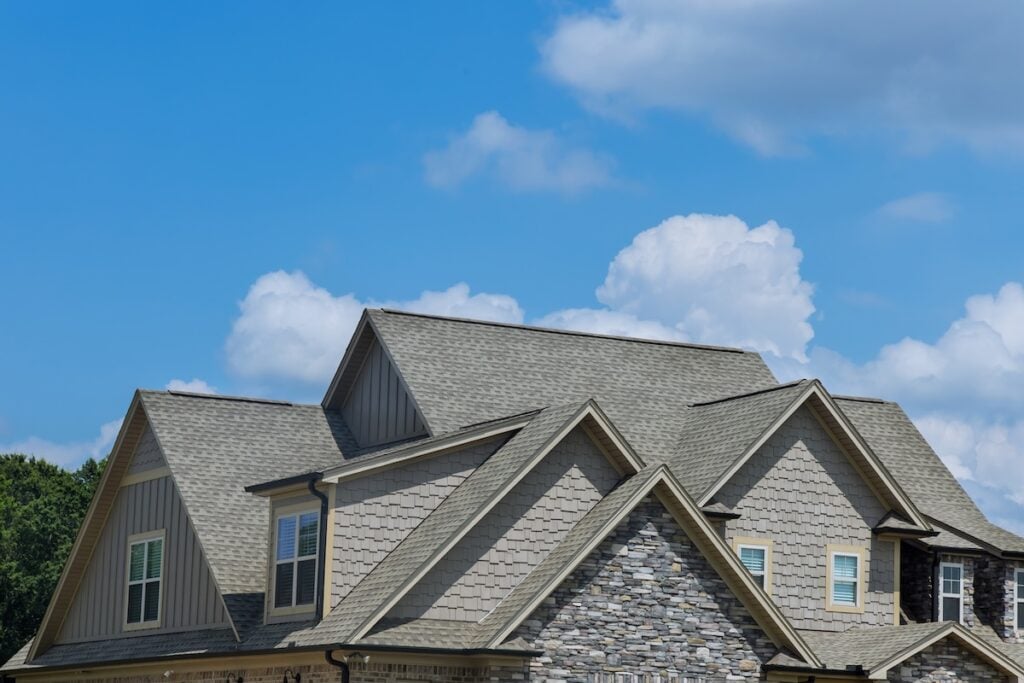
CertainTeed offers several distinct shingle lines, each with unique color palettes designed to suit different aesthetic preferences and performance requirements. The Landmark series remains their most popular architectural shingle option, featuring dimensional designs that mimic the appearance of premium materials at an accessible price point.
The Presidential Shake line delivers rustic charm with colors that replicate natural wood weathering patterns. These options work particularly well on homes with traditional or craftsman-style architecture. Meanwhile, the Grand Manor collection provides luxury aesthetics with sophisticated color blending that creates depth and visual interest. Whether you prefer Landmark or Grand Manor designs, our roofing in Cary experts can guide you in choosing the best CertainTeed shingle colors.
Color Durability and Technology
- Modern CertainTeed shingle colors use advanced granule technology to resist fading and maintain a vibrant appearance over time.
- The proprietary color-blending process ensures consistent coverage and minimizes streaking or uneven weathering found in older shingle formulations.
- Lighter CertainTeed shingle colors feature solar-reflective properties that reduce heat absorption, contributing to energy efficiency.
- These energy-efficient shingles are particularly beneficial in warmer climates, where cooling costs make up a significant portion of annual energy expenses.
⭐️ 5 Top CertainTeed Shingle Colors for 2025

Choosing the right shingle color can boost your home’s curb appeal and increase its value. CertainTeed’s top shingle colors for 2025 offer both style and durability, helping you make a smart, impactful choice for your roof.
1. Weathered Wood
Weathered Wood consistently ranks among the most requested CertainTeed shingle colors for its versatility and timeless appeal. This medium-toned brown option features subtle gray undertones that complement both traditional and contemporary home styles. The color works exceptionally well with cream, white, or natural stone siding materials. Homeowners who love the timeless look of Weathered Wood often rely on trusted roofing services in Raleigh for expert installation and repair.
Homeowners appreciate how Weathered Wood ages gracefully, developing a richer patina over time without appearing outdated. This option pairs beautifully with copper gutters and downspouts, creating an elevated look that enhances property value.
2. Charcoal Black
Bold and sophisticated, Charcoal Black creates dramatic contrast when paired with lighter siding colors. This deep shade works particularly well on modern farmhouse and contemporary architectural styles. The color’s intensity provides excellent definition for complex rooflines while maintaining a clean, streamlined appearance.
Charcoal Black CertainTeed shingles resist showing dirt and debris, making them an excellent choice for homes in wooded areas or regions with frequent storms. The color coordinates beautifully with white trim, creating a classic monochromatic scheme that never goes out of style.
3. Driftwood
This lighter brown option offers warmth without overwhelming a home’s exterior palette. Driftwood works exceptionally well with coastal and transitional architectural styles, providing an organic feel that complements natural landscaping. The color’s subtle variation creates visual depth while maintaining an understated elegance.
The lighter tone of Driftwood makes it suitable for homes in warmer climates, as it reflects more heat than darker alternatives. This practical benefit combines with aesthetic appeal to create a well-rounded choice for many homeowners.
4. Georgetown Gray
A sophisticated gray option that bridges the gap between light and dark choices, Georgetown Gray provides excellent versatility for various home styles. This color works particularly well with brick exteriors, stone accents, and both warm and cool siding tones and also offers excellent versatility, making it a popular choice for families who work with experienced roofing contractors in Knightdale.
Georgetown Gray’s balanced tone ensures it won’t clash with existing exterior elements while providing enough character to enhance curb appeal. The color’s popularity stems from its ability to complement both traditional and contemporary design elements seamlessly.
5. Burnt Sienna
For homeowners seeking a distinctive look, Burnt Sienna offers rich reddish-brown tones that create striking visual impact. This color works beautifully with earth-tone siding materials and natural stone accents. The warm undertones provide excellent coordination with autumn landscaping and wooden architectural details.
Burnt Sienna represents an excellent choice for homes in rustic or natural settings, where the color can complement surrounding vegetation and terrain. The unique tone helps homes stand out while maintaining harmony with natural surroundings.
👉 Coordinating CertainTeed Shingle Colors with Your Home’s Exterior

Successful color coordination requires considering how your chosen CertainTeed shingle colors will interact with existing exterior elements. Start by identifying the dominant colors already present on your home’s facade, including siding, trim, foundation materials, and any architectural accents. Nevertheless, sometimes an eye-sharpened roofer is needed to find the perfect color combination for your house of both for the roof, the siding, and all the other details. When planning for color coordination, it’s equally important to select the best roof shingles that match your siding and trim.
Working with Different Siding Materials
Vinyl siding offers the most flexibility when selecting CertainTeed shingle colors, as replacement or repainting remains relatively affordable. Brick exteriors require more careful consideration, as the natural variation in brick tones must complement your chosen shingle color. Stone and stucco provide neutral backdrops that work well with most CertainTeed color options.
Consider the undertones present in your siding material. Warm-toned sidings pair best with CertainTeed shingle colors that have similar warm undertones, while cool-toned materials coordinate better with grays and blues. This principle ensures visual harmony across your home’s entire exterior.
Trim and Accent Considerations
White trim provides the most versatile foundation for any CertainTeed shingle color choice. However, colored trim can create sophisticated coordination opportunities when selected carefully. Dark shingles often benefit from lighter trim colors that provide contrast and definition, while lighter shingle colors can accommodate both light and dark trim options.
Shutters, doors, and other accent elements should either complement or contrast with your chosen shingle color. Avoid selecting accent colors that compete with your shingles for attention, as this creates visual confusion rather than cohesive design.
Maintenance and Longevity of CertainTeed Shingle Colors
Different CertainTeed shingle colors require varying levels of maintenance to preserve their appearance over time. Understanding these requirements helps homeowners make informed decisions based on their willingness and ability to perform ongoing upkeep. Regular upkeep may also involve exterior details like fascia board replacement, which helps preserve curb appeal.
Cleaning and Upkeep
Lighter colored shingles may show algae, moss, or debris more readily than darker alternatives, requiring more frequent cleaning to maintain optimal appearance. However, professional cleaning services can effectively restore the original appearance of most CertainTeed shingle colors when performed correctly.
Dark colors hide dirt and debris effectively but may show fading more dramatically if it occurs. Regular inspection helps identify potential issues early, allowing for preventive measures that extend color life.
Weather Resistance
CertainTeed’s manufacturing process ensures excellent weather resistance across all color options. However, certain colors may show weathering patterns differently based on their composition and reflective properties. Understanding these characteristics helps set appropriate expectations for long-term appearance.
Storm damage affects all shingle colors similarly in terms of structural performance, but repair visibility can vary based on color choice. Common colors often provide easier matching for repair work, while unique tones may require more careful coordination.
GAF Shingles: A Worthy CertainTeed Alternative
While CertainTeed offers an impressive palette of shingle colors and styles, GAF is a leading alternative that also provides a wide range of aesthetic and functional benefits. Both brands offer popular colors like Weathered Wood, Charcoal, and Driftwood, and both CertainTeed and GAF shingles are engineered with advanced technologies to resist everything from algae growth to high winds. By exploring both options, you can find a perfect match that complements your home’s aesthetic and architectural design while ensuring long-term durability. To get a better look at the variety of GAF shingles colors, you can find more details on GAF’s offerings in our blog post. Explore the range of GAF shingle colors that rival CertainTeed’s most popular tones.
Trust Barkley-Jensen for Your CertainTeed Shingle Installation
At Barkley-Jensen Roofing & Restoration, we know that your roof is more than just a functional necessity—it’s a key part of your home’s style, protection, and value. With years of experience and a deep understanding of CertainTeed shingle colors, our certified professionals are here to guide you every step of the way, from color selection to expert installation.
When considering the best shingles in 2025, it’s clear that top brands like CertainTeed and GAF continue to lead the industry. These high-performing shingles are rated for exceptional durability, weather resistance, and long-lasting aesthetic appeal. Ultimately, the best choice depends on your specific needs, budget, and local climate, but investing in a premium product from a reputable manufacturer ensures superior long-term performance and protection.
Trust our team to deliver exceptional results that enhance your home’s curb appeal and provide the long-lasting durability you deserve. Ready to get started? Contact Barkley-Jensen Roofing & Restoration today to schedule your consultation and let us help you bring your vision to life!

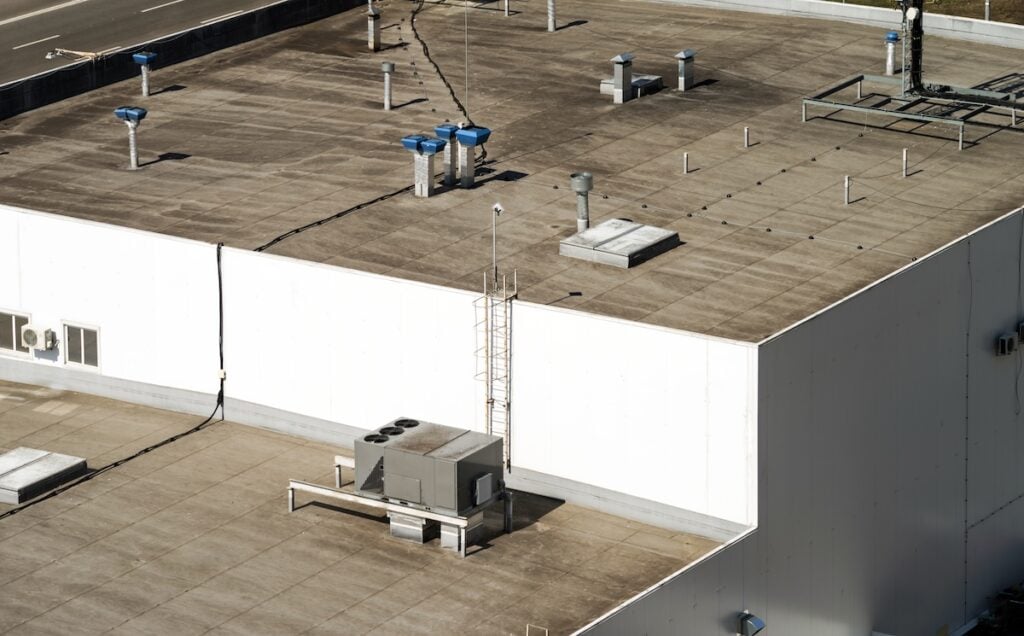
Commercial Roof Inspection Guide: Schedule, Document & Protect
07.15.2025
9 Min Read
A commercial roof represents one of your business’s most significant investments, yet many property owners overlook regular inspections until problems become costly emergencies. Your roof protects valuable equipment, inventory, and employees while maintaining the operational integrity of your facility. Understanding how to properly schedule, document, and maintain a commercial roof inspection can save thousands in repair costs and prevent devastating business interruptions.
This comprehensive guide will walk you through everything you need to know about commercial roof inspections, from establishing inspection schedules to working with qualified professionals who can keep your building protected year-round. Here’s what we’ll cover:
- Understanding commercial roof inspection basics
- 8 steps to a comprehensive commercial roof inspection
- Working with professional inspection services
- Common problems identified during inspections
🔎 Understanding Commercial Roof Inspection Basics

Commercial roofs face unique challenges compared to residential roofs, including heavy equipment installations, HVAC systems, satellite dishes, and constant foot traffic from maintenance crews. These stress points demand specialized attention during inspections. A thorough commercial roof inspection goes beyond the visible surface, evaluating membrane integrity, flashing conditions, drainage systems, penetration seals, and structural elements critical to your roof’s performance.
Weather exposure is another key factor, as commercial buildings often have large, low-slope surfaces that are more prone to water pooling, wind uplift, and thermal expansion issues. Regular inspections can catch these problems early, preserving your building’s integrity. Additionally, the inspection process is tailored to your specific roof type—whether it’s a built-up roof, modified bitumen system, single-ply membrane, or metal roofing—ensuring that the proper evaluation techniques and maintenance approaches are applied..
When to Schedule Your Commercial Roof Inspection
- Schedule bi-annual roof inspections in spring and fall for safe and thorough evaluations and many property managers trust local roofing services in Cary to prepare their buildings for seasonal changes.
- Spring inspections address winter damage like ice dams, membrane splits, and drainage issues.
- Fall inspections prepare for winter by clearing debris, checking sealants, and securing loose materials.
- Request immediate inspections after severe weather events such as hailstorms, high winds, or heavy snow.
- Inspect roofs after building modifications like new HVAC installations or satellite dishes to ensure structural integrity.
- Increase inspection frequency for aging roofs: quarterly for those over 10 years old, annual for newer systems.
✅ 8 Steps to a Comprehensive Commercial Roof Inspection

Regular commercial roof inspections help prevent costly repairs and extend the lifespan of your roof. Identifying issues early ensures the safety of your building and avoids disruptions to your business operations.
1. Pre-Inspection Planning and Safety Setup
Professional inspectors begin every job with thorough preparation to ensure safety and accuracy. This starts with reviewing all relevant documentation, including building plans, previous inspection reports, and warranty documents, to gain a complete understanding of the roof’s design, materials, and repair history. Inspectors also consider the building’s age, climate conditions, and any reported issues to tailor their inspection approach. Safety is a top priority during this phase, so they establish comprehensive safety protocols, such as proper ladder placement, the use of fall protection equipment like harnesses and anchor points, and emergency response plans. Every detail is carefully considered to minimize risks for both workers and the building’s occupants.
2. Visual Ground-Level Assessment
Before stepping onto the roof, inspectors conduct a ground-level evaluation of the building’s exterior. They look for visible signs of wear and tear, such as missing shingles, cracked or damaged gutters, sagging eaves, or any structural irregularities that could indicate larger underlying issues. This initial assessment helps them establish a baseline of the roof’s condition and identify potential problem areas that require closer attention during the roof-level inspection. It also allows inspectors to note any environmental factors, such as overhanging trees, debris, or nearby structures, that could impact the roof’s performance over time.
3. Roof Surface and Membrane Evaluation
Once they safely access the roof, inspectors perform a detailed, systematic examination of the roof surface and membrane. They carefully check for signs of damage such as splits, punctures, blisters, or other issues that compromise the roof’s integrity and waterproofing ability. High-traffic areas, such as walkways and zones around rooftop equipment, are given extra attention since they are more prone to wear. Inspectors also examine seams, material transitions, and termination points where different materials meet, as these are common areas for leaks. Their goal is to catch even minor issues before they escalate into costly repairs or even roof replacements.
4. Flashing and Penetration Inspection
Flashing systems, which are critical for preventing water intrusion around edges and roof penetrations, are carefully inspected for durability and effectiveness. Inspectors visually examine all flashing materials, including metal and rubber, to detect signs of corrosion, separation, or improper installation. They conduct physical tests, such as checking the flexibility and adhesion of caulk lines, to ensure seals are intact and functioning properly. Special emphasis is placed on areas around chimneys, vents, skylights, and HVAC equipment, where flashing is often exposed to greater stress and wear. Proper overlap and alignment are also verified to ensure long-term water resistance.
5. Drainage System Assessment
An effective drainage system is essential to prevent water pooling, which can damage the roof and lead to leaks. Inspectors evaluate all drainage components, including gutters, downspouts, roof drains, and overflow systems, to ensure they are clear and functioning as intended. Minor blockages, such as leaves or debris, are cleared during the inspection to restore proper water flow. Inspectors also look for signs of standing water, rust, or sagging in the drainage infrastructure, which could indicate system inefficiencies. They identify areas where water is not draining correctly and recommend improvements to optimize water management. Clogged drainage systems often require repair or replacement, so knowing the gutter installation cost can help you budget for long-term maintenance.
6. Equipment and Structural Review
Rooftop equipment, such as HVAC units, satellite dishes, and solar panels, undergoes a thorough inspection to ensure proper installation and seal integrity. Inspectors check for loose or improperly mounted equipment that could damage the roof surface over time. They also evaluate seals around penetrations to ensure they are watertight and not contributing to leaks. Additionally, the roof’s structural components, including decking, support beams, and parapet walls, are inspected for signs of damage, deterioration, or structural strain. This review helps ensure that the roof can safely support its load and withstand environmental stresses.
7. Interior Inspection for Water Damage
A complete roof inspection includes assessing the building’s interior for signs of water infiltration. Inspectors look for active leaks, water stains, mold growth, or other moisture-related issues on ceilings, walls, and insulation. They use tools like moisture meters and thermal imaging cameras to detect hidden water damage that might not be immediately visible to the naked eye. By correlating interior issues with exterior findings, inspectors can identify the exact source of leaks and provide targeted repair recommendations. This step is crucial for preventing further damage and maintaining the building’s structural integrity. Accurate reporting depends on precise calculations, and resources like our guide on how to measure a roof for shingles can also support inspection planning.
8. Documentation and Reporting
After completing the inspection, professional roofers compile a detailed report that summarizes their findings. This report includes clear photographs of problem areas, descriptions of identified issues, and recommendations for repairs or maintenance. Each issue is prioritized based on severity, helping property owners plan their maintenance and repair schedules effectively. In addition, the report may include cost estimates and projected timelines for repairs, enabling better budgeting and decision-making. High-quality documentation ensures transparency and serves as a valuable reference for future inspections and maintenance efforts.
👨🔧 Working with Professional Inspection Services

Selecting qualified inspection professionals significantly impacts the value and accuracy of your roof evaluation. Look for companies with proper licensing, insurance coverage, and experience with your specific roof type and building style.
Certified Inspectors Ensure Quality
Certified inspectors bring specialized knowledge of commercial roofing systems, building codes, and industry best practices. Many roofing manufacturers require certified inspectors to maintain warranty coverage on their products.
The Importance of Local Expertise
Local expertise is crucial when choosing inspection services. Companies familiar with your area’s weather, building codes, and common roof issues provide more accurate assessments than contractors without regional experience.
Insurance Requirements for Inspectors
Insurance considerations play a role in selecting an inspector. Some insurance companies have preferred contractor lists or require specific certifications for claims processing. Ensure your chosen inspector meets these requirements before scheduling.
Balancing Cost and Thoroughness
When considering costs, aim to balance thoroughness with your budget. While detailed inspections may cost more upfront, they can identify issues early, saving money on expensive emergency repairs later.
❗️ Common Problems Identified During Inspections
Understanding typical commercial roof problems helps property owners recognize the value of professional inspections and prioritize maintenance efforts effectively.
Water Infiltration
Water infiltration is one of the most common and damaging issues inspectors find. Even small leaks can lead to interior damage, mold growth, and structural deterioration if not addressed. Regular inspections help detect problems early and prevent costly repairs.
Membrane Deterioration
All commercial roofing systems face membrane deterioration over time due to weather exposure and aging. Professional inspectors can differentiate between normal wear and accelerated damage caused by installation issues or material failure. Over time, membrane deterioration may require full replacement, making it useful to understand the flat roof replacement cost before problems escalate.
Drainage Problems
Debris buildup in gutters and drains often leads to drainage problems. Standing water speeds up membrane deterioration and adds structural stress, which can cause significant damage during heavy rain or snow.
Equipment-Related Damage
Roof materials are frequently damaged by HVAC contractors, satellite installers, or maintenance crews. Regular inspections catch these issues early, preventing water infiltration and protecting warranty coverage.
Wind Damage
Wind damage can be subtle but harmful, especially for single-ply membrane systems that depend on strong adhesion. Inspectors can spot loose materials that might tear away during future storms, ensuring the roof remains weather-resistant.
🏢 Trust the Roofing Experts for Your Commercial Inspection Needs
At Barkley-Jensen Roofing & Restoration, we take pride in being the trusted partner for all your commercial roofing needs. With years of experience, a customer-first approach, and a deep understanding of the unique challenges North Carolina properties face, our team delivers reliable, professional roof inspections that protect your investment. For businesses in the Triangle area, our roofing in Knightdale team provides the local expertise you can count on to keep your property secure.
From detailed evaluations and clear communication to working directly with insurance companies, we go above and beyond to ensure your roofing concerns are handled with care and expertise. Don’t leave your commercial property to chance—schedule your roof inspection with Barkley-Jensen Roofing & Restoration today and experience the peace of mind that comes with working with the best. Contact us now to get started!
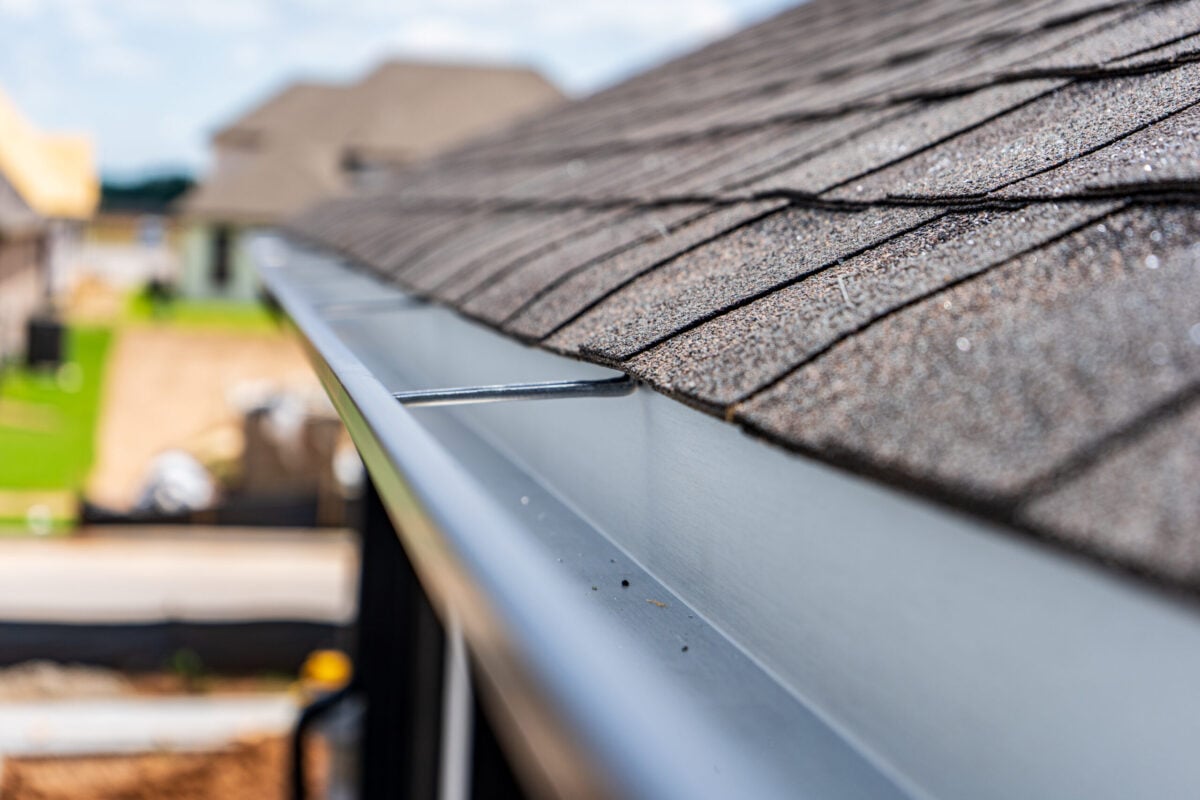
5 Standard Gutter Sizes for Your Roof Drainage System (2025)
07.08.2025
9 Min Read
Selecting the right gutter sizes for your home is one of the most important decisions you’ll make for your roof drainage system. The wrong size can lead to water damage, foundation issues, and costly repairs down the road. The right size protects your investment and keeps your home safe from water-related problems.
This comprehensive guide covers everything you need to know about gutter sizes, from standard dimensions to factors that influence your choice. You’ll learn how to calculate the right size for your home, understand different gutter profiles, and discover when to call in the professionals.
Here’s what we’ll cover:
- Understanding standard gutter sizes and their applications
- Key factors that determine the right gutter size for your home
- How to calculate gutter capacity based on roof area and rainfall
- Different gutter profiles and their size variations
- Installation considerations that affect gutter performance
❗️ Understanding Standard Residential Gutter Sizes
Most residential properties use gutters that fall into three main size categories. Each serves different home types and drainage requirements.
Five-inch gutters are the standard choice for most residential applications, offering a cost-effective, widely available solution for homes with roofs up to 5,500 square feet in areas with typical rainfall. For homes needing greater capacity, such as larger properties, steep roofs, or regions with heavy rainfall, 6-inch gutters provide enhanced water-carrying ability, handling roofs up to 7,900 square feet effectively, though they come with higher costs. On the other hand, 4-inch gutters, while less common, are still used for specialty applications like smaller structures (sheds or garages) or older homes where aesthetics or limited roof areas call for smaller systems.
Key Factors That Determine Your Ideal Gutter Size
Several important factors influence which gutter size will work best for your specific situation. Understanding these elements helps ensure optimal performance from your drainage system.
- Roof Area and Pitch: The total square footage and pitch of your roof determine the water volume your gutters must handle. Steeper roofs create faster water flow, requiring higher-capacity gutters. Low-sloped or flat roofs, on the other hand, require a different approach to ensure proper drainage. Calculate the roof area by adjusting the footprint for pitch (e.g., a 6/12 pitch has a factor of 1.12).
- Local Climate and Rainfall: Heavy, intense rainfall requires larger gutters to handle the volume. Use rainfall intensity data from the National Weather Service to guide sizing. While 5-inch gutters may suffice for average rain, 6-inch systems offer better protection during downpours.
- Roof Design Complexity: Complex rooflines with valleys, dormers, and intersections channel more water to specific areas, often requiring larger gutters or additional downspouts. Simple roof designs distribute water evenly, making standard sizing more effective.
- Trees and Debris: Homes with heavy tree coverage face more debris and clogging risks. Larger gutters handle debris better, reduce maintenance, and are compatible with gutter guards for easier long-term care.
🔎 5 Standard Gutter Sizes for Your Roof Drainage System

Understanding the specific dimensions and applications of each standard gutter size helps you make an informed decision for your home’s drainage needs.
1. 4-Inch Gutters (Rare Residential Use)
- Dimensions: These gutters measure 4 inches wide and are typically 3 inches deep. They are smaller than standard residential gutters, making them a unique option for specific applications.
- Capacity: Despite their compact size, 4-inch gutters can handle runoff from up to 2,500 square feet of roof area, which is sufficient for smaller buildings or structures with limited roof coverage.
- Best for: Ideal for small structures like sheds, detached garages, or decorative accents on historic homes. They are also commonly used in restoration projects where maintaining the original aesthetic is critical.
- Cost: These are the cheapest option in terms of materials. However, their limited availability can make them harder to source, and installation may require specialized expertise in certain cases.
2. 5-Inch Gutters (Standard Residential)
- Dimensions: At 5 inches wide and typically 4 inches deep, these gutters strike the perfect balance for most residential properties. They are the standard size used in the majority of homes today.
- Capacity: 5-inch gutters can manage water runoff from up to 5,500 square feet of roof area, making them capable of handling moderate to heavy rainfall in most regions.
- Best for: Perfect for single-story and two-story homes in areas with average rainfall. They work well with most roof designs and are a reliable, economical choice for homeowners.
- Cost: Widely available and cost-effective, 5-inch gutters offer the best value for the average homeowner. Installation is straightforward, and materials are affordable and easy to source.
3. 6-Inch Gutters (Heavy-Duty Residential)
- Dimensions: With a width of 6 inches and a depth of 4-5 inches, these gutters are larger and more robust than the standard 5-inch option. They are designed to handle a greater volume of water.
- Capacity: These gutters can accommodate water runoff from up to 7,900 square feet of roof area, making them suitable for homes with large or steep roofs and areas with heavy rainfall.
- Best for: Best for large homes, multi-story houses, or properties with steep-pitched roofs where water runoff is significant. They are also an excellent choice for regions prone to intense storms and heavy downpours.
- Cost: While they have a higher upfront cost due to their size and material requirements, the performance benefits often outweigh the expense, especially in areas with extreme weather.
4. 7-Inch and 8-Inch Gutters (Commercial/Specialty)
- Dimensions: These oversized gutters measure 7 to 8 inches wide and can have depths exceeding 5 inches. They are designed for maximum water flow and durability in demanding conditions.
- Capacity: With the ability to handle massive amounts of water, these gutters are suitable for roofs covering very large residential properties or commercial buildings.
- Best for: Ideal for commercial roofing projects such as warehouses, office buildings, and schools. They are also used in areas that experience extreme weather conditions, like heavy snowfall or torrential rain.
- Cost: These gutters are custom-made and typically require professional installation due to their size and weight. The cost is higher than standard residential options, but their durability and performance make them worth the investment for large-scale applications.
5. Half-Round Gutters (Variable Sizing)
- Dimensions: Available in diameters of 5 inches and 6 inches, half-round gutters have a U-shaped design that makes them distinct from the more common K-style gutters.
- Capacity: While they have a slightly lower capacity than K-style gutters of the same width, their open design allows for smooth water flow and easier maintenance in many cases.
- Best for: These gutters are particularly suited for historic or architecturally unique homes where their classic design adds to the aesthetic appeal. They are often chosen for their timeless look and compatibility with traditional building styles.
- Cost: Half-round gutters are generally more expensive than standard K-style options due to their specialized design and limited availability. Installation may also cost more since they require specific brackets and mounting techniques.
Gutter Profile Types and Size Variations
Different gutter profiles offer varying capacities even within the same nominal size category. Understanding these differences helps optimize your drainage system performance.
K-Style Gutters
K-style gutters feature a decorative front edge that resembles crown molding. They’re the most popular choice for modern homes due to their attractive appearance and efficient water-carrying capacity.
The flat back allows for easy mounting against fascia boards, while the bottom shape maximizes water volume. K-style gutters typically hold about 40% more water than half-round gutters of the same width.
Half-Round Gutters
Half-round gutters offer a classic, traditional appearance that complements older architectural styles. While they carry less water than K-style gutters, they’re easier to clean and less prone to debris accumulation.
These gutters work well for homes where aesthetics take priority over maximum capacity. They’re also preferred for historic renovations where maintaining architectural authenticity is important.
Box Gutters
Box gutters are built into the roof structure rather than hanging from the edge. They’re typically custom-sized for specific applications and offer superior capacity for challenging drainage situations.
Professional design and installation are essential for box gutters due to their integration with the roof system. They’re most common on commercial buildings but occasionally used for residential applications.
👉 Calculating the Right Gutter Size for Your Home

Proper gutter sizing requires careful calculation based on your specific roof characteristics and local weather patterns. When correctly handled by experienced roofers, this process ensures adequate capacity for effective water management.
Measuring Your Roof Area
Start by calculating the total roof area that will drain into each gutter section. Measure the length and width of each roof plane, then multiply these dimensions to get square footage.
For pitched roofs, use the actual roof surface area rather than the building footprint. In that case, if you want to learn more about how to measure a roof for shingles, for example, you can find all the information on our website. You can then multiply the footprint area by the appropriate pitch factor: 1.05 for 4/12 pitch, 1.12 for 6/12 pitch, or 1.25 for 9/12 pitch.
Determining Rainfall Intensity
Check local weather data for maximum expected rainfall intensity, typically measured in inches per hour. Most areas use either a 10-year or 100-year storm intensity for gutter sizing calculations.
The National Weather Service provides this data through their precipitation frequency estimates. Higher intensity areas require larger gutters or more frequent downspouts to handle peak flows.
Applying the Gutter Sizing Formula
Use this formula to determine minimum gutter size: Roof Area × Rainfall Intensity × 0.623 = Required Gutter Capacity (gallons per minute).
Compare this result to manufacturer capacity ratings for different gutter sizes. Always round up to the next larger size to provide a safety margin for extreme weather events.
👨🔧 Trust the Experts at Barkley-Jensen for Your Gutter Needs
At Barkley-Jensen Roofing & Restoration, we understand that every North Carolina home has unique drainage requirements. Our team of roofers brings years of experience helping homeowners select and install gutter systems that handle our region’s challenging weather patterns. From initial assessment through final installation, we focus on delivering solutions that provide lasting protection for your property.
Ready to upgrade your home’s drainage system with properly sized gutters? Contact Barkley-Jensen Roofing & Restoration today for a comprehensive assessment and detailed proposal. Let our expertise guide you toward the perfect gutter solution for your North Carolina home.