


Barkley-Jensen Roofing & Restoration

How Long Does a Metal Roof Last? (Roofing Material Guide)
07.01.2025
7 Min Read
When you’re considering a new roof for your home, you want to make an investment that will protect your property for years to come. Metal roofing has become increasingly popular among North Carolina homeowners, and for good reason. But the question remains: how long does a metal roof last?
A well-installed metal roof can last 40 to 70 years or more, depending on the type of metal used and environmental factors. This impressive lifespan makes metal roofing one of the most durable options available today, far outlasting traditional asphalt shingles that typically need replacement every 15 to 25 years.
This comprehensive guide will walk you through:
- Different types of metal roofing materials and their lifespans
- Key factors that influence how long your metal roof will last
- Signs that indicate your metal roof may need attention
- Cost considerations over the roof’s lifetime
🔎 Types of Metal Roofing Materials and Their Lifespans
The type of metal you choose for your roof plays a significant role in determining how long it will last. Each material offers different benefits and durability levels.
- Steel Roofing: The most popular choice for metal roofing, steel lasts 30–50 years (galvanized) or 40–60 years (galvalume). Protective coatings like zinc and paint improve durability and resistance to rust and weathering.
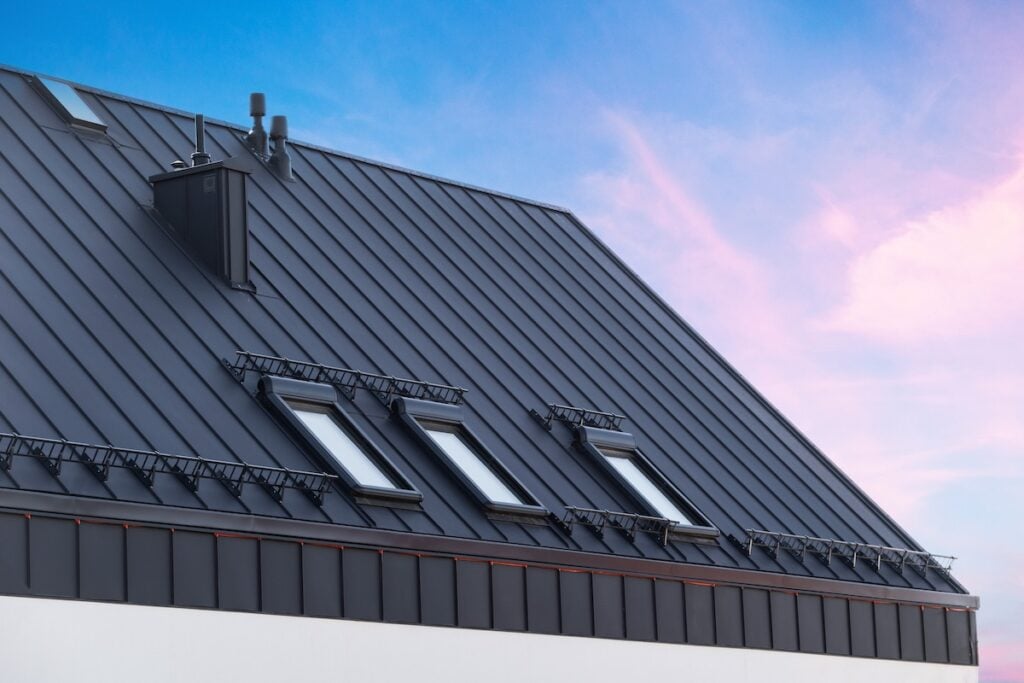
- Aluminum Roofing: Ideal for coastal areas due to its corrosion resistance, aluminum roofs last 40–70 years. Lightweight and low-maintenance, but may dent from hail or debris.
- Copper Roofing: A premium option, copper roofs can last over 100 years. They develop a natural patina for added protection, offering exceptional longevity despite higher upfront costs.
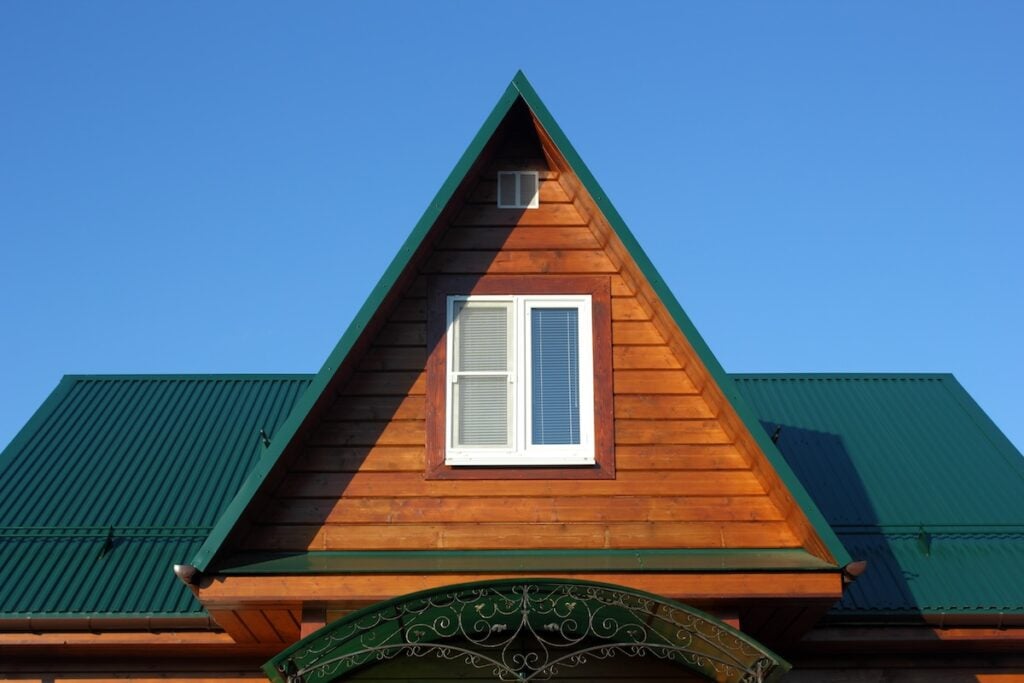
- Zinc Roofing: With lifespans of 80–100+ years, zinc roofs are durable and eco-friendly. They develop a protective patina and self-heal small scratches, making them highly resilient.
The best metal roof for your property depends on your building type and specific needs. Homes often benefit from cost-effective options like steel or aluminum, while commercial properties may prioritize durability and efficiency with zinc or copper. Pairing the right material with a regular commercial roof inspection ensures lasting protection and maximum value over time.
❗️ 6 Factors That Affect Metal Roof Lifespan
Several important factors influence how long your metal roof will actually last. Understanding these elements helps you maximize your investment and plan for proper maintenance.
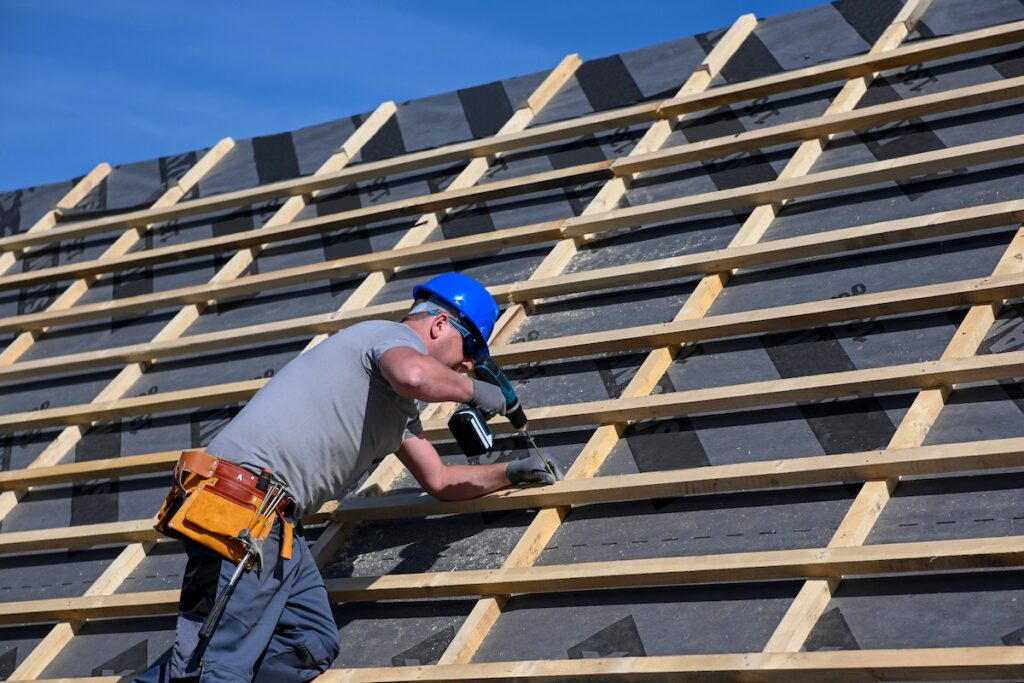
1. Installation Quality
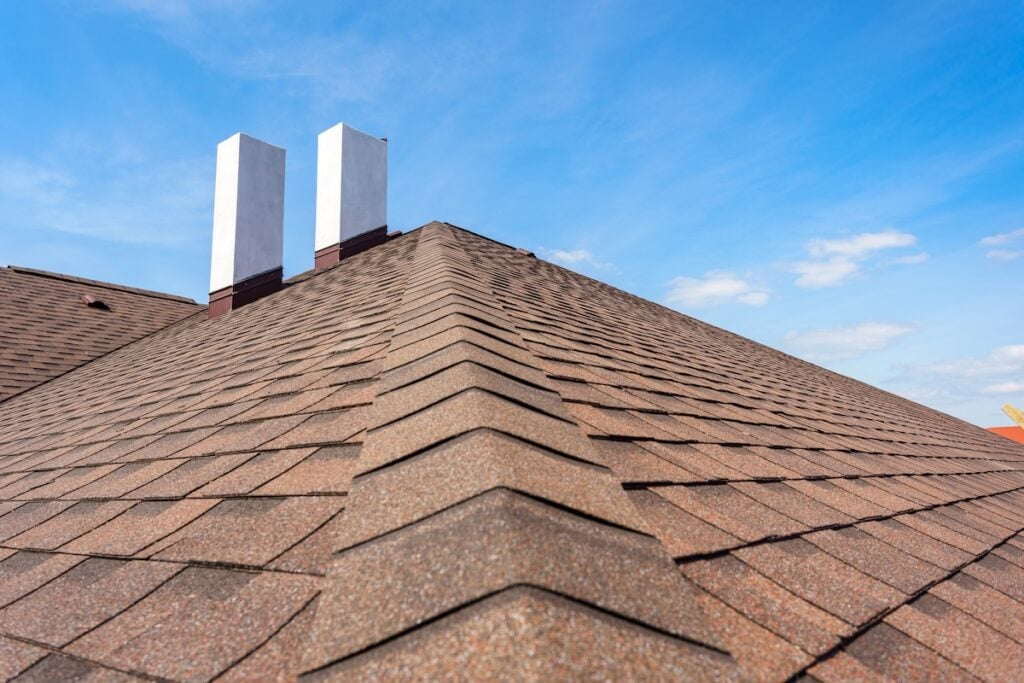
Installation by qualified roofers is crucial for achieving the full lifespan potential of your metal roof. Proper installation includes correct fastening techniques, adequate ventilation, and appropriate flashing around penetrations like chimneys and vents.
Poor installation can lead to premature failure, even with high-quality materials. Working with experienced roofing contractors who understand metal roofing systems ensures your roof will perform as expected throughout its intended lifespan.
2. Climate and Weather Conditions
Your local climate significantly impacts how long your metal roof will last. North Carolina’s varied weather patterns, including high humidity, occasional severe storms, and temperature fluctuations, can affect different metal roofing materials in various ways.
Coastal areas face additional challenges from salt air, which can accelerate corrosion in some metals. Inland areas may experience more extreme temperature variations that cause expansion and contraction cycles in roofing materials.
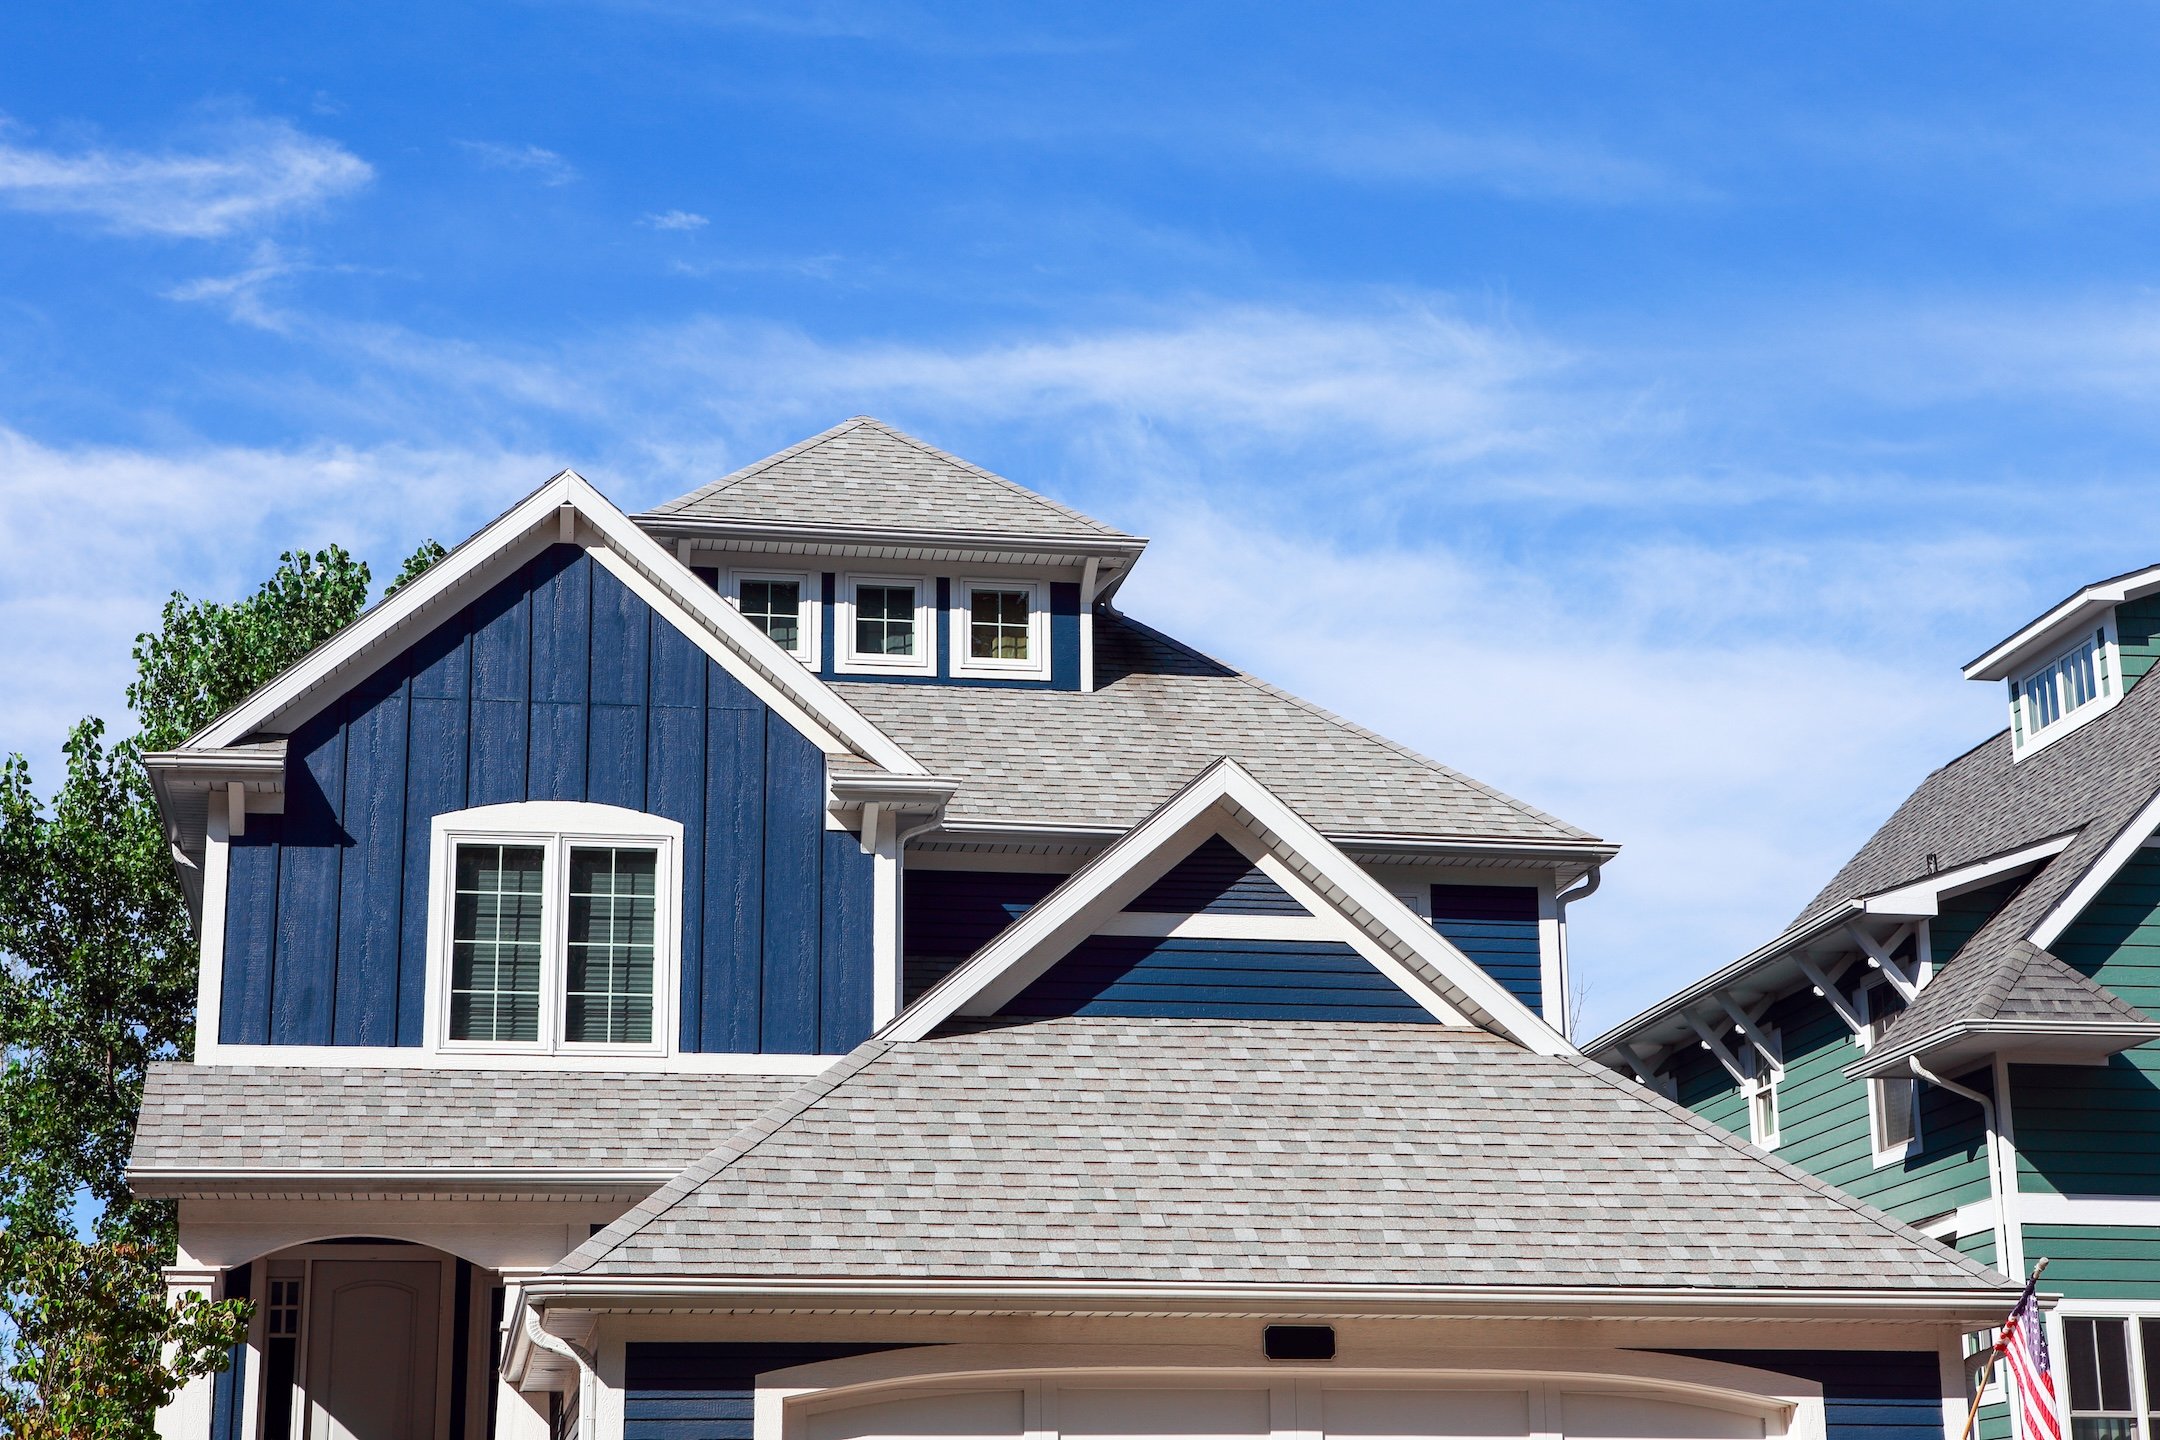
3. Roof Pitch and Drainage
Proper water drainage is essential for metal roof longevity. Steeper roof pitches naturally shed water more effectively, reducing the risk of standing water and potential corrosion issues. Adequate gutter systems and proper slope design prevent water from pooling on the roof surface. Well-installed gutters not only protect the roof but also direct rainwater safely away from the foundation, preserving your property’s structural integrity over time.
Flat or low-slope metal roofs require special attention to seaming and drainage to achieve their full lifespan potential. Standing water can accelerate wear and lead to premature failure if not properly addressed, making gutter maintenance and drainage planning especially important.
4. Maintenance Practices
Regular maintenance significantly extends metal roof lifespan. This includes cleaning debris from gutters, removing accumulated leaves or branches, and inspecting for loose fasteners or damaged areas.
Annual inspections by eye-sharpened roofing contractors will help identify minor issues before they become major problems. Prompt attention to small repairs can prevent more extensive damage and help your metal roof reach its full lifespan potential.
5. Paint and Coating Systems
The quality of protective coatings on your metal roof directly affects its longevity. High-quality paint systems with multiple layers provide better protection against UV rays, moisture, and temperature extremes.
Premium coating systems may add to the initial cost but significantly extend the roof’s lifespan. Some advanced coatings offer warranties of 30 years or more, reflecting their durability and protective capabilities.
6. Ventilation Systems
Proper attic ventilation prevents moisture buildup that can lead to condensation on the underside of metal roofing. Adequate ventilation also helps regulate temperature extremes that cause expansion and contraction cycles.
Good ventilation systems include both intake and exhaust vents that create consistent airflow. This circulation helps prevent ice dams in winter and reduces heat buildup in summer, both of which can affect roof longevity.
⚠️ Signs Your Metal Roof Needs Attention
Even durable metal roofs eventually show signs of aging. Recognizing these indicators helps you address issues before they become major problems.
Visible Corrosion or Rust
While modern metal roofing materials are highly resistant to corrosion, rust can still develop over time, especially around fasteners or damaged areas. Early-stage rust can often be treated and sealed to prevent further deterioration.
Extensive rust or corrosion may indicate that the roof is approaching the end of its useful life or that there are underlying moisture issues that need attention.
Loose or Missing Fasteners
Metal roofing systems rely on proper fastening to maintain their weather resistance. Loose or missing fasteners can allow water infiltration and wind damage. Regular inspection and maintenance of fasteners helps preserve the roof’s integrity.
Coating Deterioration
The protective coating on metal roofing gradually degrades due to UV exposure and weathering. Chalking, fading, or peeling of the coating system indicates that recoating may be necessary to maintain the roof’s protective qualities.
Water Infiltration
Any signs of water leaks should be addressed immediately. Metal roofs are designed to be watertight, so leaks typically indicate problems with seams, fasteners, or flashing that require professional attention.
💵 Cost Considerations Over Time

While metal roofing requires a higher initial investment than asphalt shingles, its longevity makes it cost-effective over time. Understanding the long-term financial benefits helps justify the upfront expense.
Initial Investment vs. Long-Term Value
A metal roof typically costs two to three times more than asphalt shingles initially. However, when you consider that metal roofing can last two to three times longer than asphalt, the cost per year of service is often comparable or better.
Additionally, metal roofing often increases property value and may qualify for insurance discounts due to its durability and fire resistance.
The Role of Professional Installation in Longevity
The quality of a metal roof’s installation is a major factor in how long it lasts. This includes using the right roofing tools for the job. Specialized equipment is essential for proper cutting, fastening, and sealing, ensuring every component is installed with precision to withstand decades of weather.
Energy Efficiency Benefits
Metal roofing’s reflective properties can reduce cooling costs during hot summer months. These energy savings accumulate over the roof’s lifetime, contributing to the overall value proposition.
Some metal roofing systems qualify for energy efficiency tax credits, further improving the financial benefits of this roofing choice.
Reduced Maintenance Costs
Metal roofs generally require less maintenance than other roofing materials over their lifetime. This reduced maintenance requirement translates to lower ongoing costs and fewer disruptions to your daily life.
🏡 Trust Barkley-Jensen for Your Metal Roofing Needs
A metal roof is a long-term investment that can provide decades of durability, energy efficiency, and protection for your home—especially when installed and maintained by experienced professionals. At Barkley-Jensen Roofing & Restoration, we pride ourselves on delivering top-quality craftsmanship and personalized service tailored to your needs.
Our deep understanding of North Carolina’s unique climate, combined with our commitment to transparency and customer satisfaction, makes us the team you can trust for all your roofing needs. Ready to get started? Contact us todayfor a consultation and estimate, and let us help you protect your home with a roof built to last.
7 GAF Shingle Colors to Consider for 2025 (Roofing Guide)
06.24.2025
9 Min Read
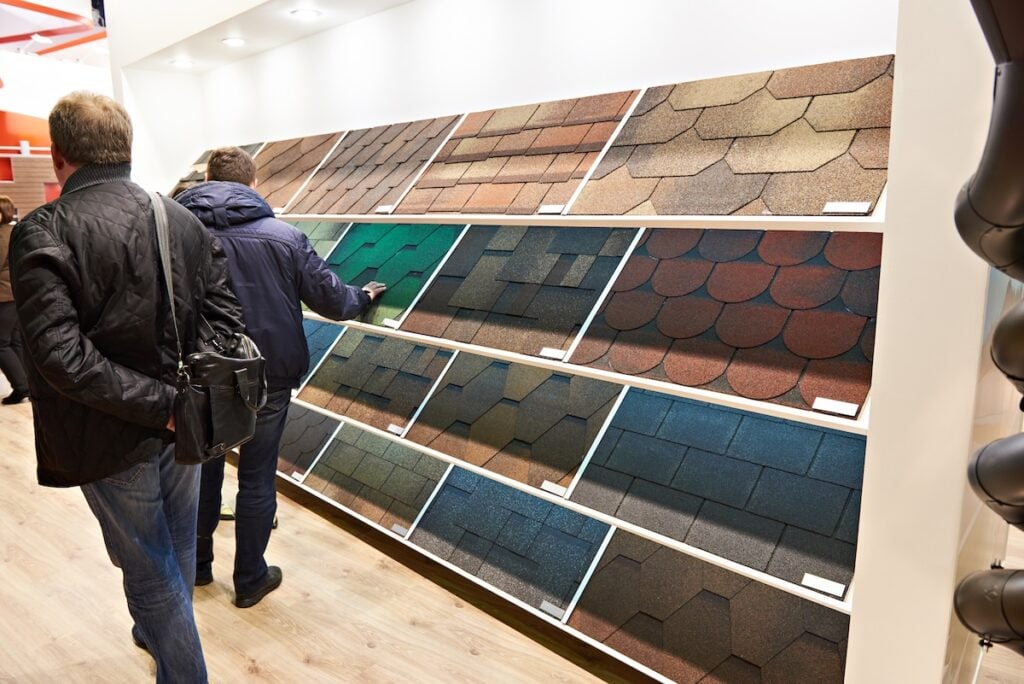
Choosing the right shingle color can transform your home’s curb appeal and increase its value. As we head into 2025, GAF continues to lead the roofing industry with an impressive range of shingle colors that blend style, durability, and energy efficiency. Whether you’re planning a complete roof replacement or simply exploring your options, understanding the latest GAF shingle colors will help you make an informed decision that complements your home’s architecture and your personal style.
This comprehensive guide covers everything you need to know about GAF shingle colors for 2025, including trending options, factors to consider when choosing colors, and how different shades can impact your home’s energy efficiency and resale value. We’ll also explore GAF’s most popular color collections and provide practical tips for selecting the perfect shade for your North Carolina home.
- Understanding GAF’s color collections and options
- 7 top GAF shingle colors to consider for 2025
- How GAF shingle colors affect home value
- Maintenance and longevity of different GAF shingle colors
🔎 Understanding GAF’s Color Collections and Options
GAF offers an extensive palette of shingle colors across its various product lines, each designed to meet different aesthetic preferences and functional needs. Their color options span from classic neutrals to bold statement shades, ensuring there’s a perfect match for every home style.
The company organizes their colors into several distinct collections, including Timberline HD, Timberline Ultra HD, and Grand Sequoia lines. Each collection features unique color blends that create depth and dimension on your roof. GAF’s advanced manufacturing process allows for multi-tonal color combinations that mimic natural materials while providing superior weather resistance.
Factors to Consider When Choosing GAF Shingle Colors
- Match your home’s architectural style: Traditional colonial homes pair well with classic colors like Charcoal or Weathered Wood, while modern farmhouses shine with options like Barkwood or Mission Brown.
- Consider your climate: In North Carolina, lighter shingle colors reflect heat during hot summers, while darker shades perform better in colder months and hide dirt effectively.
- Factor in exterior elements: Coordinate shingle colors with your siding, brick, stonework, and trim for a cohesive, polished look.
- Appearance is holistic: A home’s curb appeal comes from the combination of many details—fascia, siding, trim, and of course, shingles—all working together to create a balanced and attractive look.
- Enhance your home’s appearance: Choose GAF shingle colors that complement your home’s features rather than competing with them.
Coordinating shingle colors with siding and trim is especially important for homeowners investing in roofing in Raleigh, where traditional and modern styles often blend.
🏠 7 Top GAF Shingle Colors to Consider for 2025

Choosing the right shingle color can enhance your home’s curb appeal and complement its architectural style. GAF’s top shingle colors for 2025 offer durable, stylish options to keep your roof looking great for years.
1. Charcoal
Charcoal remains one of the most popular GAF shingle colors for good reason. This versatile dark gray offers a sleek, modern look that complements virtually any home style, from contemporary to traditional. Its bold color creates a striking contrast, especially when paired with white, cream, or light-colored siding. The neutral tone of Charcoal also makes it easy to match with a variety of trim colors, whether you prefer bright whites for a crisp, clean appearance or darker accents for a more dramatic effect. Additionally, Charcoal’s timeless appeal ensures that your roof will maintain its stylish appearance for years to come, regardless of changing trends.
2. Weathered Wood
For homeowners seeking a warm, rustic aesthetic, Weathered Wood is the perfect choice. This shingle color mimics the natural aging process of cedar shakes, offering a look that exudes charm and character. Its earthy brown hues are ideal for homes with traditional or craftsman architectural styles, as they blend seamlessly with natural surroundings. Weathered Wood pairs beautifully with earth-tone siding, such as beige, olive, or taupe, and enhances the texture of stone or brick accents. The rich, dimensional tones of Weathered Wood also add depth to your roof, giving your home a cozy and inviting feel that complements its natural environment. Its earthy brown tones are perfect for craftsman-style homes, and many families choose professional roofing services in Cary to bring out that rustic charm.
3. Mission Brown
Mission Brown is a rich, deep brown that radiates warmth and sophistication. This shingle color is an excellent fit for homes with brick exteriors, as its dark hues harmonize beautifully with the reddish tones of brickwork. Mission Brown’s versatile color also works well with both traditional and contemporary architectural styles, making it a great choice for homeowners who want a classic yet adaptable look. Whether paired with neutral siding or bold accent colors, Mission Brown adds an air of elegance and refinement to any home. Its durability and rich pigmentation also ensure long-lasting vibrancy, even in harsh weather conditions.
4. Pewter Gray
Pewter Gray is a lighter gray option that combines modern aesthetics with practical benefits. This color provides a contemporary, clean look that appeals to homeowners seeking a fresh and understated appearance. One of Pewter Gray’s standout advantages is its ability to reflect sunlight more effectively than darker shingles, offering improved energy efficiency and helping to keep your home cooler during warmer months. It pairs well with a variety of siding colors, from light pastel hues to darker neutrals, and works particularly well on homes with modern or minimalist designs. Pewter Gray strikes the perfect balance between style and functionality.
5. Barkwood
Barkwood is a sophisticated addition to GAF’s shingle color palette, combining brown and gray tones to create a natural, refined look. This versatile color is ideal for homeowners who want a roof that blends effortlessly with different architectural styles, from traditional to transitional designs. Barkwood’s unique mix of earthy tones complements stone and brick exteriors, enhancing the overall texture and appeal of your home’s façade. Its warm, neutral shades also allow for creative pairings with a wide range of siding and trim colors, making it a reliable choice for those who want a balanced, harmonious aesthetic that stands out in subtle ways.
6. Hunter Green
For those who want to make a bold statement, Hunter Green is a standout choice. This deep green shade offers a striking and classic look that works particularly well with colonial, Victorian, and Tudor-style homes. The rich, vibrant tone of Hunter Green pairs beautifully with white or cream trim, creating a crisp, dramatic contrast that enhances the architectural details of your home. It’s also an excellent choice for homes surrounded by lush landscaping, as its natural green hue complements the environment. Hunter Green shingles add a touch of uniqueness to your roof while maintaining a timeless appeal that never goes out of style. For bold shades like Hunter Green, working with trusted roofing contractors in Knightdale ensures installation matches your home’s design.
7. Oyster Gray
Oyster Gray is a light, neutral shingle color that offers a clean and contemporary look, perfect for modern home designs. Its soft gray tones provide a subtle yet elegant appearance, making it an excellent choice for homeowners who prefer a lighter roof color. Oyster Gray also boasts energy efficiency benefits, reflecting sunlight and helping to keep your home cooler in warm climates. This color pairs well with light-colored exteriors, such as white, pale blue, or beige, and creates a cohesive, polished look. Oyster Gray is a versatile option that brings a sense of brightness and sophistication to your roof while contributing to your home’s overall energy savings.
👉 How GAF Shingle Colors Affect Home Value
The right shingle color can have a big effect on your home’s resale value. Neutral colors like Charcoal, Weathered Wood, and Pewter Gray are popular with buyers, making them a safe choice if you’re planning to sell soon.
Bold Colors: A Risk or a Reward?
Bold or unique colors might suit your personal style, but they could narrow your pool of buyers. However, if the color matches your home’s architecture and fits the neighborhood aesthetic, it could boost curb appeal and value.
Explore Other Top Shingle Brands
While GAF is a leader in roofing materials, it’s always a good idea to explore your options before making a final decision. To compare another top brand and its unique color palette, check out our in-depth guide to CertainTeed shingle colors.
Regional Preferences in Shingle Colors
Location matters when choosing shingle colors. In North Carolina, for example, earth tones and natural hues are favorites, blending well with the state’s natural beauty and traditional architectural styles.
🛠️ Maintenance and Longevity of Different GAF Shingle Colors
Regular maintenance by a reliable roofing company will guarantee the longevity of GAF shingles colors is crucial for protecting your roof and ensuring it lasts for years. Choosing the right color can also impact energy efficiency and overall curb appeal. Whether you choose lighter or darker shades, our breakdown of the best roof shingles will help you maximize both style and durability.
Wear and Aging of GAF Shingle Colors
Different GAF shingle colors may show wear, dirt, and aging at varying rates. Lighter colors often reveal dirt and algae growth more readily, especially in humid climates like North Carolina’s. However, they may also make hail or impact damage more noticeable.
Durability of Darker Colors
Darker colors are better at hiding minor imperfections and dirt but may fade more over time due to UV exposure. GAF’s advanced granule technology helps reduce fading across all colors, though some natural weathering is expected with any roofing material.
Maintenance and Warranty Coverage
Regular maintenance, such as professional cleaning and inspections, can preserve your roof’s appearance regardless of the color you choose. GAF’s warranty coverage also ensures long-term color retention and reliable performance.
Commercial Roof Maintenance
For business owners, routine roof maintenance is just as critical. Regular commercial roof inspections, drain cleanings, and timely repairs not only extend the lifespan of commercial roofing systems but also help prevent costly disruptions to daily operations. Investing in a maintenance plan keeps your property protected, efficient, and looking professional year-round. Routine maintenance also includes scheduling a roof inspection to prevent costly business disruptions.
👨🔧 Trust Barkley-Jensen for Your GAF Shingle Installation
Choosing the right GAF shingle color can transform your home’s look while adding long-lasting value and protection. At Barkley-Jensen Roofing & Restoration, we’re proud to be a team of well-known roofers that you can trust for all your roofing needs. Our certified experts bring unmatched product knowledge, precision installation, and a commitment to customer satisfaction that sets us apart.
Whether you’re looking to boost curb appeal or enhance energy efficiency, we’re here to guide you every step of the way. Contact us today to schedule your free consultation and let us help you create the perfect roofing system for your home!

3 Tab vs Architectural Shingles (5 Pros & Cons to Consider)
06.19.2025
9 Min Read
When it comes to roofing, choosing the right shingles is more than just a style choice. It’s a decision that affects your home’s protection, durability, and resale value for years to come. Two of the most popular roofing materials on the market are 3-tab shingles and architectural shingles. But which one is the best fit for your home?
This post dives into the differences, pros, and cons of 3-tab vs. architectural shingles to help you make an informed decision about your roofing needs. Here’s what we’ll cover:
- Comparing 3-tab shingles and architectural shingles
- Key differences between 3-tab and architectural shingles
- How to determine which type is right for you
👉 Comparing 3-Tab Shingles and Architectural Shingles

At Barkley-Jensen Roofing & Restoration, we pride ourselves on being a trusted roofing contractor offering homeowners a wide range of solutions tailored to their needs. From classic options like 3-tab shingles to premium choices such as architectural shingles—and many more—we provide expert guidance to help you choose the right material for your home’s style, budget, and long-term protection.
3-tab shingles are a traditional roofing material known for their uniform, flat design that creates a clean and sleek look. Made from a single layer of asphalt, they feature three distinct cutouts, or “tabs,” along the bottom edge. They are cost-effective, lightweight, and offer a simple, symmetrical design. However, they may lack durability and the variety of style options found in modern alternatives.
On the other hand, architectural shingles, also called dimensional or laminate shingles, are a premium option crafted from multiple layers of asphalt. This gives them a heavier, textured appearance that resembles materials like wood shake or slate. They are more durable, highly resistant to harsh weather, and offer a luxurious, dimensional look in various shapes and colors. Architectural shingles typically have a longer lifespan, with warranties often ranging from 30 to 50 years, making them a worthwhile investment for homeowners seeking beauty and resilience in their roofing systems.
Benefits of Proper Roof Maintenance
- Extends the lifespan of your shingles and roofing system.
- Helps prevent leaks and costly water damage.
- Improves energy efficiency by maintaining proper insulation.
- Enhances curb appeal and overall home value.
- Ensures early detection of potential issues like mold or rot.
⚖️ 5 Key Differences Between 3-Tab and Architectural Shingles

Understanding the differences between 3-tab and architectural shingles is crucial for choosing the right roofing material for your home. The choice impacts durability, appearance, and long-term costs.
1. Durability
3-tab shingles are known for their affordability and functionality, but their durability is limited. Typically lasting between 15 to 25 years, their lifespan largely depends on the climate they’re exposed to and the level of maintenance they receive. However, their thinner and lighter construction makes them more susceptible to damage caused by wind, storms, and extreme weather conditions. Over time, issues like granule loss and cracking can arise, further reducing their longevity. For homeowners living in areas prone to harsh weather, these shingles may not be the most reliable option, as they are less equipped to handle environmental challenges.
On the other hand, architectural shingles are designed with durability as a priority. With a lifespan of 30 years or more, they are thicker, heavier, and better equipped to withstand strong winds, storms, and other environmental stressors. Many architectural shingles are rated to endure wind speeds of up to 130 mph, making them a more resilient choice for areas prone to extreme weather. With proper care and maintenance, these shingles can often exceed their expected lifespan, providing long-term reliability and peace of mind for homeowners.
2. Cost
When it comes to cost, 3-tab shingles are the more affordable option, making them appealing to homeowners with tight budgets or those looking for a quick roofing solution. Their lower upfront price allows for a cost-effective way to replace or install a roof without breaking the bank. However, their affordability comes with trade-offs. Due to their shorter lifespan and increased susceptibility to damage, homeowners may face frequent repairs or replacements, which can add up over time and result in higher long-term costs.
Architectural shingles, while more expensive initially, offer greater value over the long term. Their superior durability means fewer repairs and replacements, saving homeowners money in the years to come. In addition, these shingles often enhance the overall appearance and value of a home, making them a worthwhile investment. For homeowners planning to stay in their property for many years, the higher upfront cost is offset by the long-term savings and benefits.
3. Appearance
The visual appeal of a roof is an important factor for many homeowners, and 3-tab shingles provide a simple, traditional look with their flat, uniform appearance. While functional, they lack the textured or dimensional qualities that can add character to a home’s exterior. Additionally, 3-tab shingles are typically available in fewer colors and styles, which may limit customization options for those looking to enhance their home’s curb appeal.
Architectural shingles, on the other hand, offer a premium aesthetic with their textured, dimensional design. They create depth and visual interest, elevating the appearance of a home. Available in a wide variety of shapes, colors, and styles, these shingles allow homeowners to match their roof to their personal preferences or align it with the architectural style of their house. The enhanced appearance of architectural shingles not only boosts curb appeal but can also increase property value, making them a popular choice for those who prioritize aesthetics.
It’s also worth noting that the roofline itself plays a big role in how polished a home looks. Elements like the fascia give structure to the edges of the roof and create a clean finish that complements the shingles. If you’d like to learn more about what is fascia on the house, check out our post.
4. Weight
3-tab shingles are lightweight, which makes them easy to handle and install. This feature simplifies the installation process and often reduces labor costs, making it a convenient choice for homeowners looking for a budget-friendly or DIY-friendly roofing option. However, their lower weight also means they provide less stability and are more prone to being damaged by severe weather conditions, such as high winds or heavy storms.
In contrast, architectural shingles are heavier and denser, which contributes to their superior durability. The added weight provides enhanced stability and ensures a more secure fit to the roof, making them less likely to be damaged by wind or extreme weather. However, their increased weight may require a roof structure capable of supporting the added load, which could necessitate additional work or reinforcement during installation.
5. Installation
The lightweight design of 3-tab shingles makes them relatively easy and quick to install. Their straightforward structure simplifies the process, which can reduce labor costs and make them a preferred choice for homeowners seeking an affordable and fast roofing solution. This ease of installation also appeals to DIY enthusiasts. However, precision is crucial during installation, as improper alignment can compromise their ability to resist wind and water damage, potentially leading to future problems. Taking the time to measure a roof for shingles correctly ensures accuracy from the very beginning and helps avoid costly mistakes down the road.
Architectural shingles, on the other hand, are more complex to install due to their added weight and textured design. Their installation typically requires skilled professionals who can ensure proper placement and alignment. The additional expertise and labor needed often result in higher installation costs. However, the investment is justified by the enhanced durability, appearance, and long-lasting performance of architectural shingles, making them a worthwhile choice for homeowners looking for a superior roofing option.
👉 How to Choose Between 3-Tab and Architectural Shingles

The right choice depends on your priorities, budget, and the specific needs of your roof. Consider the following factors:
Budget
If you’re aiming for a cost-effective roofing solution, 3-tab shingles are a great choice. They are more affordable than architectural shingles, making them ideal for homeowners on a tight budget. While they may not offer the same premium features, they still provide reliable functionality for basic roofing needs.
Weather Conditions
For homes located in areas with extreme weather conditions such as strong winds, heavy rain, or hail, architectural shingles are the better option. These shingles are designed to handle harsher elements and provide greater durability and resistance. Investing in architectural shingles helps ensure your roof can withstand unpredictable weather and protect your home effectively.
Aesthetic Preferences
If enhancing curb appeal is one of your priorities, architectural shingles have an edge over 3-tab shingles. They come in a wider variety of colors, textures, and designs, offering a more sophisticated and stylish look. Exploring options like CertainTeed shingle colors can help you visualize how different shades and finishes will complement your home. Their dimensional appearance can even mimic the look of more expensive roofing materials like slate or wood, elevating your home’s exterior.
Long-Term Investment
While architectural shingles have a higher upfront cost, their longevity and durability make them a smart long-term investment. They typically last much longer than 3-tab shingles and are less likely to need repairs or replacements. Over time, this can save you money and provide peace of mind, making architectural shingles the more economical choice for homeowners looking to maximize their roofing investment.
Expert Consultation
Choosing the right shingles for your home can be challenging, as factors like roof pitch, structural integrity, and local climate all play a role. Consulting with a professional roofing expert can provide valuable insights and help you make an informed decision. They can assess your specific needs and recommend the best type of shingles to ensure your roof performs well for years to come.
⚖️ 3 Tab vs Architectural Shingles
Choosing between 3-tab and architectural shingles is an important decision, and at Barkley-Jensen Roofing & Restoration, we’re here to make the process seamless and stress-free. With our years of expertise, commitment to quality, and customer-first approach, you can trust us to help you select the best option for your home and budget.
Ready to get started on your roofing project? Contact us today for a free consultation and let’s find the perfect solution for your roofing needs!

What Is Fascia on a House? (Homeowner’s Guide to Roof Parts)
06.17.2025
10 Min Read
Your roof is more than shingles or tiles; it’s a complex roof system with various parts working together to protect your home. One of these crucial components is the fascia part, which acts as the connective tissue of the roof system—linking and supporting key roof components such as the soffits, rafters, and gutters.
In this guide, we’ll explore:
- What fascia is on a house
- Benefits of fascia
- Why professional installation or repair is a must
What Is Fascia?

Fascia is a vertical board typically installed along the lower edge of the roof’s edge, where the roof meets the exterior walls and forms the roof overhang. Fascia is considered trim and is an important part of the exterior trim system. Its primary function is to cover and seal the ends of the roof rafters, providing structural support and creating a smooth, finished look. Fascia also serves as a fixing point for the gutter system, ensuring proper water drainage away from your home.
Roof fascia and house fascia are terms used to describe this component, and fascias come in different fascia materials. Common options include vinyl fascia, wooden fascia, fiber cement, and synthetic materials, while aluminum soffit is a related component. Fascia and soffit, or soffit and fascia, work together to protect the roof structure and building’s exterior from moisture damage, insect damage, and other exterior elements. Fascia trim or fascia cover can be added for extra protection and a polished appearance.
Building codes require professional roofing installation of fascia to ensure structural support and prevent fascia damage. Fascia is measured by the linear foot and is often replaced during a new roof installation. Peeling paint, clogged gutters, and moisture buildup can lead to fascia damage and costly repairs. Drip edge is a related component that helps direct water away from the roof edge. Choosing the right roofing material and fascia materials is important for long-term durability.
Why Is Fascia Important?
- Fascia may seem like a small detail, but it plays a big role in maintaining your home’s structural integrity by providing structural support to the roof structure. The important functions fascia play include supporting the roof system and preventing structural issues that could compromise your home’s stability.
- It protects the ends of roof rafters from being exposed to wind, rain, and pests, helping to prevent moisture damage and fascia damage.
- Without fascia, your home could face potential damage over time.
4 Benefits of Fascia on a House

A properly installed and maintained fascia board delivers several benefits. Fascia not only protects the home’s exterior and other exterior elements—such as trim, soffit, roof, and siding—from moisture and weather, but also enhances the finished look and boosts the home’s curb appeal. Here are three key reasons why fascia is vital to your roof’s performance:
1. Enhanced Aesthetic Appeal
Fascia plays a key role in improving the overall visual appeal of your home. As part of the exterior trim and other exterior elements, fascia enhances the building’s exterior by providing a clean and polished look to the roofline, which boosts your home’s curb appeal and contributes to its overall design. This sleek finish can also increase the value of your property by creating a more refined and modern aesthetic. Additionally, fascia hides the unsightly and exposed roof rafters, giving your home a more finished and cohesive appearance. Whether you’re renovating or building new, well-maintained fascia adds to the overall charm of your home. It’s an excellent way to leave a lasting impression.
2. Supports Gutters
Your gutters rely heavily on the fascia for stability, as the fascia supports and anchors the gutter system. Gutters attach directly to the fascia, and a strong, durable fascia ensures that your gutters stay in place, even during heavy rains, snowstorms, or strong winds. If you have clogged gutters, water can overflow and cause moisture damage to the fascia and other roofing components. This support is crucial for directing water away from your home’s foundation, preventing flooding and structural damage. Without a sturdy fascia, your gutters may sag or detach entirely, leading to costly repairs. Installing a fascia cover or fascia trim can help protect the fascia from water-related issues and extend its lifespan. Furthermore, a properly installed fascia provides a secure base for seamless gutter installation, improving the overall efficiency and longevity of your drainage system.
3. Protects Against Weather Damage
Fascia acts as the first line of defense against harsh weather conditions. Along with soffit and soffits, fascia helps prevent moisture buildup at the roof edge by supporting proper attic ventilation and protecting against water intrusion. By serving as a barrier, it protects the vulnerable edges of your roof from water intrusion, strong winds, and pests that can cause significant damage. Using materials like fiber cement for fascia and soffits can help protect against insect damage and moisture-related issues. Keeping moisture out is particularly important, as it helps prevent wood rot and mold, which can compromise the structural integrity of your home. Additionally, fascia’s protective function extends the lifespan of your roof by reducing the wear and tear caused by exposure to the elements. It also minimizes maintenance needs, saving you time and money in the long run.
4. Improves Energy Efficiency
Fascia can also contribute to better energy efficiency in your home. When combined with soffit, fascia helps promote air circulation beneath the roof eaves, which enhances energy efficiency by maintaining proper airflow and reducing moisture buildup. Sealing gaps along the roofline helps prevent drafts and reduces heat loss during colder months. This added insulation helps stabilize indoor temperatures, reducing your reliance on heating and cooling systems. Not only does this make your home more comfortable year-round, but it can also lead to significant savings on energy bills. A properly installed and maintained fascia ensures that your home remains energy-efficient while reducing your carbon footprint.
Do You Need Professional Help With Fascia?

While some homeowners may try a DIY approach, fascia installation and repair require precision and expertise. Professional roofing expertise is particularly important during roof replacement or when installing a new roof, as the entire roof system—including the fascia, soffits, gutters, and drip edge—may need to be inspected and updated. Here’s why hiring the right professionals is very important:
Proper Installation Matters
Installing fascia correctly isn’t just about looks—it’s a key part of protecting your home’s structure. When placed properly, fascia supports your gutters, keeping them secure so water can flow away from your property as intended. It also helps your home meet building codes, ensuring both safety and durability.
If fascia is installed poorly, problems can show up quickly. Misaligned gutters may fail to channel water, leading to pooling around your foundation, leaks inside your home, or even damage to walls and ceilings. Over time, these issues can turn into expensive repairs that could have been avoided.
That’s why the right roofing tools make a big difference. Power nailers, cutting saws, and leveling equipment help installers align fascia boards precisely and fasten them securely. These tools ensure there are no gaps or weak spots that could compromise your home’s protection.
By trusting professionals with the right skills and equipment, you ensure your fascia system is properly installed from the start. This means long-term reliability, fewer worries about water damage, and peace of mind knowing your home is fully protected.
Material Selection
Choosing the right fascia material is a decision that requires careful consideration. There are several fascia materials to choose from, including vinyl fascia, wooden fascia, fiber cement, aluminum soffit, composite materials, and other synthetic materials. Each option has its own set of benefits and limitations. For example, wooden fascia offers a classic, natural look but may require regular maintenance to protect it from rot and weather damage, especially in humid climates. Vinyl fascia is a popular synthetic material that is low-maintenance, durable, and resistant to moisture, making it a long-lasting choice for many homeowners. Fiber cement is another durable option, known for its resistance to fire, rot, and insect damage, as well as its versatility and low-maintenance qualities. Aluminum soffit is lightweight, durable, and resistant to rust, making it an excellent choice for regions prone to heavy rainfall, though it can dent more easily than other options. Composite materials combine the benefits of several materials, offering durability and aesthetic flexibility.
In addition to selecting the fascia material itself, you may also consider installing a fascia cover for added protection against weather-related damage. The choice of roofing material can also impact which fascia materials are most suitable, as compatibility and overall durability should be considered. Beyond durability and maintenance, your local climate, aesthetic preferences, and budget also play a significant role in determining the best fit for your home. Consulting with professionals can help you weigh these factors, ensuring you select a material that aligns with your home’s needs while maximizing value and longevity. Their expertise can save you from costly mistakes and help you make an informed decision that enhances your home’s functionality and appearance.
Guaranteed Results
When you hire experts for fascia installation or replacement, you’re not just paying for their skills—you’re also receiving the added assurance of guaranteed results. Most professional installers offer warranties on their work, giving you peace of mind that the job has been completed to a high standard. These warranties often cover issues such as faulty installation or defects in materials, ensuring you don’t face unexpected costs if problems arise. For instance, if your fascia begins to detach or your gutters fail to function properly due to installation errors, a warranty ensures the issue is resolved without additional expenses. Beyond financial protection, these guarantees reflect the confidence professionals have in their craftsmanship and their commitment to customer satisfaction. By hiring experts, you invest in a solution that not only protects your home from water damage but also provides long-term reliability. If issues do arise, you’ll have access to support and services that keep your home in excellent condition without the hassle of unexpected repairs. Professional installation backed by warranties is an investment in both quality and peace of mind, ensuring your home remains protected for years to come.
Count On Us for Fascia Installations & More
Fascia plays a crucial role in protecting your home and enhancing its curb appeal, making it essential to choose the right team for installation and repair. At Barkley-Jensen Roofing & Restoration, we combine expert craftsmanship, premium materials, and exceptional customer service to deliver results you can trust.
Beyond fascia, we also provide a full range of commercial roofing services. From flat roof repairs and maintenance programs to coatings that improve energy efficiency, our team delivers solutions tailored to the needs of businesses. Whether you own a small storefront or manage a large industrial property, you can count on us for reliable service that keeps your building protected year-round.
Whether you need fascia work, roofing repairs, or comprehensive exterior solutions, our experienced team is here to help. Homeowners in Cary, Durham, and surrounding areas rely on us for our commitment to quality and excellence. Contact us today for a free consultation and let us take care of your home with the care it deserves!

Roof Inspection Cost: What to Expect from Your Roofer
06.12.2025
7 Min Read
When was the last time you had your roof inspected? If you’re not sure, you might be overdue. Roof inspections are a critical part of home maintenance, ensuring your home stays safe, comfortable, and protected from the elements. But how much should you budget for a roof inspection?
This guide breaks down everything you need to know. Here’s what we’ll cover:
- How much can you expect to pay
- Factors that affect your roof inspection cost
- What’s included in a typical inspection
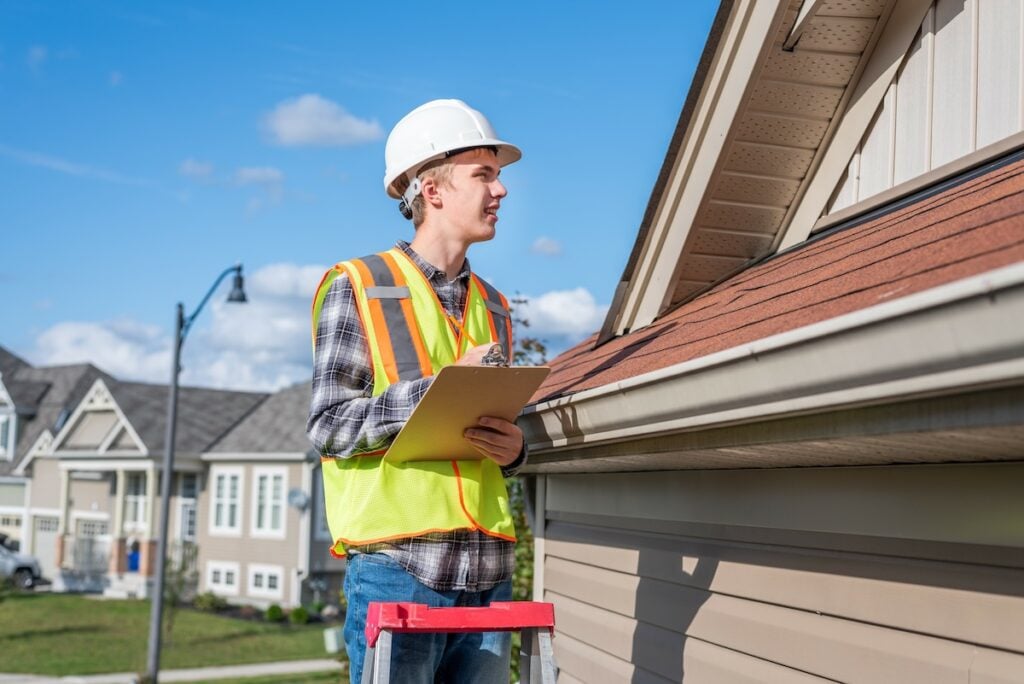
💵 How Much Does a Roof Inspection Cost?
The average cost of a professional roof inspection ranges from $150 to $400, depending on factors like the size of your roof and the scope of the inspection. While this may seem like an added expense, regular inspections will save you money in the long run by catching small issues before they turn into bigger, costlier repairs.
At Barkley-Jensen Roofing & Restoration, we also offer free inspections in certain cases, such as after severe weather events or to help homeowners file insurance claims.
Why Are Roof Inspections Important?
A roof does more than top off your home; it protects everything inside, from structural integrity to personal belongings. Regular roof inspections allow you to catch problems like leaks, missing shingles, or mold growth early, preventing costly repairs later.
Professionals recommend getting a roof inspection:
- Annually: To assess wear and tear from weather.
- After Severe Storms: High winds, hail, or heavy rain can cause damage that isn’t always visible.
- Before Buying or Selling a Home: A clean bill of health for your roof can improve property value or ease negotiations.
👉 5 Key Factors That Affect Roof Inspection Cost
Not all roofs are created equal, and these factors can influence what you’ll pay for an inspection.
1. Size of Your Roof
The size of your roof plays a major role in determining the cost of an inspection. Larger roofs naturally take more time to inspect, as there’s a greater area to cover. Inspectors will need to examine every part of the roof, which can increase both time and labor costs. For example:
- Small homes, townhouses, or single-level properties typically cost less, ranging from $150–$250. These roofs are quicker to inspect due to their limited size.
- Larger homes or multi-level properties can cost significantly more, often running closer to $350–$400. The added levels, square footage, and hard-to-reach areas require more effort and time for a thorough inspection.
2. Roof Condition
The condition of your roof directly impacts the complexity of the inspection. If your roof is in good condition with no visible damage, the process tends to be faster and simpler. However, if your roof has noticeable wear, significant damage, or structural issues, the inspector may need to perform a more detailed assessment. For example:
- A roof with minor wear may need only a basic inspection.
- A roof with cracked shingles, leaks, or sagging areas might require additional testing, like moisture readings or thermal imaging. Such complexities can add time and cost to the inspection, as inspectors may need specialized equipment or additional time to assess the damage accurately.
3. Type of Roof Material
The type of material your roof is made from is another factor that affects inspection costs. Different materials require varying levels of expertise and equipment. For example:
- Slate, tile, or metal roofs often require specialized knowledge and tools to properly evaluate their condition. These materials are more durable but can have unique issues such as rust, broken tiles, or improper sealing.
- Flat roofs, by contrast, are simpler to inspect and tend to cost less. However, steep or heavily sloped roofs add complexity to the inspection process, as they are harder to navigate safely and require more time to ensure every area is thoroughly checked.
4. Inspection Type
The type of inspection you choose has a significant impact on cost. There are generally two levels of roof inspections:
- Basic Inspection ($150–$200): This is a quick visual check of your roof. The inspector will look for visible signs of damage, such as missing shingles, loose flashing, or debris buildup. While useful for routine maintenance, this type of inspection may not uncover hidden issues.
- Comprehensive Inspection ($300–$400): A more detailed assessment that dives deeper into the condition of your roof. This often includes tools such as drones for aerial footage, moisture detection equipment, and a thorough written report with recommendations for repairs or maintenance. This option is ideal if you suspect problems or need a roof certification.
5. Location
Where you live also plays a big role in determining roof inspection costs. Prices vary by region and are influenced by local market conditions. For instance:
- In areas with extreme weather conditions, such as hurricanes, heavy snow, or high winds, inspection costs may be higher due to greater demand for roofing services. Inspectors in these regions may also provide specialized evaluations to ensure your roof can withstand harsh environmental conditions.
- Rural areas may have lower costs due to less competition, but if you live in a remote location, travel fees may be added. Conversely, urban areas with higher living costs may reflect that in their pricing, even for basic inspections.
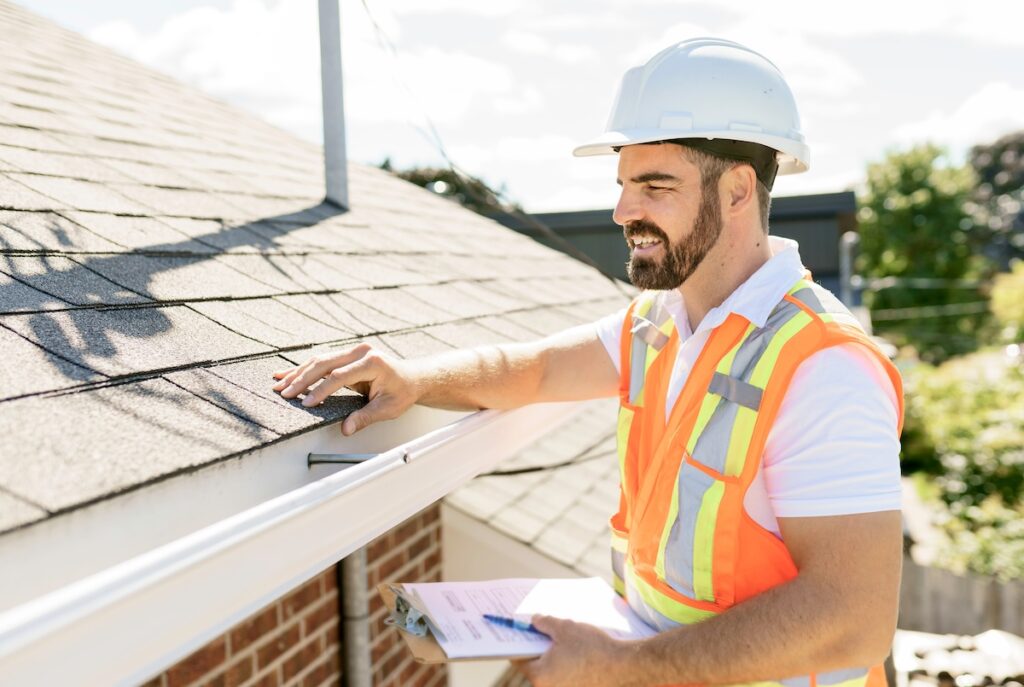
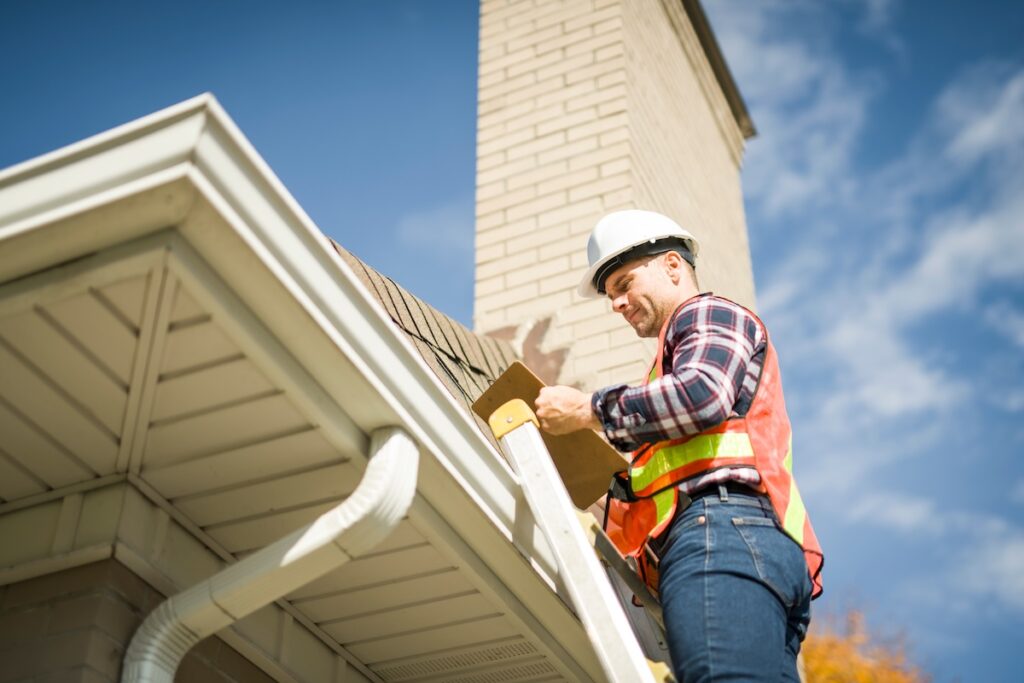
🤔 What’s Included in a Roof Inspection?

A professional roof inspection is more than just a glance at your shingles. Here’s what you’ll typically get:
Visual Examination
Our team starts by thoroughly inspecting your roof for visible issues such as cracked or missing shingles, mold growth, or pooling water. These are often the first signs of wear and tear that can lead to bigger problems if not addressed promptly.
Structural Integrity Test
We assess the strength and stability of your roof’s underlying support system. This includes inspecting beams, fascia boards, and other structural components to ensure your roof can handle the elements and remain secure for years to come.
Gutter Evaluation
Proper drainage is crucial for roof health. We check that your gutters and downspouts are clear of debris and functioning correctly, ensuring water is directed safely away from your home to prevent damage to both the roof and the foundation.
Leak Detection
Using advanced tools and techniques, we locate any weak points, damaged flashing, or hidden leaks that could compromise your roof. Even the smallest leak can lead to significant damage over time, so early detection is key.
Comprehensive Report
After completing our inspection, we provide a detailed report that outlines all findings, recommended repairs, and cost estimates. This ensures you have a clear understanding of your roof’s condition and the next steps needed to keep it in great shape.
🏠 The Guide For Roof Inspection Cost
At Barkley-Jensen Roofing & Restoration, we understand that roof inspections are more than just a routine task—they’re an investment in the safety and longevity of your home. With years of experience, a commitment to quality, and a passion for customer satisfaction, our team is dedicated to providing thorough, reliable inspections at a fair price. Whether you’re preparing for changing seasons, recovering after a storm, or simply prioritizing your home’s upkeep, you can trust us to deliver exceptional service every time.
Don’t wait until small issues become costly repairs—schedule your roof inspection today and experience the expertise that makes us North Carolina’s trusted roofing professionals. Contact Us Now to get started!

How to Shingle a Roof (7-Step Asphalt Shingles Installation)
06.10.2025
7 Min Read
Shingling a roof is no small task. But with the right tools, knowledge, and guidance, you can protect your home from the elements and enhance its curb appeal. Whether you’re replacing an old roof or starting from scratch, this guide will walk you through the essential steps on how to shingle a roof properly.
Here’s what we’ll cover in this post:
- Understanding the basics of shingling
- 7 steps to install asphalt shingles
- Tips for maintaining your roof after installation
🤔 What Does Shingling a Roof Entail?
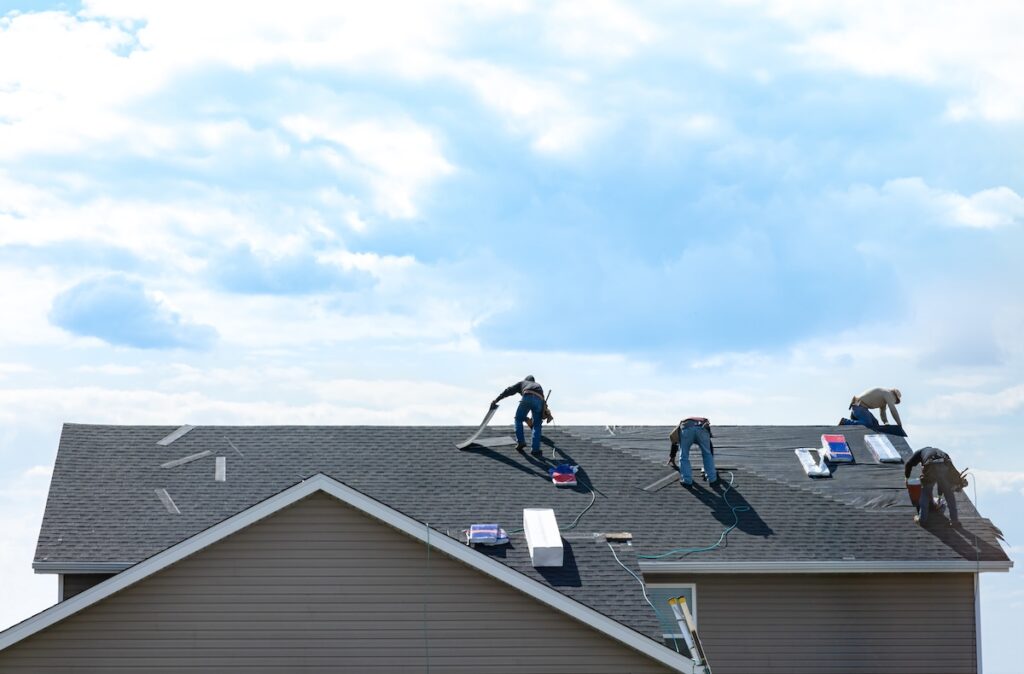
Shingling a roof is the process of installing overlapping layers of asphalt shingles to protect a home’s structure from rain, snow, and UV damage. Asphalt shingles are one of the most popular roofing materials because of their affordability, durability, and wide range of styles.
While the task itself demands a great deal of precision and effort, the end result is a weather-tight, aesthetically pleasing roof that can last decades.
Essential Tools and Materials Needed
Before starting your roofing project, ensure you have the following tools and materials ready to go:
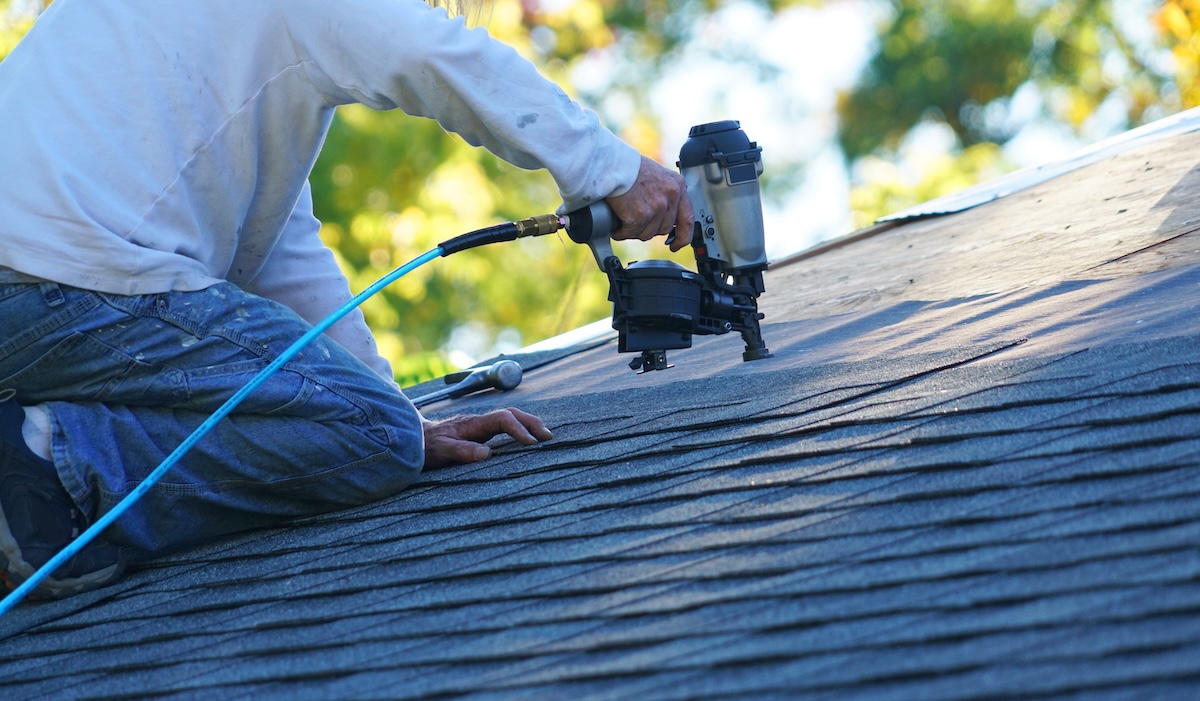
- Roofing hammer or nail gun
- Roofing blade or utility knife
- Chalk line
- Measuring tape
- Roofing shovel (for tear-off)
- Ladder and roof jacks for safety
- Asphalt shingles
- Roofing nails
- Roof underlayment
- Starter strip shingles
- Ridge cap shingles
- Ice and water shield
✅ 7 Steps to Install Asphalt Shingles

Installing asphalt shingles correctly is essential to ensure your roof is durable, weather-resistant, and long-lasting. Proper installation also helps prevent leaks and costly repairs down the line.
1. Remove Old Roofing Materials
The first step in replacing a roof is to remove all old materials, including shingles, nails, and debris. Use a roofing shovel or pry bar to strip away the existing shingles. Pay attention to any stubborn nails or leftover adhesive, as these can interfere with the new roofing installation. A clean surface is essential for ensuring that the new shingles adhere properly, creating a durable and long-lasting roof. Take the time to clear the roof down to the decking and inspect for any damage that may need repairs before moving forward.
2. Install Roofing Felt or Underlayment
Once the old materials are removed, cover the roof surface deck with roofing felt or underlayment. This layer acts as an additional moisture barrier, protecting your home from potential leaks. Roll out the felt or underlayment across the roof, starting at the bottom edge and working your way up. Overlap each layer by at least two inches to prevent gaps that could allow water to seep through. Secure the material with staples or nails, ensuring it is smooth and free of wrinkles for a solid base.
3. Apply Ice and Water Shield
Ice and water shield is critical for areas most vulnerable to leaks, such as valleys, roof edges, and places prone to water pooling. This material provides an extra layer of protection against heavy rain, snow, and ice dams. Cut the ice and water shield to fit the specific areas, then adhere it directly to the roof deck. Make sure it is firmly pressed down and properly sealed at the edges to maximize its effectiveness. This step is especially important for homes in colder climates.
4. Position the Starter Strip
The starter strip shingles are installed at the edge of the roof to create a strong foundation for the main rows of shingles. These strips are designed to provide wind resistance and protect the edge of the roof from damage. Align the starter strip carefully along the edge of the roof and secure it using nails. Ensure the strip is straight, as this will determine the alignment of the subsequent rows of shingles. A properly positioned starter strip sets the stage for a professional-looking finish.
5. Begin Laying Shingles
With the starter strip in place, you can start laying the main rows of shingles. Begin at the bottom edge of the roof and work your way up. Align the first row of shingles with the starter strip, ensuring a straight and even placement. Use a chalk line to guide your rows and maintain consistency. Follow the manufacturer’s instructions for proper nailing and overlapping, as these details are key to the roof’s durability. Continue layering shingles, overlapping each row slightly, until you reach the roof’s peak.
6. Install Ridge Cap Shingles
After all the main rows of shingles are installed, finish by adding ridge cap shingles to the peak of the roof. These specially designed shingles provide additional protection against wind and water while giving the roof a polished, finished look. Position the ridge cap shingles so they overlap slightly, covering the top row of shingles. Nail them securely in place, following the manufacturer’s guidelines. This final step ensures that the roof is sealed and protected from the elements.
7. Inspect and Clean Up
Before considering the job complete, perform a thorough inspection of the roof. Check that all shingles are properly aligned, securely fastened, and free of gaps or loose edges. Look for any areas that may need additional attention or sealing. Once the inspection is complete, clean up the worksite. Remove any leftover materials, nails, and debris to leave the area safe and tidy. A clean finish not only ensures safety but also reflects the quality of the work done.
💡 Tips for Maintaining Your Roof After Installation
Your newly-shingled roof is an investment, and proper maintenance will keep it in great shape for years to come.
Schedule Regular Inspections
Make it a habit to inspect your roof at least twice a year, ideally in the spring and fall. Look for signs of damage, such as loose or missing shingles, cracks, or water stains. Catching these issues early can save you from costly repairs down the road. Don’t forget to check the attic for any signs of leaks or moisture as well.
Keep It Clean
Debris like leaves, branches, and dirt can pile up on your roof, trapping moisture and leading to mold, rot, or even structural damage. Regularly clean your roof and gutters to ensure water flows freely and doesn’t pool in unwanted areas. A clean roof not only protects your home but also enhances its appearance.
Ensure Proper Ventilation
Good roof ventilation is crucial for preventing moisture buildup, which can lead to mold, mildew, and wood rot. Check that your attic has adequate airflow, with vents properly functioning. A well-ventilated roof also helps regulate indoor temperatures, improving energy efficiency.
Trim Nearby Trees
Overhanging branches pose a significant risk to your roof, especially during storms or high winds. They can scrape against the shingles, causing damage, or fall and create major issues. Regularly trim back trees near your home to prevent branches from coming into contact with your roof. This proactive step can save you from unexpected repairs.
🏠 The Steps To Shingle a Roof
Shingling a roof is a complex and labor-intensive task that requires precision, skill, and the right materials to ensure lasting protection for your home. While it’s great to understand the process, having a professional you can trust makes all the difference. At Barkley-Jensen Roofing & Restoration, we bring years of experience, top-quality materials, and a commitment to customer satisfaction to every project.
Whether you need a roof replacement or professional installation, our team delivers results that stand the test of time. Don’t leave your roof to chance—contact us today to schedule your consultation and let us handle your roofing needs with care and expertise!
5 Signs of Hail Damage on Roof Shingles & Other Materials
06.05.2025
6 Min Read
Severe hailstorms can wreak havoc on your home, and often, your roof takes the brunt of it. Since hail damage isn’t always easy to spot from ground level, it’s essential to know the warning signs so you can take quick action. Ignoring hail damage can lead to costly repairs or replacement down the road.
This guide will take you through the following:
- Safety tips when checking for hail damage
- Signs of hail damage on roof shingles
- Why professional inspections matter
⚠️ Safety Tips When Checking for Hail Damage
Inspecting your roof for hail damage is important, but doing so safely is even more critical. Start by ensuring you have the proper equipment, such as a sturdy ladder and non-slip shoes. Avoid climbing onto the roof if it’s wet, icy, or if you’re uncomfortable with heights. It’s always a good idea to inspect the roof from the ground whenever possible, using binoculars for a clearer view. Pay attention to your surroundings, as loose debris or unstable surfaces can pose a hazard. If you’re unsure about your safety or the extent of the damage, it’s best to call a professional roofing contractor to handle the inspection. Your safety should always come first!
Things to Look Out for Before Checking for Hail Damage
- Check the weather conditions to ensure it’s safe to inspect. Avoid wet, windy, or icy conditions.
- Look for any visible hazards around the area, such as loose debris or fallen branches.
- Ensure your ladder is in good condition and securely positioned before use.
- Wear appropriate clothing, including non-slip shoes, for added safety.
- Inspect from the ground if possible, using binoculars to avoid unnecessary risks.
👉 5 Signs of Hail Damage on Roof Shingles
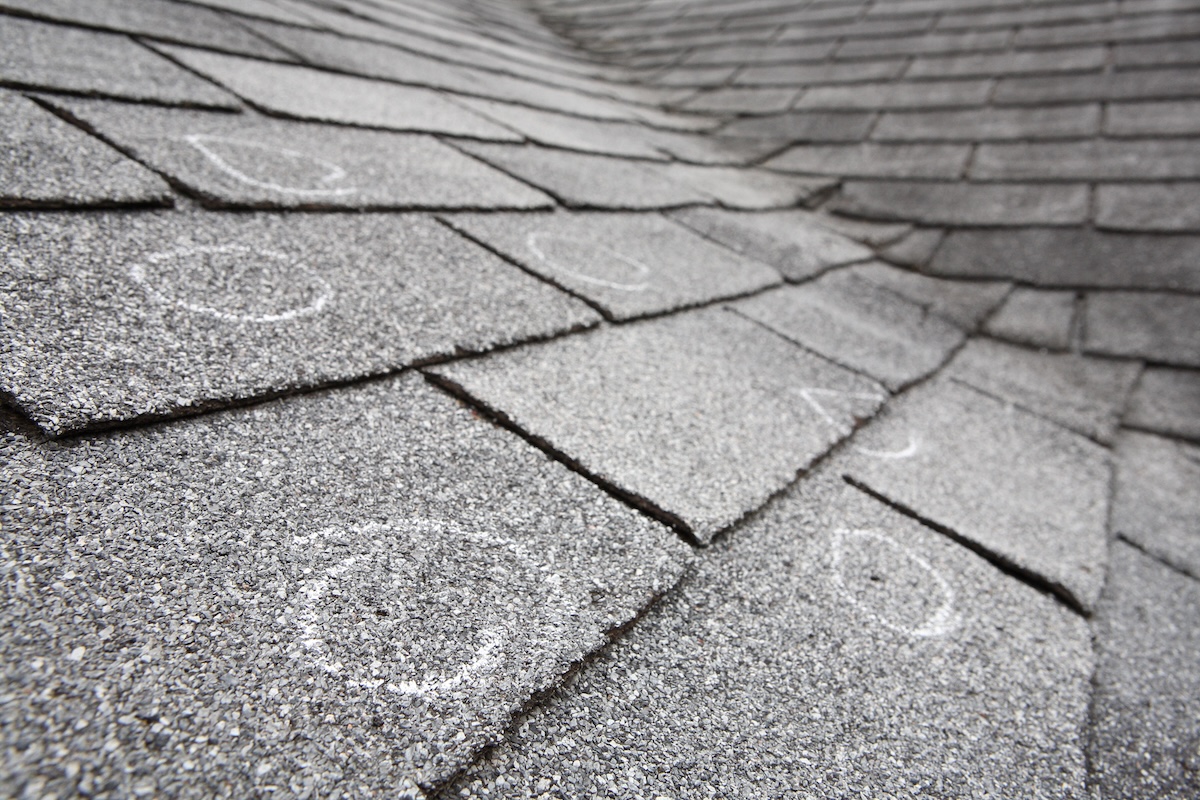
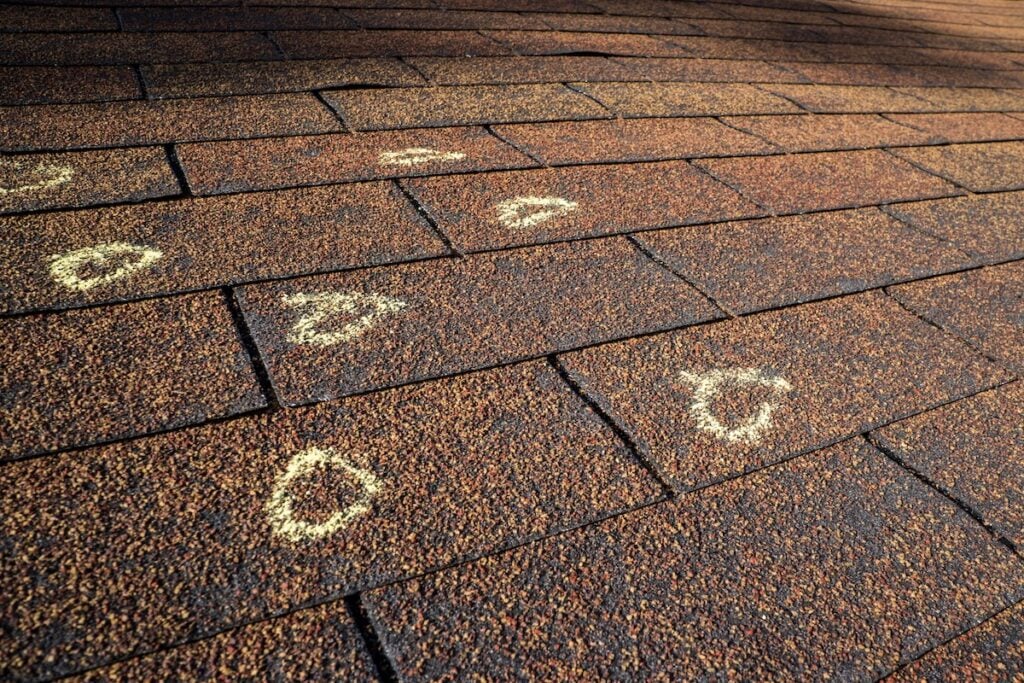
Your shingles are your roof’s first line of defense. When hail hits, it can leave visible and hidden damage. Here are some ways to identify hail damage on shingles:
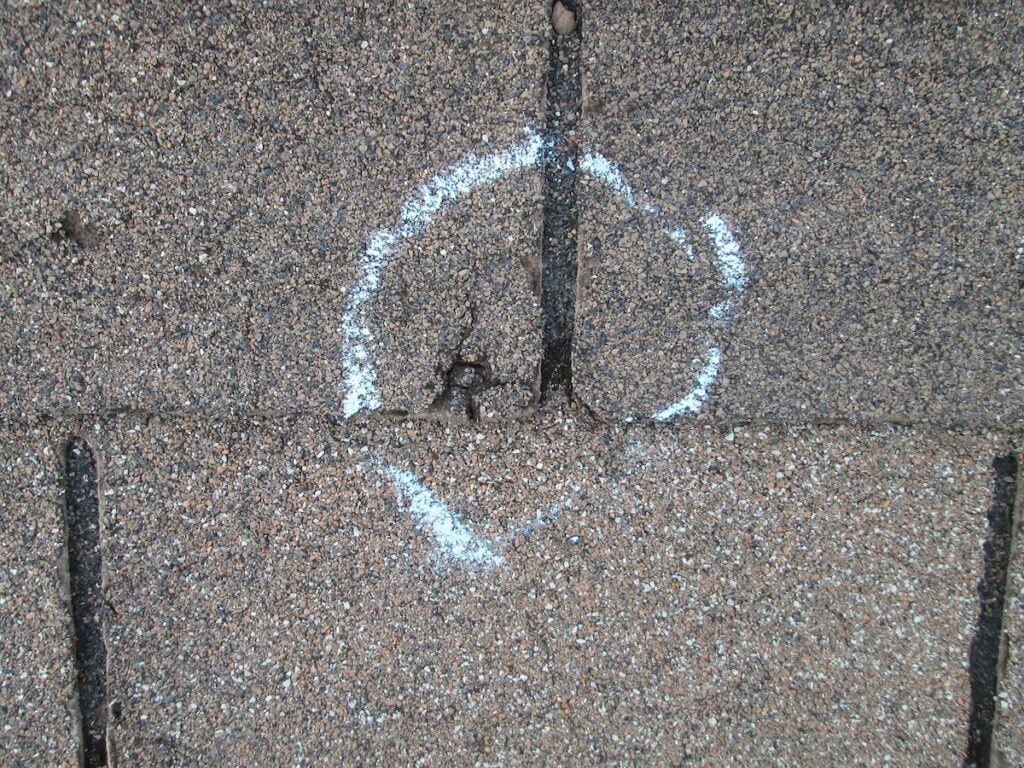
1. Visible Dents or Bruises
Hailstones can create noticeable dents or circular bruises on the surface of asphalt shingles. These marks often appear as dark spots where the protective granules have been displaced. Over time, these areas become vulnerable to further damage from UV rays and weather exposure. When inspecting, gently touch these spots to check for softness, as this can indicate that the underlying layers of the shingle have been compromised. Soft spots may also be more prone to water infiltration, leading to potential leaks over time.
2. Granule Loss
Granules are an essential protective layer on shingles, shielding them from UV rays and weathering. Large hailstones can knock these granules loose, leaving behind bald patches that expose the asphalt underneath. This exposure can significantly shorten the lifespan of your roof and lead to faster deterioration. Check your gutters, downspouts, or areas around your home for an accumulation of granules, as this is a clear sign of hail damage. Granule loss not only affects the appearance of your roof but also weakens its ability to provide protection.
3. Cracks or Tears
Strong hail impacts can crack or tear shingles, especially if the shingles are older or already weakened by wear and tear. Cracks may appear as visible lines or splits along the surface of the shingle, while tears can create openings that expose the roofing materials beneath. These damaged areas can eventually allow water to seep through, leading to leaks and potential water damage inside your home. Regular inspections after a hailstorm are crucial to identify and address these issues before they escalate into more significant problems.
4. Exposed Fiberglass Mat
Hail that strikes a shingle with enough force can puncture it deeply, sometimes exposing the fiberglass mat underneath. This is a critical sign of structural compromise, as the fiberglass mat is an integral part of the shingle’s durability and weather resistance. Exposed fiberglass indicates that the shingle is no longer providing adequate protection, leaving your roof vulnerable to water infiltration, UV damage, and further wear. If you notice exposed fiberglass, it’s essential to address the damage immediately to prevent further deterioration.
5. Shingle Edges with Damage
The edges of shingles are particularly vulnerable to impact from hail because they are thinner and more exposed. Hail can cause curling, splitting, or chipping along the edges, which weakens the overall integrity of the shingle. Damaged edges create openings that make it easier for water to penetrate and can lead to further issues like leaks or ice dam formation in colder climates. Inspect the edges of your shingles carefully after a storm, as early detection of damage can help prevent more extensive repairs down the line.
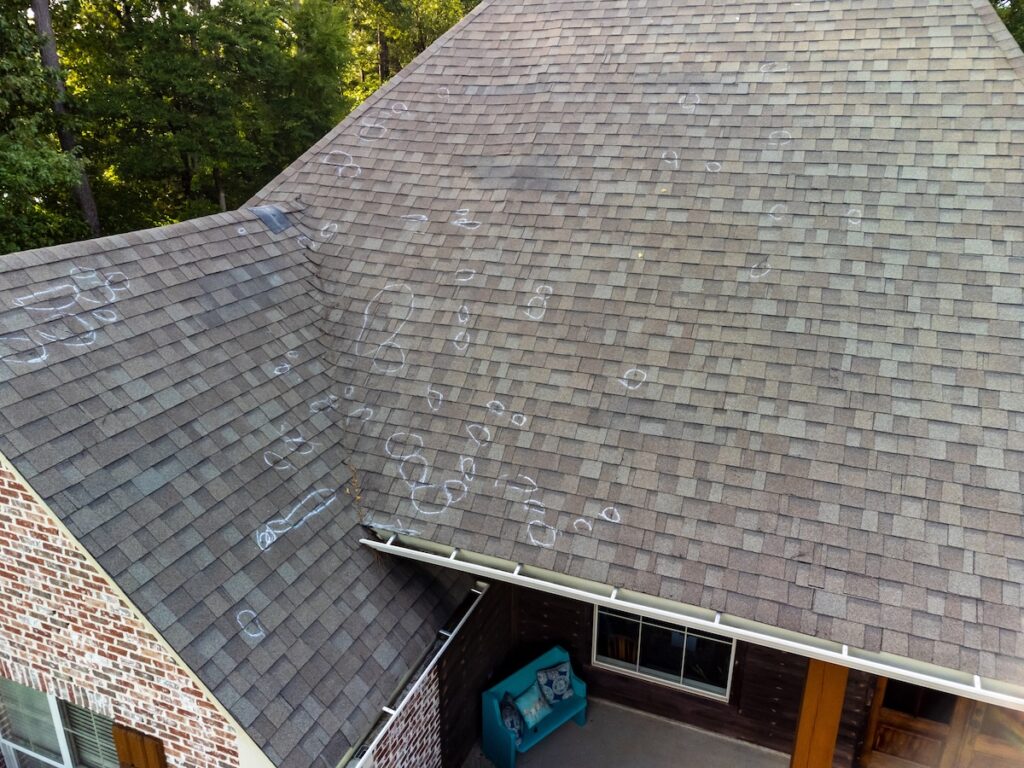
🔎 Why Professional Inspections Matter
After a hailstorm, it’s crucial to schedule an inspection by a licensed roofing professional—even if your roof looks fine. Here’s why this step matters:
Unseen Damage
Roofing professionals can identify damage that is often missed by an untrained eye. This includes issues like compromised shingles, small cracks, and structural weaknesses that may not be immediately obvious. These hidden problems, if left unaddressed, can lead to larger and more costly repairs down the line. Regular inspections ensure your roof stays in top condition.
Insurance Claims Support
A professional roof inspection is invaluable when dealing with hail damage and filing an insurance claim. Inspectors can provide detailed documentation of any damage, including photos and reports, making it easier to navigate the claim process. This thorough documentation ensures you receive the proper compensation for necessary repairs or replacements without unnecessary delays or disputes.
Prevention of Further Issues
Hail damage, if ignored, can lead to more serious problems over time, such as leaks, water damage, and mold growth. Addressing these issues quickly through a professional inspection not only protects your home but also saves you from costly repairs in the future. Taking preventive action helps maintain the integrity of your roof and the safety of your home.
🏡 Hail Damage on Roof Shingles
At Barkley-Jensen Roofing & Restoration, we know how important it is to address hail damage before it leads to bigger, more costly problems. With our expertise in storm damage restoration, prompt service, and customer-focused solutions, we’re the team you can trust to keep your roof strong and your home protected.
Plus, our guidance with insurance claims makes the process as stress-free as possible. Don’t let hail damage compromise your roof—contact us today to schedule your free inspection and let our experts provide the care and peace of mind you deserve.
Hail Damage Roof Repair Process (Explained In 5 Steps)
06.03.2025
7 Min Read
When severe weather strikes and hailstones come down, your roof may be at risk. Hail damage to your roof can compromise its structural integrity, leading to costly repairs if left unchecked. Understanding the process of hail damage roof repair can help you make informed decisions and restore your home’s safety quickly.
At Barkley-Jensen Roofing & Restoration, we specialize in fixing storm-damaged roofs, offering efficient solutions, top-notch customer service, and peace of mind. Read on to learn about the hail damage roof repair process in detail. This blog will teach you:
- How to identify hail damage on your roof
- Steps involved in repairing hail damage
- Key benefits of professional roof repair services
🔎 How to Spot Hail Damage on Your Roof
Hailstorms can take a serious toll on your roof, often causing damage that isn’t immediately visible. Addressing these issues as soon as possible is critical to prevent further complications like leaks or structural damage. The first step is knowing what to look for—both inside and outside your home. Here’s how you can identify hail damage effectively.
1. Exterior Damage
Your roof’s exterior is the first line of defense against hail, which means it often bears the brunt of the impact. Inspecting the outside of your home carefully can help you spot telltale signs of damage:
- Shingles: Cracked, chipped, or missing shingles are clear indicators of hail impact.
- Gutters: Look for dents or loose sections in your gutter system, as hail often leaves visible marks.
- Roof Ridge Caps: These are particularly vulnerable to damage due to their location and exposure.
2. Interior Damage
Hail damage doesn’t just affect the outside of your home. If the exterior has been compromised, it can lead to interior problems that may take longer to notice. Pay attention to these signs inside your home:
- Water Leaks: Stains or damp spots on your ceiling may signal roof damage allowing water to seep in.
- Attic Issues: Inspect the attic for any sunlight penetrating through the roof or water spots on beams.
3. Granule Loss
Beyond visible damage, hail can cause more subtle issues that compromise your roof’s functionality. One common sign is granule loss:
Check your downspouts for excessive granules, as hail can knock them off your shingles, reducing their protective efficiency.
✅ 5 Steps of The Hail Damage Roof Repair Process
Understanding the hail damage roof repair process is crucial to protecting your home and ensuring long-term durability. It helps you stay informed, avoid further damage, and work effectively with repair professionals.
1. Schedule an Inspection
Why it matters: A professional inspection ensures that all damage, even hidden or less obvious issues, is identified early.
The first step to restoring your roof is scheduling a thorough inspection. At Barkley-Jensen Roofing & Restoration, we offer same-day inspections for your convenience. Our experienced team carefully evaluates the condition of your roof, pinpointing hail damage and any other issues caused by weather or wear and tear. This detailed assessment lays the foundation for successful repairs or restoration, giving you peace of mind that no problem is overlooked.
2. File an Insurance Claim
Why it matters: Properly documenting damage can help you reduce or eliminate out-of-pocket costs.
Filing an insurance claim can feel intimidating, but it’s a critical step in offsetting repair expenses. At Barkley-Jensen, we make the process easier by assisting homeowners every step of the way. From documenting the damage during the inspection to working directly with your insurance provider, we streamline the claims process. Our goal is to ensure you receive the compensation you’re entitled to without unnecessary delays or stress.
3. Receive a Detailed Plan
Why it matters: A clear plan ensures you understand the scope, timeline, and costs upfront.
Once the inspection is complete, we provide you with a comprehensive plan detailing everything needed to restore your roof. This plan includes a breakdown of the necessary repairs or replacements, a clear timeline, and a transparent cost estimate. With Barkley-Jensen, there are no hidden fees or surprises—just a straightforward approach that helps you prepare for the work ahead.
4. Repair or Replace Your Roof
Why it matters: Restoring your roof strengthens your home and protects it from future damage.
Whether your roof needs minor repairs or a full replacement, our team uses premium materials designed for durability and weather resistance. We work efficiently to ensure your roof is restored to its full strength, keeping your home safe and secure. From fixing damaged sections to installing a brand-new roof, we handle every step with precision and care, so you can trust the quality of the results.
5. Final Review and Cleanup
Why it matters: Ensures the highest quality standards and leaves your property spotless.
Once the repair or replacement is completed, we conduct a final review to ensure every detail meets our quality standards. Your satisfaction is our priority, so we double-check all work to guarantee it’s done right the first time. Our team also takes care of the cleanup, leaving your property in pristine condition. With Barkley-Jensen Roofing & Restoration, you can enjoy a restored roof and a mess-free yard.
✅ 3 Benefits of Professional Hail Damage Roof Repair
Professional hail damage roof repair prevents further structural issues and extends the lifespan of your roof. It ensures your home stays protected while maintaining its value.
1. Prevents Escalation of Damage
Addressing roofing issues early, such as small leaks or minor cracks, can prevent them from developing into much larger problems. For example, leaks left unattended can lead to water damage, mold growth, or rotting wood, which can compromise the structural integrity of your home. By acting quickly, you not only avoid expensive repairs but also maintain the safety and comfort of your living space. Timely repairs are a proactive way to protect your home and wallet.
2. Enhances Longevity
A properly repaired roof using high-quality materials and expert craftsmanship can significantly extend its lifespan. Professional roofers ensure that every repair is done correctly, from sealing cracks to replacing damaged shingles or tiles. This attention to detail helps your roof withstand harsh weather conditions, such as heavy rain, wind, or snow, year after year. Investing in timely repairs ensures your roof remains durable and functional, giving you peace of mind for the long term.
3. Boosts Home Value
A well-maintained roof is one of the most noticeable features of a home, contributing to its overall curb appeal. When potential buyers see a roof in excellent condition, it signals that the home has been cared for, which can increase buyer confidence and lead to higher offers. Additionally, a high-quality roof reduces the likelihood of future repairs for new homeowners, making your property a more attractive investment. Whether you’re selling soon or down the road, a strong and visually appealing roof can add significant value to your home.
🛠️ The Hail Damage Roof Repair Process
At Barkley-Jensen Roofing & Restoration, we understand how stressful hail damage can be, and we’re here to make the repair process as smooth and worry-free as possible. With years of experience, a commitment to quality craftsmanship, and a focus on unmatched customer care, our team is dedicated to restoring your roof quickly and efficiently.
When you choose us, you’re not just getting a service—you’re partnering with a team that puts your home and peace of mind first. Don’t let hail damage compromise your roof any longer. Contact us today to schedule your inspection and see why homeowners trust us for all their roofing needs.
How Long Does It Take to Replace a Roof? (Full Process)
05.08.2025
6 Min Read
Roof replacement is a significant investment and an essential step to protect your home from the elements. But one of the most common questions homeowners ask is, “How long does it take to replace a roof?” The answer can vary depending on factors like the size and type of your roof, the weather, and the contractor you choose.
This comprehensive guide will walk you through everything you need to know about the roof replacement timeline. Here’s what we’ll cover:
- Overview of the roof replacement timeline
- 5 steps to replace a roof
- How to prepare for a roof replacement
👉 Overview of the Roof Replacement Timeline
For most residential homes, replacing a roof takes 1–3 days. However, this is a general estimate. Here’s a quick breakdown of what the timeline might look like:
- Smaller homes (under 2,000 square feet): 1 day
- Average-sized homes (2,000–3,000 square feet): 2–3 days
- Larger homes or complex roofs (e.g., multiple peaks, steep slopes): 3–5 days
While these are typical timelines, unforeseen challenges like bad weather or structural repairs could extend the project.
Factors That Impact the Duration
Several variables influence the time it takes to replace your roof. Here are the most common ones:
- Roof Size: Larger roofs require more labor, materials, and time to complete.
- Materials Used: Asphalt shingles are quick (1–2 days), while metal or slate roofs take longer due to precision or extra reinforcement.
- Accessibility: Trees, narrow driveways, or poor roof access can slow down the work.
- Roof Complexity: Features like peaks, valleys, dormers, or steep slopes make the project more challenging.
- Weather Conditions: Rain or extreme heat can cause delays, as safety and quality are always a priority.
✅ 5 Steps to Replace a Roof (A Clear Timeline)

The roof replacement process generally happens in several key phases. Here’s a detailed look at the steps:
1. Inspection and Planning
Before any work begins, your contractor will thoroughly inspect the roof to assess its current condition. This initial phase helps identify any existing damage, such as leaks, worn-out shingles, or structural issues that may affect the replacement process. The contractor will also discuss material options with you, helping you choose the best shingles, tiles, or panels based on your preferences and budget. Additionally, they will outline the timeline for the project, so you know what to expect at each stage. This step is essential for ensuring a smooth process and typically takes about a day to complete.
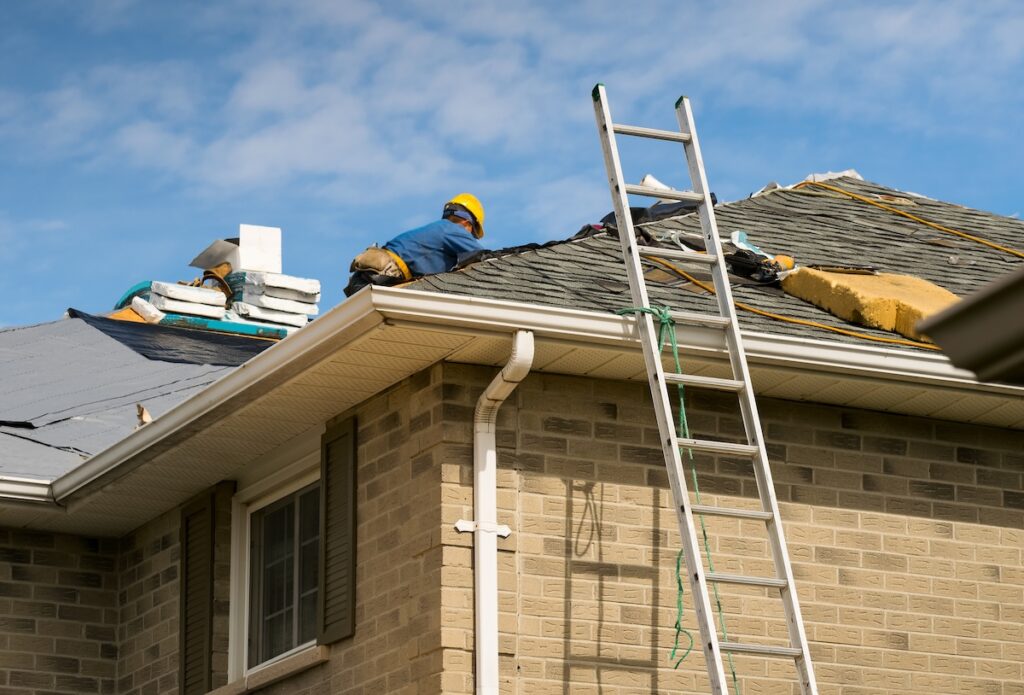
2. Removing the Old Roof
Once the inspection and planning are complete, the next step is to remove the existing roof. This involves tearing off the old shingles, underlayment, vents, and any other components that are part of the current roofing system. The process ensures a clean slate for the new installation. For an average home, removing the old roof takes a full day. This step can be labor-intensive, as the crew must carefully remove all materials while ensuring no damage occurs to the home’s structure or surrounding property.
3. Roof Deck Preparation
After the old roofing materials have been removed, the contractor will inspect the roof deck to ensure it is in good condition. The roof deck, which serves as the foundation for the new roof, will be checked for any signs of rot, damage, or compromised areas. If any issues are found, the damaged sections will need to be replaced to maintain the roof’s integrity. Once this is done, a waterproof underlayment is added to protect the roof deck from moisture and leaks. Depending on the condition of the decking, this stage can take anywhere from half a day to a full day to complete.
4. Installing the New Roof
This is the most exciting step, as you’ll begin to see visible progress. The contractor will start by laying down the new underlayment, which serves as an extra layer of protection for your roof. Next, the new roofing material—whether shingles, metal panels, or tiles—will be installed according to the plan discussed earlier. Ventilation components, such as ridge vents and exhaust vents, are also added during this stage to ensure proper airflow in your home. For most homes and standard materials, the installation process typically takes one to two days, depending on the size and complexity of the roof.
5. Finishing Touches and Cleanup
Once the new roof is installed, the crew will focus on finalizing the project. This includes sealing all flashing and vents to prevent leaks and ensure a watertight finish. The team will also clean up the job site, removing any debris, old materials, or leftover scraps from the installation process. Lastly, a final quality check is performed to confirm that every aspect of the roof meets professional standards and satisfies the homeowner. This last phase generally takes just a few hours to complete, leaving you with a new, fully functional, and visually improved roof.
🛠️ How to Prepare for a Roof Replacement
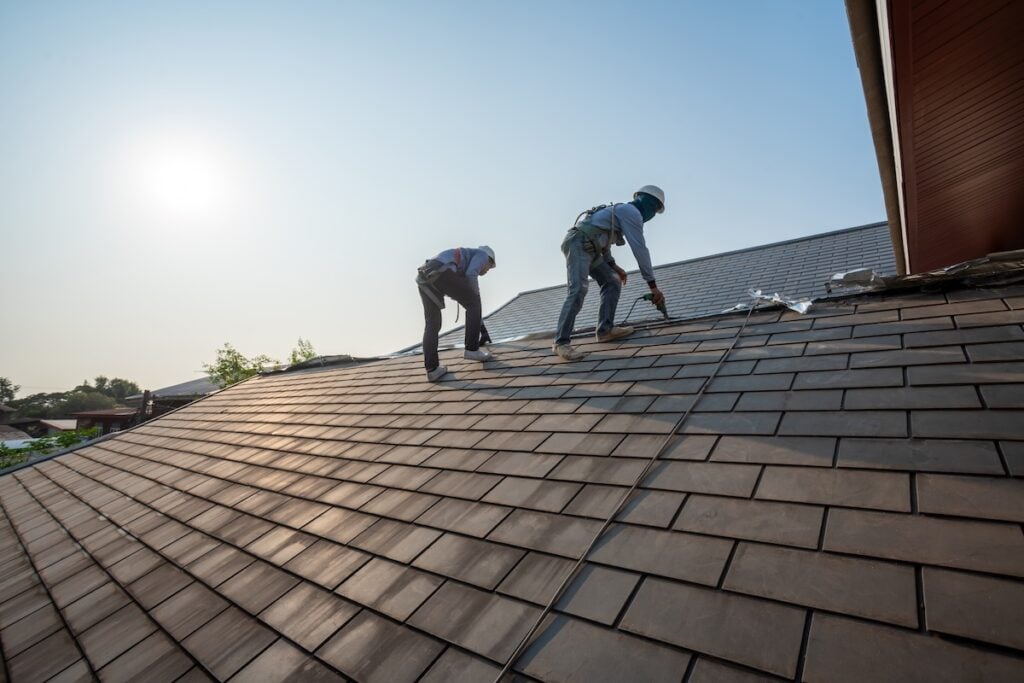
A little preparation makes the process smoother for everyone. Here’s what you can do in advance:
Clear the Driveway
Make sure your driveway is free of any vehicles, bikes, or other obstructions. This will provide enough space for trucks, dumpsters, and any other equipment needed for the project. It also ensures a smoother workflow for the team and prevents accidental damage to your property.
Remove Wall Hangings
Take down any pictures, mirrors, or decor from the walls inside your home. Construction work can cause vibrations, which might shake items off the walls and result in damage or breakage. Store these items safely until the project is complete.
Secure Outdoor Furniture
Move any patio furniture, plants, or other outdoor items away from your home’s perimeter. This will protect them from dust, debris, or accidental damage during construction. Consider covering larger items with a tarp if moving them isn’t possible.
Communicate with Neighbors
Let your neighbors know about the upcoming construction work. Give them a heads-up about increased noise, potential disruptions, or the presence of trucks and equipment. A quick note or conversation can go a long way in maintaining good relationships during the project.
🏡 The Roof Replacement Timeline
At Barkley-Jensen Roofing & Restoration, we understand that replacing your roof is a big project, and timing plays a crucial role in minimizing disruptions to your daily life. With our expert craftsmanship, premium materials, and efficient project management, we ensure your roof replacement is completed quickly and seamlessly, without cutting corners. More than that, we’re here to provide unmatched customer service and transparent communication every step of the way.
Ready to work with a team you can trust for all your roofing and siding needs? Contact Barkley-Jensen Roofing & Restoration today for a free inspection, and let us help protect your home with quality you can count on.

Seamless Gutters: What They Are + Key Benefits
05.06.2025
7 Min Read
If you’re considering upgrading your home’s gutter system, seamless gutters are a term you’ve likely come across. But what exactly are they, and why are they a game-changer for homeowners? Seamless gutters are a sleek and efficient option that can elevate both your property’s functionality and curb appeal. This comprehensive guide will cover:
- What seamless gutters are and how they differ from traditional sectional gutters
- The top benefits of seamless gutters that make them worth the investment
- A step-by-step breakdown of their installation process
🔎 Understanding Seamless Gutters

Seamless gutters live up to their name by being manufactured in one continuous piece, eliminating the need for separate sections joined by seams. Unlike traditional sectional gutters, which are pieced together and require frequent maintenance, seamless gutters are custom-cut to perfectly fit your home’s dimensions.
They’re typically made from materials like aluminum, copper, or steel, depending on your style and needs. Without joints and seams along their length, they offer a polished look and eliminate the weak points that often lead to leaks or clogs.
Traditional Sectional Gutters
- Made from pre-cut sections joined together
- Vulnerable to leaks and clogs at the joints
- Require frequent repairs and cleaning
- Less durable over time
Seamless Gutters
- Custom-fitted to your home for a perfect fit
- No seams = fewer chances of leaks or debris buildup
- Maintenance is minimal
- Designed for long-term durability and better performance
✅ 6 Benefits of Seamless Gutters

When it comes to protecting your home against water damage, seamless gutters stand out as one of the most effective options. Here are several reasons why homeowners are making the switch.
1. Minimal Maintenance
Seamless gutters require far less maintenance compared to traditional sectional gutters. Since they are designed without joints or seams, there are fewer places for leaves, twigs, and other debris to get stuck. This significantly reduces the chances of clogs forming, meaning you’ll spend less time cleaning out your gutters and more time enjoying a properly functioning system. Additionally, fewer clogs can help prevent water overflow, which protects your home from potential damage. With seamless gutters, you get both convenience and peace of mind.
2. Long-lasting Durability
Seamless gutters are crafted from high-quality materials such as aluminum, copper, or steel, making them incredibly durable and resistant to the elements. They are designed to handle harsh weather conditions, including heavy rain, snow, and strong winds, without warping or breaking. Unlike sectional gutters, which can come apart at the seams over time, seamless gutters maintain their structural integrity for years. This long-lasting durability reduces the need for frequent repairs or replacements, saving you money and the hassle of constant maintenance.
3. Leak Prevention
One of the biggest advantages of seamless gutters is their ability to prevent leaks. Traditional gutters have multiple seams and joints that can weaken over time, allowing water to seep out. These leaks can lead to serious problems, such as water damage to your roof, walls, siding, and foundation. With seamless gutters, the continuous design eliminates most of these weak points, ensuring a secure and leak-free performance. By minimizing the risk of leaks, seamless gutters help protect your home from costly repairs and long-term damage.
4. Enhanced Curb Appeal
In addition to their functionality, seamless gutters significantly improve the appearance of your home. Their clean, streamlined design creates a polished look that enhances your home’s exterior. Since they are custom-fitted to your property, seamless gutters avoid the unsightly gaps and visible joints that can detract from your home’s curb appeal. Plus, they can be painted or coated in various finishes to complement your house’s color scheme and architectural style. This aesthetic upgrade not only boosts your home’s visual appeal but also makes it more attractive to potential buyers if you decide to sell.
5. Custom Fit for Perfect Coverage
Seamless gutters are tailor-made to fit the exact dimensions of your home, ensuring they provide the ideal coverage needed for effective water management. Unlike sectional gutters, which come in pre-cut lengths and require assembly, seamless gutters are installed as a single piece, cut on-site to perfectly match your home’s measurements. This precise fit ensures optimal water flow and prevents issues like water pooling or overflowing, which can damage your landscaping and foundation. With seamless gutters, every inch of your roofline is properly protected.
6. Improved Property Value
Investing in seamless gutters is not only a smart move for protecting your home—it’s also a way to increase its overall value. Their durability, low-maintenance design, and attractive appearance contribute to a more desirable property. Potential buyers are often drawn to homes with high-quality, long-lasting features that reduce future expenses and upkeep. In addition, seamless gutters demonstrate that you’ve taken measures to protect your home from water damage, which can reassure buyers about the condition of the property. By choosing seamless gutters, you’re making a worthwhile investment in both your home’s protection and its market value.
👉 How Seamless Gutters Are Installed

Installing seamless gutters is a highly customized process that requires precision and expertise. Here’s what you can expect during installation.
Step 1: Research and Consultation
The first step in the gutter installation process is connecting with an experienced professional team like Barkley-Jensen Roofing & Restoration. During the initial consultation, the team will assess your home’s unique needs and guide you through choosing the ideal gutter system. This includes selecting the right material (such as aluminum, copper, or steel), the most suitable color to match your home’s exterior, and a design that enhances both functionality and curb appeal. This step ensures that your gutters not only perform well but also complement the aesthetics of your home.
Step 2: On-site Measurement
Once the consultation is complete, a professional installation team will visit your property to conduct precise measurements of your home’s dimensions. Accurate measurements are key to creating gutters that fit perfectly and perform optimally. The team will evaluate factors like roofline length, angles, and potential drainage challenges to ensure the gutters are tailored to the specific requirements of your home. This step eliminates guesswork and contributes to a seamless installation process.
Step 3: Gutter Fabrication
After measurements are taken, the next step is gutter fabrication. Using advanced machinery, seamless gutters are crafted on-site from a single piece of material such as aluminum or steel. This process eliminates the need for multiple seams, reducing the risk of leaks and ensuring a more durable, long-lasting gutter system. Fabrication is done with precision, allowing for complete customization based on the exact specifications of your home. This ensures that your gutters are not only functional but also built to last.
Step 4: Installation and Securement
With the gutters fabricated and ready, the professional team will begin the installation process. Each section of the gutter system is carefully positioned and securely attached to your home using durable brackets and fasteners. Proper alignment is critical to ensure water flows freely toward the downspouts, so the team pays close attention to the slope and positioning of the gutters. This step ensures your gutters perform efficiently in directing water away from your home’s foundation, protecting it from potential water damage.
Step 5: Final Quality Check
Before the project is considered complete, the installation team conducts a thorough quality inspection. This involves checking that all components are securely fastened, properly aligned, and functioning as intended. They will also test the system to make sure water flows smoothly through the gutters and downspouts without any obstruction. By the end of this step, you’ll have a fully operational gutter system that not only enhances the functionality and appearance of your home but also provides long-term protection against water damage.
🏠 Seamless Gutters Benefits
Choosing the right team for your seamless gutter installation is essential to protecting your home and enhancing its curb appeal. At Barkley-Jensen Roofing & Restoration, we combine years of expertise, high-quality craftsmanship, and a customer-first approach to deliver results you can trust.
From custom solutions to durable materials, we’re dedicated to providing seamless gutters that not only work flawlessly but also complement your home’s exterior. Ready to upgrade your gutters? Contact us today for a free consultation and let Barkley-Jensen Roofing & Restoration transform the way you protect your home.